


OVER
Steps
Do This
6.
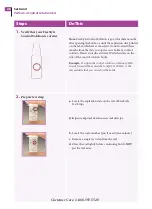
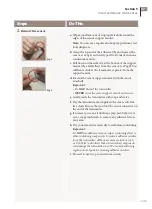
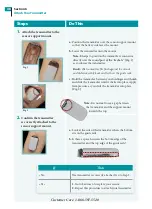
Prepare the insertion site.
a. Wash your hands thoroughly with soap and water.
b. Clean the selected insertion site area with soap
and water.
c. Rinse the area thoroughly and pat dry.
d. Wipe the area with an alcohol prep pad.
Note 1: The insertion area MUST be clean and dry.
Otherwise:
• An infection could occur.
• The sensor support mount may not stick to the site.
Note 2: Do NOT place a bandage on the insertion
site before inserting the sensor. The sensor may not
penetrate the skin and the system will not work with a
bandage under the sensor.
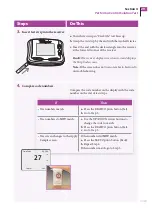
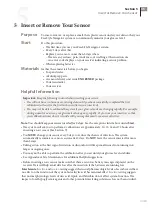
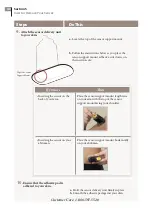
7.
Remove the sensor delivery
unit from package.
a. Remove the sensor delivery unit from its sterile package
by peeling off the foil on the back of the package.
b. Save the package.
Note: You will need the sensor code number on the back
of the package, later.
Important:
We recommend that you save the sensor kit
carton or the sensor sterile package until the last sensor
from your sensor kit has been used and discarded. Saving
the package will help you to have sensor lot information,
expiration dates and sensor code etc. accessible when you
need them.
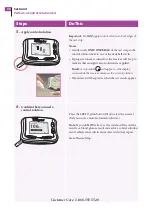
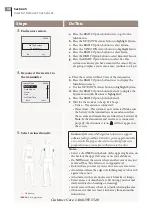
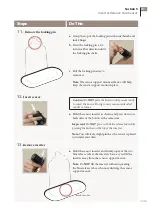
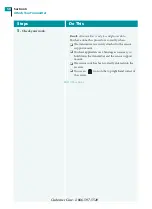
8.
Remove the protective liner from
the sensor support mount.
a. Bend the two-piece protective liner slightly so you can
see the seam between the two pieces.
b. Peel away the smaller section.
c. Peel away the larger section.
Caution:
Do
NOT
use the sensor delivery unit if the
sterile package is open or damaged.
Section 5
39
Insert or Remove Your Sensor
Summary of Contents for FREESTYLE NAVIGATOR
Page 2: ......
Page 4: ......
Page 8: ......
Page 9: ...1 Getting Acquainted ...
Page 23: ...2 Install or Replace Transmitter and Receiver Batteries ...
Page 29: ...3 Set the Time and Date ...
Page 34: ...Customer Care 1 866 597 5520 ...
Page 35: ...4 Perform a Control Solution Test ...
Page 42: ...Customer Care 1 866 597 5520 ...
Page 43: ...5 Insert or Remove Your Sensor ...
Page 54: ...Customer Care 1 866 597 5520 ...
Page 55: ...6 Attach Your Transmitter ...
Page 61: ...7 Calibrate Your System Test Blood Glucose Manually ...
Page 74: ...Customer Care 1 866 597 5520 ...
Page 75: ...8 Set Review or Change the Alarm Settings ...
Page 89: ...9 Daily Use ...
Page 96: ...Customer Care 1 866 597 5520 ...
Page 97: ...10 Respond to Alarms Errors and Problems ...
Page 119: ...11 Add Events ...
Page 125: ...12 Review Reports and Edit Events ...
Page 135: ...13 Clean Your System ...
Page 136: ...Section 13 Key Terms n Receiver n Transmitter n Contact Points Customer Care 1 866 597 5520 ...
Page 139: ...14 Link and Unlink Your Transmitter and Receiver ...
Page 144: ...Customer Care 1 866 597 5520 ...
Page 145: ...15 Reset User Settings ...
Page 146: ...Customer Care 1 866 597 5520 ...
Page 149: ...16 Change Country Settings ...
Page 155: ...17 Appendix A Site Maintenance ...
Page 158: ...Customer Care 1 866 597 5520 ...
Page 159: ...18 Appendix B Specifications ...
Page 173: ...19 Appendix C FCC Compliance Information ...
Page 174: ...Customer Care 1 866 597 5520 164 Section 18 Appendix B Specifications ...
Page 182: ...Customer Care 1 866 597 5520 ...
Page 183: ...20 Glossary ...
Page 184: ...Customer Care 1 866 597 5520 174 Section 19 Appendix C Classification Compliance Declaration ...
Page 191: ...21 Index ...
Page 192: ...Customer Care 1 866 597 5520 ...
Page 195: ......


