


Aquaprobe
®
AP-7000 Instruction Manual
10401-00894 Rev M
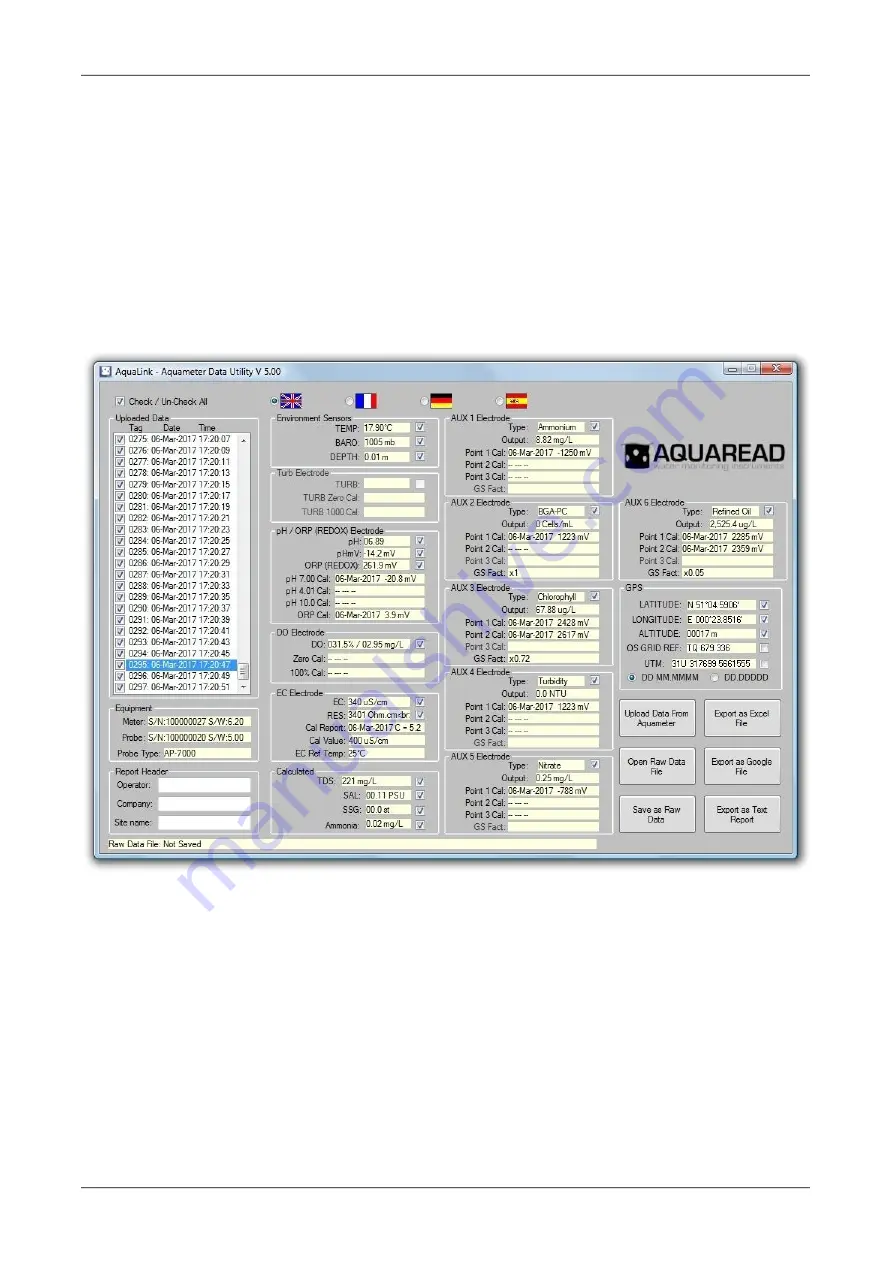
Select your preferred operating language by clicking on one of the national flags.
17.5. Uploading Data From Your Aquameter
®
Ensure your Aquameter
®
has batteries installed but is switched off. Connect the
Aquameter
®
to your PC using the USB cable supplied. The Aquameter
®
should switch itself
on automatically and display ‘USB CONNECTED’ on its screen.
Click the ‘
Upload Data From Aquameter
®
’
button. AquaLink will search for the
Aquameter
®
then upload all the available logged data from the Meter to your PC. A
progress bar and file counter will be displayed during this process. Once upload is
complete, the memory Tag, date and time for all the logged data that has been uploaded
will be displayed in the
Uploaded Data
column on the left of the screen.
To view any of the logged data records, simply click on the desired Tag, date and time label
as shown above. The data for the highlighted label will be displayed in the individual data
boxes, which are grouped by electrode function. Any data that is unavailable or out of
range will be displayed as dashes. To move up and down the Tag/date/time column, use
either your mouse or the cursor up/down keys.
Remember, the Aquameter
®
stores all logged data in a raw Probe format, so can be made
to output logged data in several different forms, dependent upon the Meter’s current
settings. See
Important Information About Memory Mode
in section 8 for more information.
17.6. Displaying GPS Co-ordinates
On the right of the screen, the position at which the data was logged is displayed in the
GPS boxes (when logged using an AM-200 GPS Aquameter
®
only). Latitude and longitude
© 2017 Aquaread
®
Ltd.
www.aquaread.com
Page 117 of 143


