PC T EL
9 2
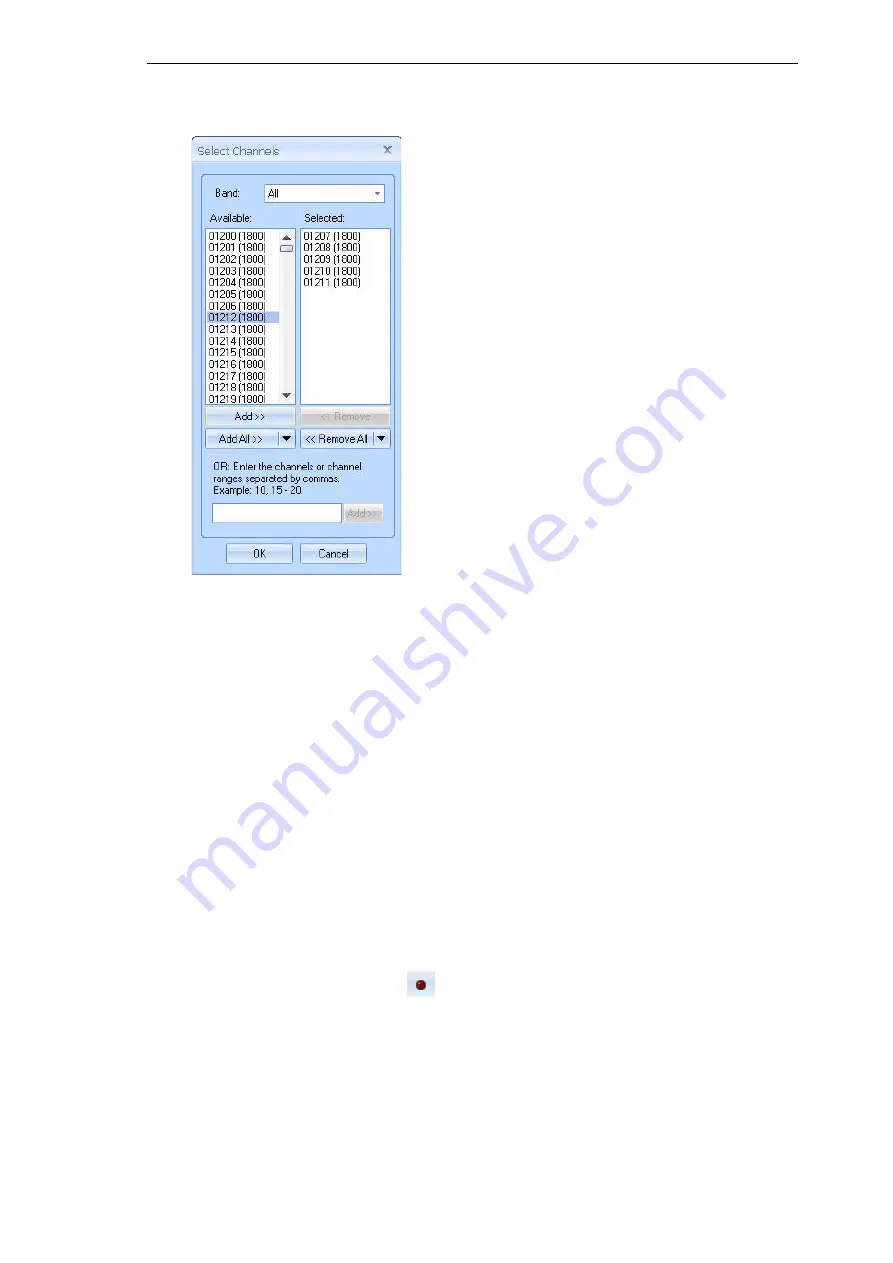
3. By clicking the
Select Channels
button, you can access the
Select Channels
dialog.
4. Select one band from the list or all of them. You can also select one band at a time and add
the bands you want to scan. If all bands are selected, you have the possibility to select
Remove All | ... items from every band
. Alternatively, if only one band is selected you can
remove only items from the current band through
Remove All | ...items from current band
.
The
Available
view provides a list of channels that are available for scanning. To add
channels to the
Selected
list, click on a number in the
Available
list and then click the Add
button or simply double-click a channel to add it to the Selected list. To select all available
channels for scanning, click the
Add All
button. An alternative method to select channels is
to type the channel numbers in the field at the bottom of the dialog and to click
Add
.
To remove channels from the
Selected
list, click on the channel you want to remove and
then click the
Remove
button or double-click the channel. To remove all channels, click the
Remove All
button. You can select several channels simultaneously by holding down the
SHIFT
key and clicking on the channels you want to add or remove.
5. After making the appropriate settings, click
OK
and
OK
again and go to online mode to start
the scanning.
6. A green light on the scanner Device Status window should start blinking. This means that the
device is working properly and scanning using the default settings.
7. Click the Start Recording button
to start recording the results in an output file.
Summary of Contents for NEMO FSR1
Page 1: ...Version 6 20 SCANNER GUIDE...


