


Upgrading Modero Firmware
74
12” and 15” Modero Touch Panels
4.
Click the
Communications Settings
button to open the Communications Settings dialog.
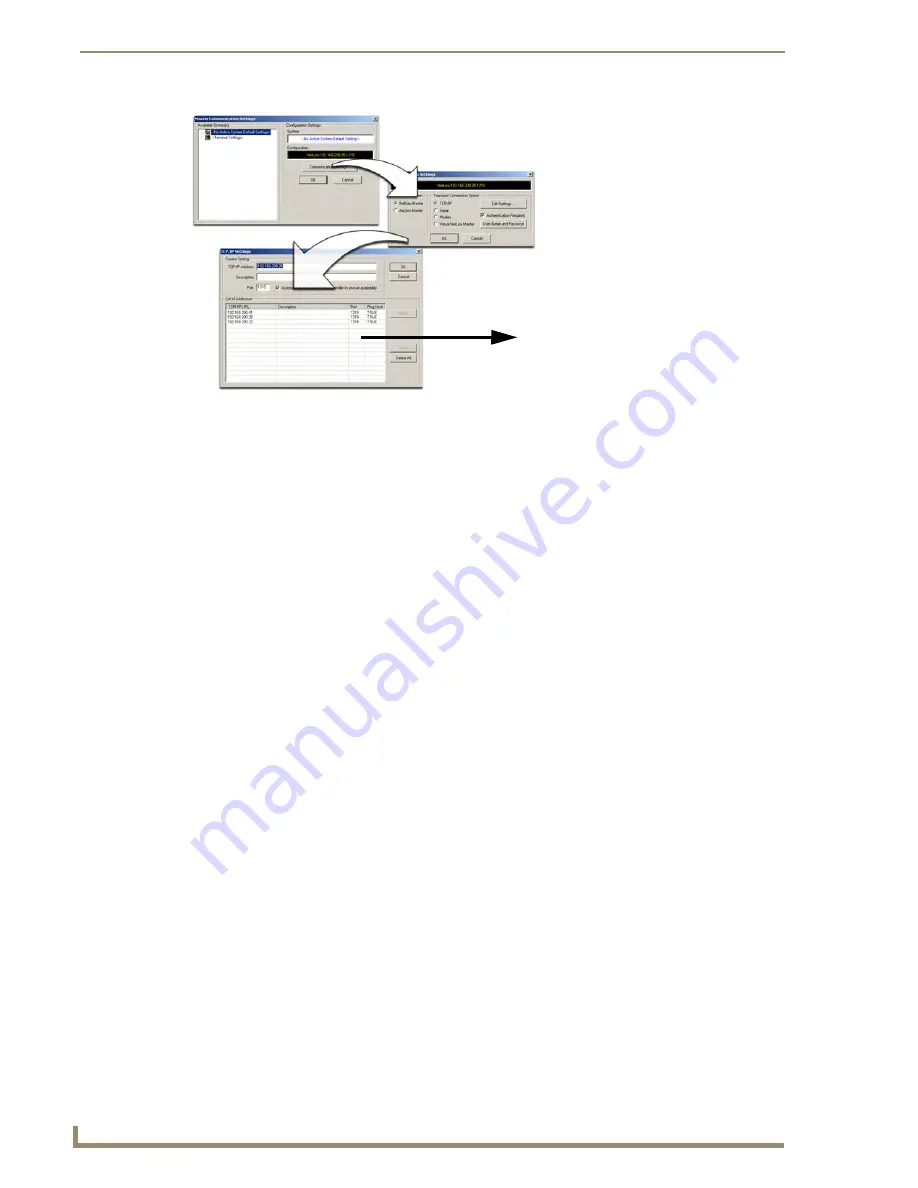
5.
Click on the
NetLinx Master
radio button (
from the Platform Selection section
) to indicate that you are
working with a NetLinx Master (such as the NXC-ME260/64 or NI-Series of Integrated Controllers).
6.
Click on the
Authentication Required
radio box (if the Master is secured) and then enter a username and
password.
7.
Click on the
TCP/IP
radio button (
from the Transport Connection Option section
) to indicate you are
connecting to the Master through an IP Address.
8.
Click the
Edit Settings
button (
on the Communications Settings dialog
) to open the TCP/IP Settings
dialog (FIG. 71).
9.
From within the TCP/IP dialog click
New
to enter the IP information for a new IP Address or select from
the list of previously entered IP Address and alter their properties by clicking the
Edit
button and making
your changes.
10.
Enter the IP Address into the
TCP/IP Address
field. This information is obtained from either your System
Administrator or obtained from the Master.
11.
Click
OK
when you are done adding or editing the IP Address from the
New/Edit TCP/IP Setting
dialog.
12.
Click
OK
three more times to close the open dialogs and save your settings.
13.
Click
Yes
to interrupt the current communication from the Master and apply the new settings.
14.
Select
Tools
>
Reboot the Master Controller
to access the
Reboot the Master
dialog, then click
Reboot
to reboot the Master and incorporate any changes.
15.
Once the dialog replies with
"Reboot of system complete"
, press
Done
.
16.
Click the
OnLine Tree
tab in the Workspace window to view the devices on the System.
The default
System value is one
.
17.
Right-click on the
Empty Device Tree/System
entry and select
Refresh System
to re-populate the list.
FIG. 71
Assigning Communication Settings and TCP/IP Settings
List of previously saved IP Addresses


