


Setup Pages and Descriptions
61
NXD-500i 5" Modero Wall/Flush Mount Touch Panel with Intercom
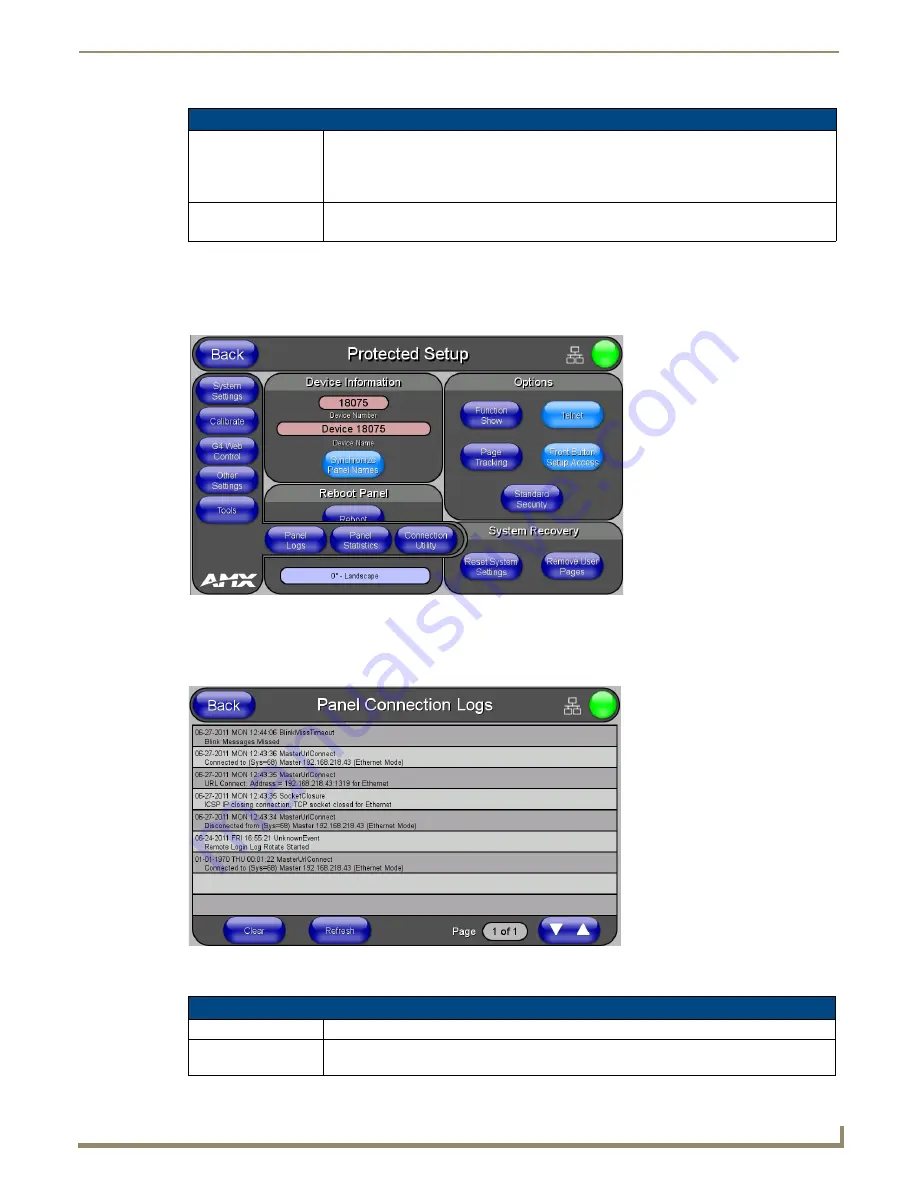
Tools
The Tools button provides a menu to select either the
Panel Connection Logs Page
section on page 61, the
Panel
Statistics Page
section on page 62, or the
Connection Utility
section on page 64. Select any of the options to access that
page.
Panel Connection Logs Page
The options on the
Panel Connection Logs
page allows viewing and tracking of the connection history for the panel
(FIG. 60).
Features on this page are as follows:
SIP Settings Page (Cont.)
User Name:
This option enables you to enter the user name used for authentication to the proxy server.
Normally, the user name is the same as the phone number assigned to the extension you are
using.
This field is optional.
Password:
This option enables you to enter the password for the user at the proxy server.
This field is optional.
FIG. 59
Tools popup menu
FIG. 60
Panel Connection Logs page
Panel Connection Logs Page
Back:
Saves all changes and returns to the previous page.
Wired icon:
The icon to the left of the Connection Status Icon displays that the current connection to the
Master is
Wired
(image of three networked computers).
Summary of Contents for Modero NXD-500i
Page 4: ......
Page 12: ...viii NXD 500i 5 Modero Wall Flush Mount Touch Panel with Intercom Table of Contents...
Page 32: ...Panel Calibration 20 NXD 500i 5 Modero Wall Flush Mount Touch Panel with Intercom...
Page 130: ...Programming 118 NXD 500i 5 Modero Wall Flush Mount Touch Panel with Intercom...
Page 134: ...Troubleshooting 122 NXD 500i 5 Modero Wall Flush Mount Touch Panel with Intercom...


