


Setup Pages and Descriptions
60
NXD-500i 5" Modero Wall/Flush Mount Touch Panel with Intercom
You may need to load a Duet module to enable the touch panel to receive SIP calls. The Duet module translates between
the standard interface and the device protocol. It parses the buffer for responses from the device, sends strings to control
the device, and receives commands from the UI module or telnet sessions. Refer to the documentation supplied with the
Duet Module for more details
.
Features on this page include:
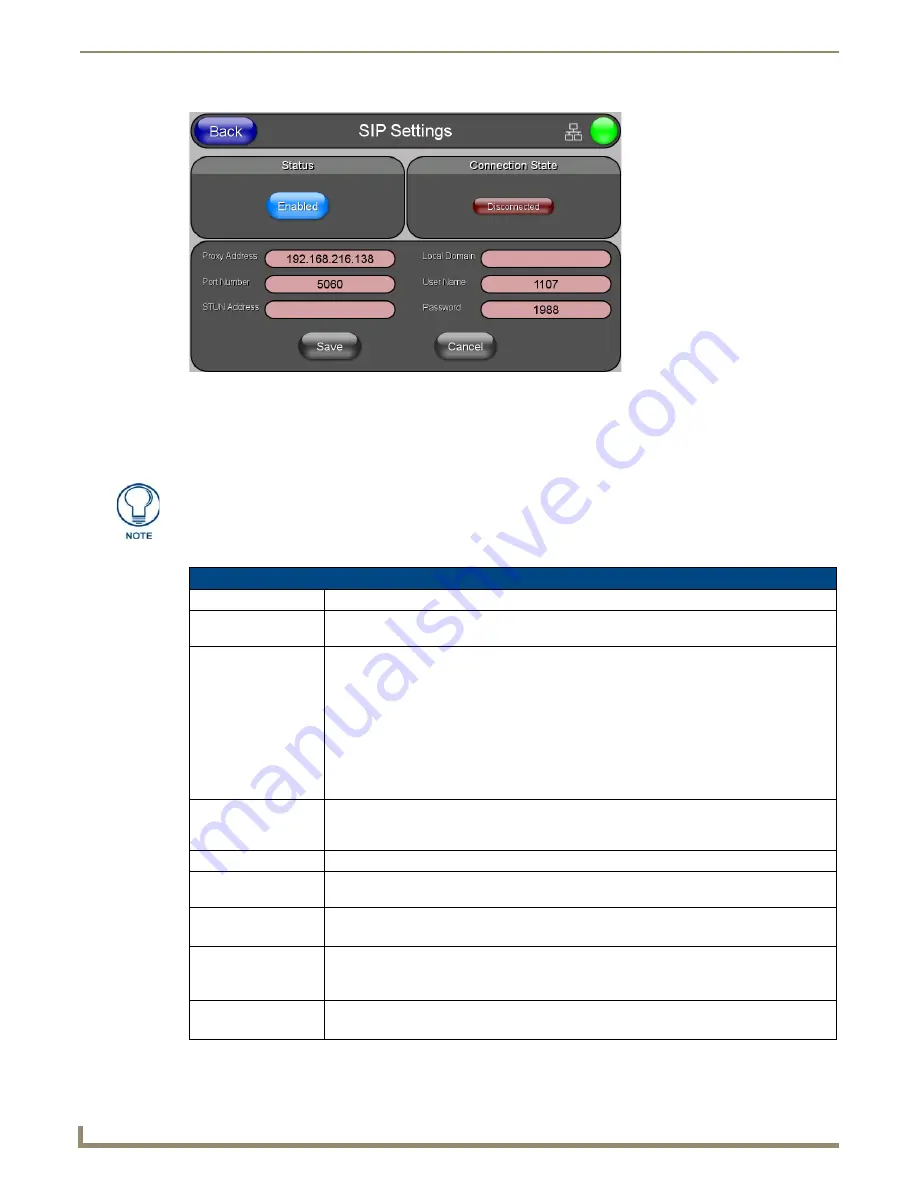
FIG. 58
SIP Settings Page
A sample UI module is provided in the module package. It is not intended to cover
every possible application, but can be expanded as needed by a dealer to meet the
requirements of a particular installation.
SIP Settings Page
Back:
Saves all changes and returns to the previous page.
Wired icon:
The icon to the left of the Connection Status Icon displays that the current connection to the
Master is
Wired
(image of three networked computers).
Connection Status icon: The icon in the upper-right corner of each Setup page shows online/offline state of the panel to
the master.
• Bright red - disconnected
• Bright green - connected. Blinks when a blink message is received to dark green every 5
seconds for half a second then go back to bright green.
• Bright yellow - panel missed a blink message from the master. It will remain yellow for 3
missed blink messages and then turn red. It will return to green when a blink message is
received.
Note
: A lock appears on the icon if the panel is connected to a secured NetLinx Master.
Status:
This option enables the SIP Stack on startup. If you disable this option, the panel will not
attempt to read the rest of the configuration and will not register with a proxy server. However,
point-to-point SIP will still be enabled allowing for existing intercom functionality.
Connection State:
This option displays whether you are connected to the proxy server.
Proxy Address:
This option enables you to enter the IP address or DNS name of the proxy server that you want
to use to register.
Port Number:
The option displays the port you use to connect to the proxy server.
The standard SIP port is 5060, but some providers use different ports.
STUN Address:
This option enables you to enter the IP address or DNS name of the Simple Traversal of UDP
through NATs (STUN) server.
This field is optional.
Local Domain:
This is the realm used for authentication.
This field is optional.
Summary of Contents for Modero NXD-500i
Page 4: ......
Page 12: ...viii NXD 500i 5 Modero Wall Flush Mount Touch Panel with Intercom Table of Contents...
Page 32: ...Panel Calibration 20 NXD 500i 5 Modero Wall Flush Mount Touch Panel with Intercom...
Page 130: ...Programming 118 NXD 500i 5 Modero Wall Flush Mount Touch Panel with Intercom...
Page 134: ...Troubleshooting 122 NXD 500i 5 Modero Wall Flush Mount Touch Panel with Intercom...


