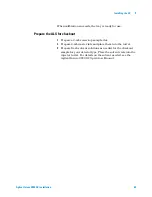


Installing the GC
1
Agilent Intuvo 9000 GC Installation
83
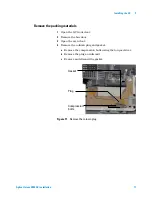
5
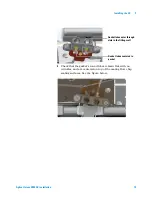
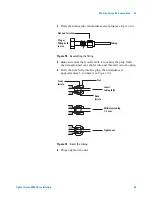
Secure the column by using the Intuvo torque driver to close
the column clamps.
6
Insert the column’s Intuvo Smart ID Key into the lower USB
connection along the right side of the oven.
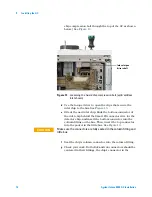
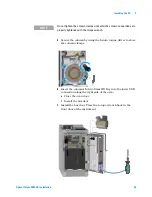
e
Close the oven door.
f
Install the bus door.
7
Install the bus door. Place the torque wrench back in the
front door of the instrument.
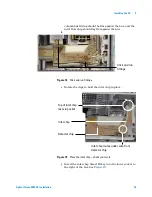
NOTE
Do not tighten the column clamps until after the column connections are
properly tightened with the torque wrench.
Summary of Contents for Intuvo 9000
Page 1: ...Agilent Technologies Agilent Intuvo 9000 Gas Chromatograph Installation and First Startup...
Page 6: ...6 Agilent Intuvo 9000 GC Installation...
Page 25: ...Installing the GC 1 Agilent Intuvo 9000 GC Installation 25 3 Reinstall the GC covers...
Page 27: ...Installing the GC 1 Agilent Intuvo 9000 GC Installation 27 Turn on the GC...
Page 29: ...Installing the GC 1 Agilent Intuvo 9000 GC Installation 29...
Page 84: ...84 Agilent Intuvo 9000 GC Installation 1 Installing the GC 8 Close the GC front door...
Page 114: ...Agilent Technologies...


