Installing the Motherboard
2-3
User’s Manual
Note
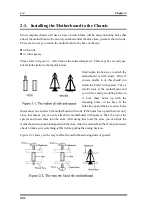
If the motherboard has mounting holes, but they don’t line up with the holes on the base
and there are no slots to attach the spacers, do not despair, you can still attach the
spacers to the mounting holes. Just cut the bottom portion of the spacers (the spacers
may be a little hard to cut , so mind your fingers). In this way, you can still attach the
motherboard to the base without worrying about short circuits. Sometimes you may
need to use the plastic springs to isolate the screw from the motherboard PCB surface as
the circuit wire may be too near the hole. Be careful. Do not let the screw contact the
printed circuit wire or parts on the PCB that are near the fixing hole. Otherwise it may
damage the board or cause board malfunctioning.
2-2. Installation of the Pentium
III CPU
The installation method for the CPU is printed on the package of the retention mechanism
that comes with the motherboard. You can refer to it while you install the CPU.
Note:
!
Installing a heat sink and cooling fan is necessary for proper heat dissipation from
your CPU. Failing to install these items may result in overheating and damage of
your CPU.
!
Please refer to your boxed processor installation or other documentation attached
with your CPU for detailed installing instructions.
Summary of Contents for SE6
Page 2: ......
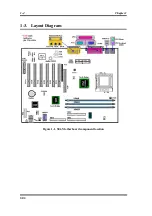
Page 8: ...1 4 Chapter1 SE6 1 3 Layout Diagram Figure 1 1 SE6 Motherboard component location ...
Page 10: ...1 6 Chapter1 SE6 ...
Page 80: ...3 50 Chapter3 SE6 ...
Page 92: ...C 4 Appendix C SE6 ...
Page 96: ...D 4 Appendix D SE6 ...
Page 104: ...Appendix F SE6 F 4 ...
Page 118: ...Appendix I SE6 I 6 ...
Page 126: ...Appendix K SE6 K 4 ...
Page 138: ...N 4 Appendix N SE6 ...
Page 144: ...O 6 Appendix O SE6 ...


