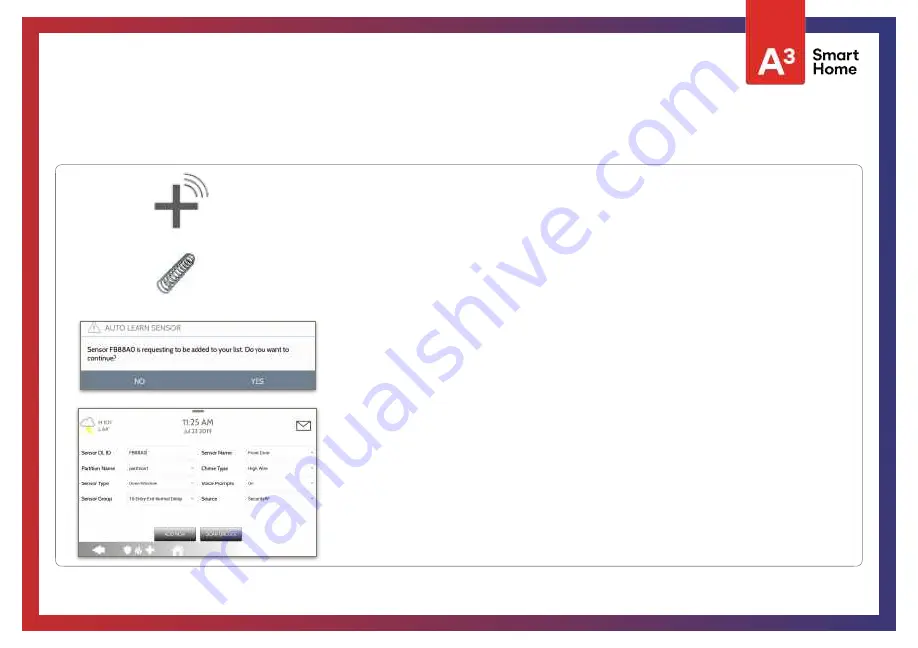
1. Select “
Auto Learn Sensor
”
2. Open/Close or Tamper a sensor to enroll. Image sensors have a 2 min enrolling window. For contacts
HARDWIRED
into “Sensor 1 or 2” on the back of the panel, simply open the contact. For PowerG contacts,
hold the “enroll” button until the yellow LED flashes.
3. Panel will chime and display the sensor’s DL code, or HW1/HW2 for hardwired contacts. Select OK to
confirm.
4. Configure
Partition Name
,
Sensor Type
,
Sensor Group
,
Sensor Name
,
Chime Type
and
Voice Prompts
with the smart filtering drop down lists.
5. Select “
Add New
” to complete and move to the next sensor.
QOLSYS CONFIDENTIAL AND PROPRIETARY
PAGE OF
54
177
NOTE:
The hardwire inputs on the panel can only be programmed as a Door/Window, Motion or Glass
Break “Sensor Type”.
When enrolling an “S-Line” sensor, the panel will auto detect that it’s encrypted and change the “Source”
field to S-Line.
IQ Panel 2+ only: When enrolling a sensor of a di
ff
erent frequency (345MHz, 433MHz, PowerG) the Source
field will change to accommodate the incoming signal type.
When a sensor with the frequency 345 is used, you will be given an additional field to specify the Loop #.
AUTO LEARN SENSOR
SECURITY SENSORS
Summary of Contents for Qolsys IQ Panel 2
Page 8: ...INSTALLING THE PANEL...
Page 13: ...USER INTERFACE...
Page 17: ...PROGRAMMING...
Page 52: ...SECURITY SENSORS...
Page 84: ...WI FI DEVICES...
Page 91: ...Z WAVE DEVICES...
Page 102: ...BLUETOOTH DEVICES...
Page 110: ...SYSTEM TESTS...
Page 135: ...CUSTOMIZATION...
Page 148: ...MAINTENANCE...
Page 154: ...TROUBLESHOOTING...
Page 164: ...LEGAL...
Page 172: ...SPECIFICATIONS...


