Chapter 2
______________________________________________________
Zaxcom Fusion User’s Manual
82
Analog Input (#) page
Page purpose:
This page maintains several parameters for each analog input channel.
How to get here:
(
INPUT
key
Channel
button
)
(
MENU
key
Input Configure
button
Channel
button
)
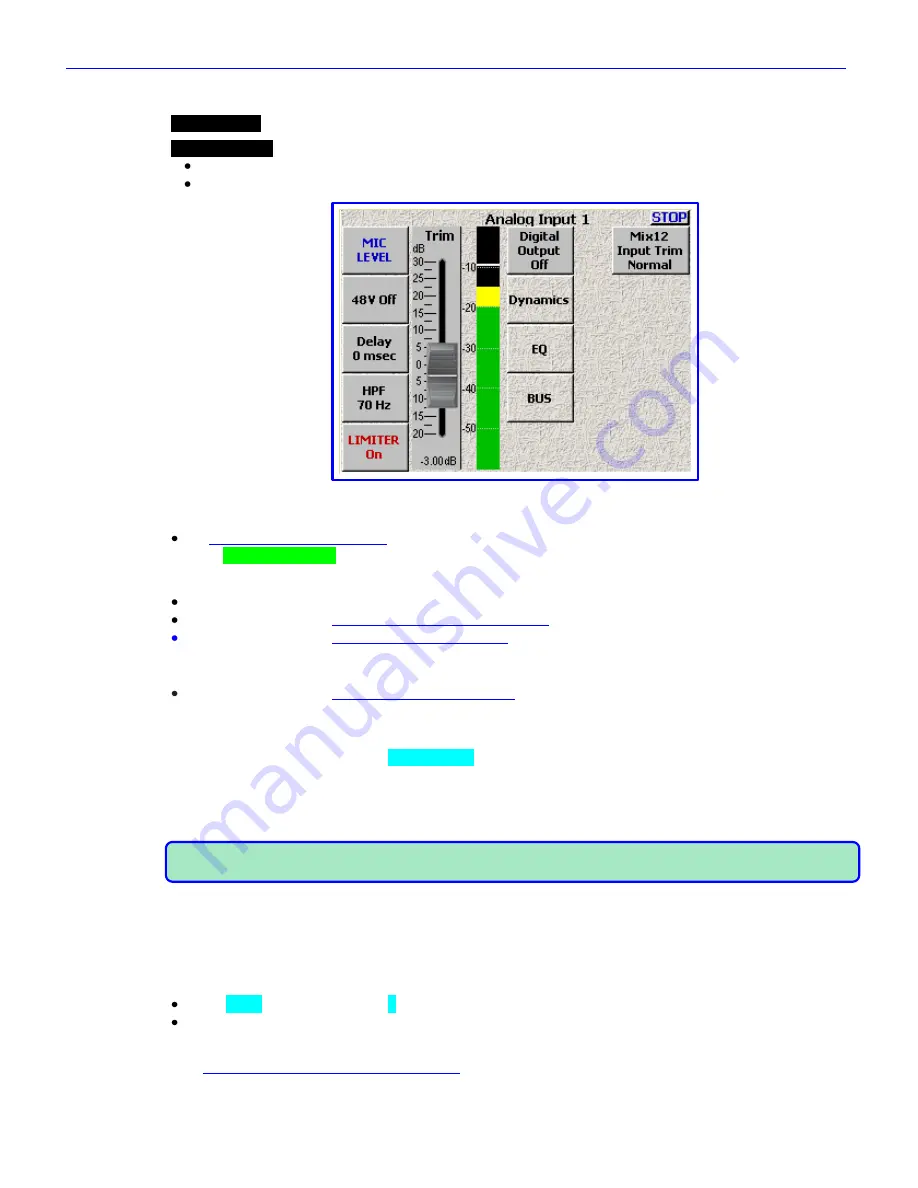
Figure 2-44 Analog Input (#) page
Page Notes
See
– Effects Package and More
{
p.142
} for the theory behind using the Delay processor.
** Coming Soon **
Page Level Shortcuts
1
–
8
keys
– the same as clicking on analog channel buttons 1 – 8.
D
key
– goes to the
Analog Input (#) – Dynamics page
{
p.84
} for the current channel.
E
key
– goes to the
Analog Input (#) – EQ page
{
p.86
} for the current channel.
This functions the same
as the
EQ
key
on the Mix-12.
B
key
– goes to the
Analog Input (#) – BUS page
{
p.89
}
for the current channel. This functions the
same as the
BUS
key
on the Mix-12.
Mic/Line Level button
Toggles this channel‟s level between
LINE LEVEL
and
MIC LEVEL
.
48V Off/On button
Phantom power works in cooperation with the Mic/Line Level settings. If you have a channel set to Line-Level,
you can‟t turn
On
that channel‟s phantom power.
NOTE:
If you change a channel from microphone input (Mic) to line input (Line), the phantom power for that
channel is turned „OFF‟ and the
48V On
button
is changed to
48V Off
.
Setting Phantom Power
To turn „ON‟ 48V phantom power, select the
’
48V Off
‟
button
. When phantom power is enabled,
’
48V Off
‟
changes to „
48V On
„.
Delay button
Enter a value for the amount of delay for this input.
Unit =
msec
– (Valid range:
0
–
40
, Value step: 1)
Unit =
samples
– (Valid range:
0
–
1920
, Value step: 1)
Delay button Shortcuts
See:
Common Data Entry Field Shortcuts List
{
p.146
}


