These signaling messages typically do not require all of the D-
channel’s bandwidth. By sending and receiving data on the D-channel,
your ISDN TA can take advantage of its extra capacity.
AO/DI uses a protocol known as X.25 over the D-channel to conduct
low bandwidth operations, such as checking for new messages by your
email program. To make an AO/DI call, an X.25 connection is
established between your ISDN TA and your Internet Service Provider
over the D-channel. Data from your computer is sent over this
connection.
When there is too much data to be sent or received over the D-channel,
one or more ISDN B-channels are engaged to provide data speeds up to
128 Kbps (or higher with compression). Dynamic Bandwidth
Allocation is used to decide when to engage and disengage the B-
channels. Phone numbers for the B-channels may be provided by the
user. Optionally, Bandwidth Allocation Control Protocol (BACP) and
Bandwidth Allocation Protocol (BAP) can be used to get the B-channel
phone numbers and negotiate bandwidth allocation.
During an AO/DI connection, both Analog Device Ports can be used.
Your ISDN TA can also accept one AO/DI call.
Benefits of AO/DI include:
Since the D-channel is always available, it can provide Always
On connectivity. This is ideal for applications such as email, push
technologies (such as Pointcast™ ), and other applications that
require a permanent network connection.
Because B-channels are brought up only when they are needed to
boost data throughput, B-channel connection costs are
significantly reduced.
Both Analog Device Ports can be used, even while there is an
active data connection.
Setting Up AO/DI on Your ISDN TA
Note: AO/DI must be supported by your ISDN line and your Internet
Service Provider. Much of the information needed to set up your ISDN
TA for AO/DI is provided by your phone company. For more
information, see the chapter
“Ordering ISDN Service.”
Also note that AO/DI requires that you use MultiLink PPP with
Dynamic Bandwidth Allocation.
To set up AO/DI:
1
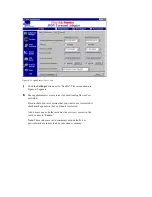
Open ControlCenter and click the Configuration Manager icon.
2
Click the Advanced Configuration button, followed by the ISDN
Line tab.


