Setting SPIDs, Telephone Numbers, and TEIs
Manually
If both AutoSPID and the SPID Wizard fail to identify the SPIDs and
telephone numbers for your ISDN line, these numbers can be entered
manually.
Remember: The SPIDs and telephone numbers for your ISDN line
should have been provided by your phone company when you ordered
your ISDN service.
You also need to know the switch type being used by your ISDN line.
If you do not have this information, contact your phone company.
To enter your SPIDs and telephone numbers manually:
1
Open ControlCenter and Click the Configuration Manager icon
on the left side of the ControlCenter screen.
2
Then click the Advanced Configuration button, followed by the
ISDN Line tab.
3
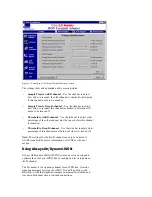
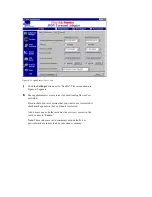
The screen shown in Figure 5-5 appears. Select the switch type
provided by your phone company from the drop-down menu
labeled “Switch Protocol Type.”
4
Enter your area code in the “Area Code” text box in the
“Directory Numbers” section.
Then enter one of your telephone numbers in the “Telephone
Number 1 (DN1)” text box. Enter your other telephone number in
the “Telephone Number 2 (DN2)” text box.
Note: If you ordered a type of ISDN service not discussed in the
chapter “Ordering ISDN Service,” you may have a different
number of telephone numbers.
5
Enter the SPID for your first telephone number in the “For DN1”
text box in the “Service Profile Identifier (SPID)” section.
Then enter the SPID for your second telephone number in the
“For DN2” text box.
Also, be sure that Enable AutoSPID Mode is selected in the
“Service Profile Identifier (SPID)” section. A check mark appears
in the box next to an item when it is selected.
Setting Terminal Endpoint Identifiers
In some cases, the Terminal Endpoint Identifiers (TEI) for each
telephone number must be set to a fixed number. A TEI is used by the
telephone company switch to recognize requests coming from your
ISDN TA.


