Page | 100
7.1.1
Creating a Scene
9
The following steps show how to create a scene.
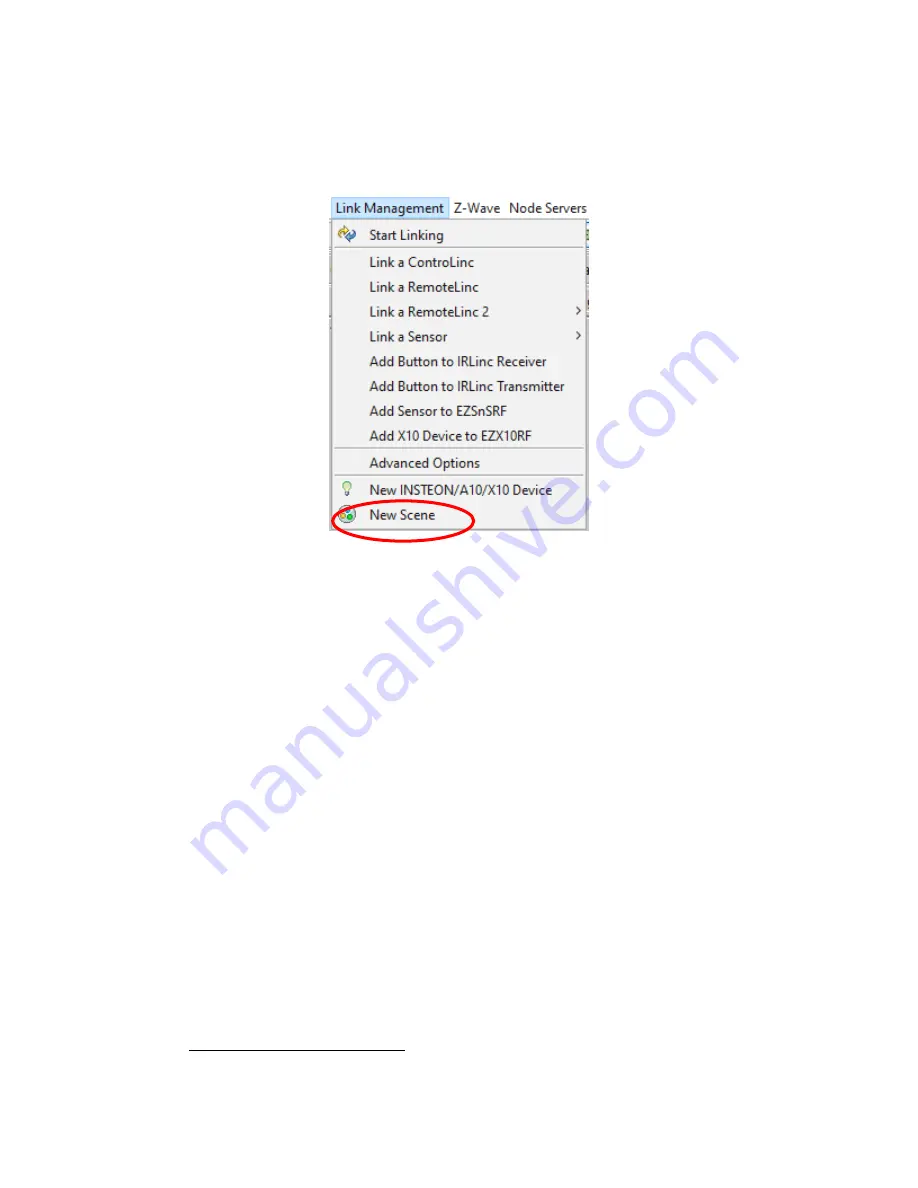
Figure 96: The Link Management Menu
•
Select New Scene from the Link Management menu or the Tool Bar Icon.
•
Name the scene you wish to create and enter this in the Name field of the Scene
dialog.
•
Once you created the scene, this will be added to the Tree View having its own scene
node.
•
Add the devices to the scene. You can select one or more devices then drag and drop
them to the scene. To select multiple devices, select the first device, hold down CTRL
key then select the next device or devices. Once all the devices are selected, drag and
drop this to the scene.
•
You will be presented with a Confirm Add dialog with a list of all the devices you
selected. Assign the controller and responders by highlighting the device and select
controller/responder button. From this dialog you can also remove devices.
9
(Universal Devices)
Содержание ISY-994i Series
Страница 1: ...The ISY 994i Home Automation Cookbook ...
Страница 35: ...Page 12 Figure 6 UDAjax Main Screen ...
Страница 36: ...Page 13 Figure 7 UDAjax Devices Scenes Screen ...
Страница 68: ...Page 45 Figure 44 NodeServer Configuration popup 5 2 5 Tools Menu Figure 45 Tools Menu ...
Страница 98: ...Page 75 You should now see local weather information as shown below Figure 73 Local Weather Information ...
Страница 102: ...Page 79 6 6 3 2Activate My OpenADR Portlet Figure 77 OpenADR My OpenADR Menu Option ...
Страница 103: ...Page 80 6 6 3 3Configure OpenADR Settings Figure 78 OpenADR Settings Menu Option ...
Страница 104: ...Page 81 Figure 79 OpenADR Settings Display ...
Страница 108: ...Page 85 6 6 3 7Issue an Event Figure 84 OpenADR Issue and Event ...
Страница 109: ...Page 86 Figure 85 OpenADR Events You can use the Event Viewer to see the operational status of ISY and OpenADR events ...
Страница 110: ...Page 87 Figure 86 OpenADR Event Viewer ...
Страница 116: ...Page 93 Figure 92 ElkRP2 Account Details M1XEP Setup Button In the M1XEP Setup Window ...
Страница 267: ...Page 244 Figure 189 State Variables ...
Страница 268: ...Page 245 Figure 190 Programs and Folders ...
Страница 292: ...Page 269 Figure 192 Irrigation Folders Figure 193 Irrigation Devices ...
Страница 376: ...Page 353 Figure 209 Save Topology File ...
Страница 433: ...Page 410 Figure 242 X 10 recognized as Living Room East Device ...
Страница 461: ...Page 438 Figure 259 HAM Weather Data 17 2 2 Irrigation Module s Settings Figure 260 Irrigation Cycle Calculator ...
Страница 531: ...Page 508 Figure 342 Base Task Dependencies 1 Click the bottom center of screen In the Filter type http Touch HTTP Get ...
Страница 536: ...Page 513 Figure 349 In Car Detection 5 Figure 350 In Car Detection 6 In the filter type BT and then select BT Connected ...
Страница 540: ...Page 517 Figure 357 In Car Detection 12 Figure 358 In Car Detection 13 ...
Страница 602: ...Page 579 Figure 382 SecureCRT SSH Raspberry PI Session ...
Страница 620: ...Page 597 Figure 397 HyperTerminal Login The ISY Shell is displayed All input to the ISY shell must be in UPPER CASE ...
Страница 660: ...Page 637 Figure 420 ISY Select file Your ISY will now update the firmware and reboot when it is finished ...
Страница 675: ...Page 652 create surges at power on such as traditional fluorescent lights and general purpose electrical sockets ...
Страница 685: ......


