80
Chapter 9
USB Settings
• Share photos and other large files with your friends without logging in to (and paying
for) a photo-sharing site or email system.
• Get a safe backup for the materials for a presentation.
• Remove the files on your camera’s memory card from time to time during the journey.
Note:
If your ISP assigns a private WAN IP address (such as 192.168.x.x or 10.x.x.x), you cannot use this feature because
private addresses are not routed on the internet.
Follow the steps below to configure remote access settings.
1
Visit
http://tplinkwifi.net
or
http://192.168.0.1
, and log in with your TP-Link ID or the
password you set for the router.
2
Go to
Advanced
>
USB Sharing
>
Sharing Access
>
Sharing Settings
.
3
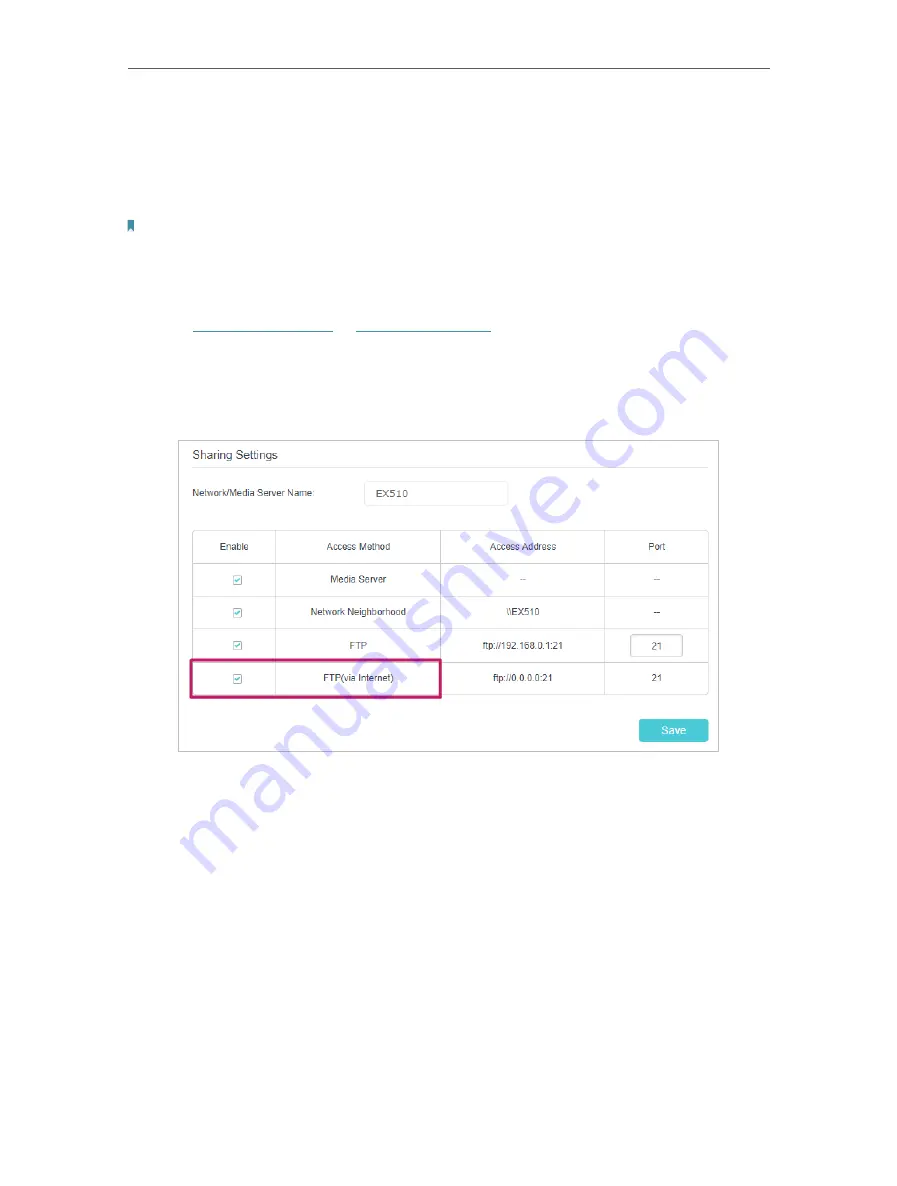
Tick the
FTP
checkbox, and then click
Save
.
4
Refer to the following table to access your USB disk remotely.
Содержание EC220-F5
Страница 1: ...2022 TP Link 1910020935 REV1 0 0 User Guide BBA Routers...
Страница 16: ...Chapter 3 Log In to Your Router...
Страница 30: ...25 Chapter 4 Set Up Internet Connection...
Страница 36: ...31 Chapter 5 Setup Your Network via TP Link Aginet App 2 Tap to create family profiles 3 Tap for more features...
Страница 48: ...43 Chapter 5 Setup Your Network via TP Link Aginet App 3 Enable IPv6 to set up an IPv6 internet connection...
Страница 54: ...49 Chapter 5 Setup Your Network via TP Link Aginet App...
Страница 106: ...101 Chapter 12 NAT Forwarding 2 Go to Advanced NAT Forwarding UPnP and toggle on or off according to your needs...
Страница 130: ...125 Chapter 16 VPN Server Client 3 Select Connect to a workplace and click Next 4 Select Use my Internet connection VPN...
Страница 136: ...131 Chapter 16 VPN Server Client 3 Select Connect to a workplace and click Next 4 Select Use my Internet connection VPN...


