DRIVE SYSTEM
7-2
Rev. 000
TX525 Service Manual
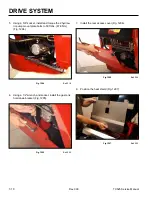
6. Start the machine and raise the loader arm enough
to clear the hydraulic floor jack. Place the floor jack
directly below the mount plate and lower the loader
arm onto the hydraulic floor jack. Continue lowering
the loader arm to raise the tracks off the ground (Fig.
1265).
8. Lower the hydraulic floor jack so the machine rests
on the jack stands. Lower the loader arms to the
resting position (Fig. 1267).
Fig 1265
PICT-4250
Fig 1267
PICT-4253
9. Make sure the machine is securely supported by the
jack stands.
7. Place two jack stands under the front frame (Fig.
1266).
Fig 1266
PICT-4251
Содержание Dingo TX 525
Страница 1: ...TX525 Service Manual Sitework Systems Form No 492 9195...
Страница 3: ...ii Rev 000 TX525 Service Manual 8 01 10 Revision 000 REVISIONS...
Страница 11: ...x Rev 000 TX525 Service Manual TABLE OF CONTENTS THIS PAGE INTENTIONALLY LEFT BLANK...
Страница 243: ...ENGINE 4 190 Rev 000 TX525 Service Manual THIS PAGE INTENTIONALLY LEFT BLANK...
Страница 263: ...ELECTRICAL 5 20 Rev 000 TX525 Service Manual THIS PAGE INTENTIONALLY LEFT BLANK...
Страница 377: ...HYDRAULIC SYSTEM 6 114 Rev 000 TX525 Service Manual THIS PAGE INTENTIONALLY LEFT BLANK...
Страница 479: ...DRIVE SYSTEM 7 102 Rev 000 TX525 Service Manual THIS PAGE INTENTIONALLY LEFT BLANK...
Страница 533: ...BRAKES 8 54 Rev 000 TX525 Service Manual 12 Install the rear access panel Fig 1836 Fig 1836 PICT 4505a...
Страница 553: ...HYDRAULIC TESTING 9 20 Rev 000 TX525 Service Manual THIS PAGE INTENTIONALLY LEFT BLANK...
Страница 554: ...TX525 Service Manual Form No 492 9195...


