BRAKES
8-3
TX525 Service Manual
Rev. 000
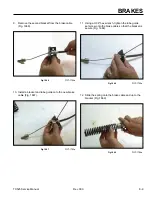
10. Slide the 2 fuel lines off the fuel tank fittings. Re-
move the fuel tank. (Fig. 1642).
Fig 1642
PICT-4265
11. Using a 1/2” socket and wrench, remove the bolt,
washer and nut securing the battery clamp and
battery guard to the frame. Remove the battery
clamp (Fig. 1643).
Fig 1643
PICT-4310a
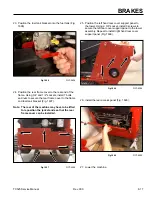
12. Slide the battery partially out of the battery mount.
Disconnect the negative battery cable from the
battery. Slide the battery out to access the positive
battery cable terminal. Disconnect the positive
battery cable and remove the battery and battery
guard from the battery mount (Fig. 1644).
Fig 1644
PICT-4312a
13. Using two 7/16” sockets, remove the 2 bolts and
nuts holding the right hand brake plate to the brake
mounting bracket (the socket/ratchet on the nut
should have a long handle) (Fig. 1645).
Fig 1645
PICT-4320
Содержание Dingo TX 525
Страница 1: ...TX525 Service Manual Sitework Systems Form No 492 9195...
Страница 3: ...ii Rev 000 TX525 Service Manual 8 01 10 Revision 000 REVISIONS...
Страница 11: ...x Rev 000 TX525 Service Manual TABLE OF CONTENTS THIS PAGE INTENTIONALLY LEFT BLANK...
Страница 243: ...ENGINE 4 190 Rev 000 TX525 Service Manual THIS PAGE INTENTIONALLY LEFT BLANK...
Страница 263: ...ELECTRICAL 5 20 Rev 000 TX525 Service Manual THIS PAGE INTENTIONALLY LEFT BLANK...
Страница 377: ...HYDRAULIC SYSTEM 6 114 Rev 000 TX525 Service Manual THIS PAGE INTENTIONALLY LEFT BLANK...
Страница 479: ...DRIVE SYSTEM 7 102 Rev 000 TX525 Service Manual THIS PAGE INTENTIONALLY LEFT BLANK...
Страница 533: ...BRAKES 8 54 Rev 000 TX525 Service Manual 12 Install the rear access panel Fig 1836 Fig 1836 PICT 4505a...
Страница 553: ...HYDRAULIC TESTING 9 20 Rev 000 TX525 Service Manual THIS PAGE INTENTIONALLY LEFT BLANK...
Страница 554: ...TX525 Service Manual Form No 492 9195...


