ENGINE
4-72
Rev. 000
TX525 Service Manual
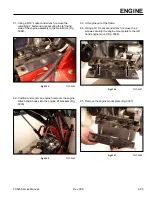
39. Tilt the radiator/oil cooler assembly forward and lift
it out of the frame so that the drain petcock is above
the frame (Fig. 0342).
Fig 0342
PICT-4973
40. Slide a length of 5/16” hose onto the drain petcock.
Place the other end of the hose into a drain pan.
Open the petcock and remove the radiator cap to
drain the coolant (Fig. 0343).
Fig 0343
PICT-4974
41. Remove the drain hose and close the petcock. Set
the radiator back in place in the frame.
42. Using a 3/8” socket, loosen the hose clamps secur-
ing the radiator hoses to the radiator fill tube and
thermostat housing (Fig. 0344).
Fig 0344
PICT-5395
43. Slide the 2 radiator hoses off the radiator fill tube
and the thermostat housing (Fig. 0345).
Fig 0345
PICT-5397
Содержание Dingo TX 525
Страница 1: ...TX525 Service Manual Sitework Systems Form No 492 9195...
Страница 3: ...ii Rev 000 TX525 Service Manual 8 01 10 Revision 000 REVISIONS...
Страница 11: ...x Rev 000 TX525 Service Manual TABLE OF CONTENTS THIS PAGE INTENTIONALLY LEFT BLANK...
Страница 243: ...ENGINE 4 190 Rev 000 TX525 Service Manual THIS PAGE INTENTIONALLY LEFT BLANK...
Страница 263: ...ELECTRICAL 5 20 Rev 000 TX525 Service Manual THIS PAGE INTENTIONALLY LEFT BLANK...
Страница 377: ...HYDRAULIC SYSTEM 6 114 Rev 000 TX525 Service Manual THIS PAGE INTENTIONALLY LEFT BLANK...
Страница 479: ...DRIVE SYSTEM 7 102 Rev 000 TX525 Service Manual THIS PAGE INTENTIONALLY LEFT BLANK...
Страница 533: ...BRAKES 8 54 Rev 000 TX525 Service Manual 12 Install the rear access panel Fig 1836 Fig 1836 PICT 4505a...
Страница 553: ...HYDRAULIC TESTING 9 20 Rev 000 TX525 Service Manual THIS PAGE INTENTIONALLY LEFT BLANK...
Страница 554: ...TX525 Service Manual Form No 492 9195...


