ENGINE
4-40
Rev. 000
TX525 Service Manual
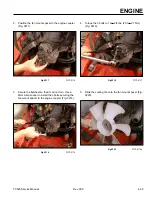
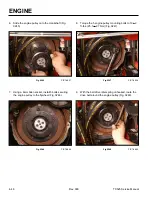
6. Using a 7/16” socket, install 4 bolts and lockwashers
securing the cooling fan to the fan mount spacer
(Fig. 0221).
Fig 0221
PICT-5112a
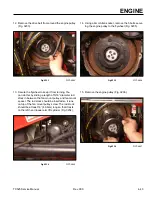
7. Torque the 4 bolts to 100
+
10 in-lbs. (11.3
+
1.1 Nm)
(Fig. 0222).
Fig 0222
PICT-5118a
8. Install the radiator and oil cooler assembly. Refer to
“Radiator & Oil Cooler Assembly Installation on page
4-15.
Flywheel Replacement
Flywheel Removal
1. Remove the tandem pump assembly from the pump
mount. Refer to “Hydraulic Tandem Pump Removal”
on page 6-30.
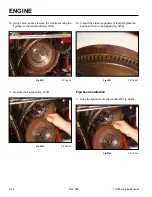
2. Using a 13mm socket, remove the 4 bolts securing
the pump mount to the engine housing (Fig. 0223).
Fig 0223
PICT-4863
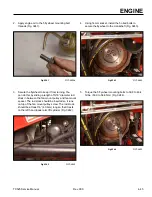
3. Remove the pump mount (Fig. 0224).
Fig 0224
PICT-4861
Содержание Dingo TX 525
Страница 1: ...TX525 Service Manual Sitework Systems Form No 492 9195...
Страница 3: ...ii Rev 000 TX525 Service Manual 8 01 10 Revision 000 REVISIONS...
Страница 11: ...x Rev 000 TX525 Service Manual TABLE OF CONTENTS THIS PAGE INTENTIONALLY LEFT BLANK...
Страница 243: ...ENGINE 4 190 Rev 000 TX525 Service Manual THIS PAGE INTENTIONALLY LEFT BLANK...
Страница 263: ...ELECTRICAL 5 20 Rev 000 TX525 Service Manual THIS PAGE INTENTIONALLY LEFT BLANK...
Страница 377: ...HYDRAULIC SYSTEM 6 114 Rev 000 TX525 Service Manual THIS PAGE INTENTIONALLY LEFT BLANK...
Страница 479: ...DRIVE SYSTEM 7 102 Rev 000 TX525 Service Manual THIS PAGE INTENTIONALLY LEFT BLANK...
Страница 533: ...BRAKES 8 54 Rev 000 TX525 Service Manual 12 Install the rear access panel Fig 1836 Fig 1836 PICT 4505a...
Страница 553: ...HYDRAULIC TESTING 9 20 Rev 000 TX525 Service Manual THIS PAGE INTENTIONALLY LEFT BLANK...
Страница 554: ...TX525 Service Manual Form No 492 9195...


