ENGINE
4-26
Rev. 000
TX525 Service Manual
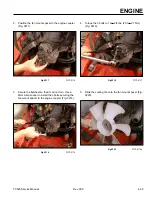
5. Loosely install the bolts on the front muffler bracket
(Fig. 0171).
Fig 0171
PICT-3265
6. Using a 1/2” wrench and 1/2” socket combination,
install and tighten the bolt and nut securing the
bottom of the muffler to the rear muffler bracket (Fig.
0172).
9. Position and tighten the air intake hose clamp to the
air filter assembly (Fig. 0174).
Fig 0172
PICT-3263
Fig 0174
PICT-3259
10. Replace the right and left side panels.
7. Tighten the bolts on both the rear and front muffler
brackets.
8. Tighten and torque the exhaust manifold bolts to 28
ft-lbs. (38 Nm) (Fig. 0173).
Fig 0173
PICT-3274
Содержание Dingo TX 525
Страница 1: ...TX525 Service Manual Sitework Systems Form No 492 9195...
Страница 3: ...ii Rev 000 TX525 Service Manual 8 01 10 Revision 000 REVISIONS...
Страница 11: ...x Rev 000 TX525 Service Manual TABLE OF CONTENTS THIS PAGE INTENTIONALLY LEFT BLANK...
Страница 243: ...ENGINE 4 190 Rev 000 TX525 Service Manual THIS PAGE INTENTIONALLY LEFT BLANK...
Страница 263: ...ELECTRICAL 5 20 Rev 000 TX525 Service Manual THIS PAGE INTENTIONALLY LEFT BLANK...
Страница 377: ...HYDRAULIC SYSTEM 6 114 Rev 000 TX525 Service Manual THIS PAGE INTENTIONALLY LEFT BLANK...
Страница 479: ...DRIVE SYSTEM 7 102 Rev 000 TX525 Service Manual THIS PAGE INTENTIONALLY LEFT BLANK...
Страница 533: ...BRAKES 8 54 Rev 000 TX525 Service Manual 12 Install the rear access panel Fig 1836 Fig 1836 PICT 4505a...
Страница 553: ...HYDRAULIC TESTING 9 20 Rev 000 TX525 Service Manual THIS PAGE INTENTIONALLY LEFT BLANK...
Страница 554: ...TX525 Service Manual Form No 492 9195...


