65
Engine Assembly
Assembly Precautions
NOTE: Refer to the Specifications section for specifica-
tions not given in this section.
After the components of the engine have been repaired,
reconditioned, or replaced, the engine can bee assembled. It
is very important to keep the engine as clean as possible
while it is being assembled, because dirt is one of the major
factors that contributes to the failure of rebuilt engines. To
avoid problems, take these precautions:
1. Do not assemble the engine in an area where any type
of grinding is done.
2. Keep your workbench, tools, and hands clean.
3. Keep sub-assemblies covered until they are needed.
4. If the engine must be left, even for a short period of
time, cover the engine until you return.
5. Make sure to follow the sequence of assembly exactly.
If certain parts are not installed in the correct order, the
engine may require some disassembly to install these
parts properly.
6. Check all the assembly tolerances such as bearing
clearance, end play, and gear lash carefully. Neglecting
these tolerances can cause serious reliability problems
in a rebuilt engine.
Assembly Procedure
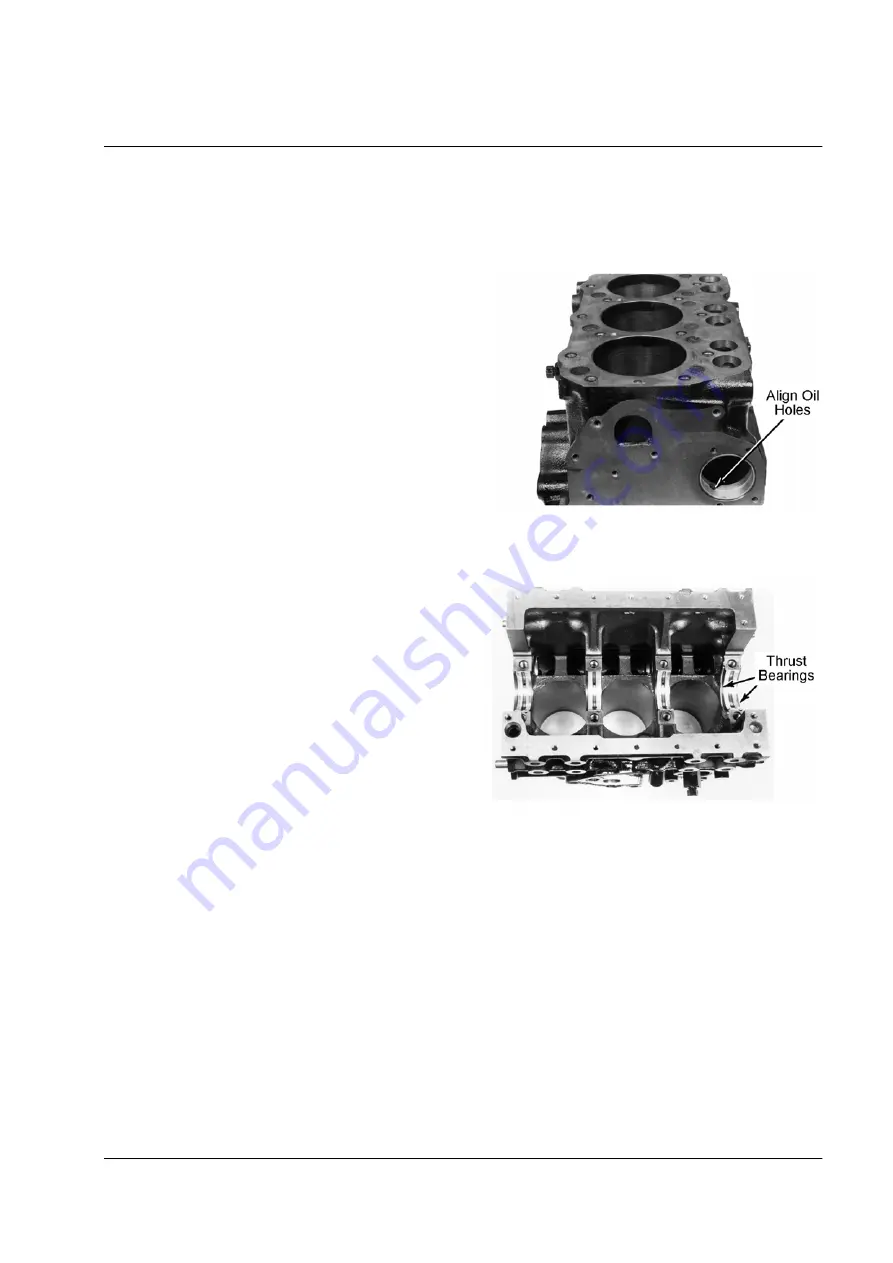
1. Install the front camshaft bearing insert using a bearing
driver. Make sure the oil holes in the bearing insert line
up with the oil holes in the front camshaft bearing bore.
2. Install or check all of the oil gallery and core plugs.
3. Place the new upper main bearing inserts in the cylin-
der block. The upper main bearing inserts are identical
and have oil holes and oil groves in them. Make sure
the holes in the bearing inserts line up with the holes in
the main bearing bores.
Install Camshaft Bearing
Install Upper Main Bearings
4. Place the upper thrust bearings in position on each side
of the upper rear main bearing. The grooves on the
thrust bearings should face away from the upper rear
main bearing.
aea286
aea287


