Electrical (Rev 1/97)
108
2. Check the overrunning clutch.
a.
Hold the pinion clutch.
b. Place the pinion shaft in the pinion clutch and try
to rotate the pinion shaft in both directions.
c.
The pinion shaft should rotate freely in one direc-
tion and should not rotate in the other direction.
d. Replace the pinion clutch if the pinion shaft does
not rotate smoothly in the proper direction, or if it
rotates in both directions.
Starter Solenoid
1. Check the heavy duty contacts on the plunger and
inside the starter solenoid. Clean these contacts if they
are dirty or burnt.
2. Use the assembly procedure to assemble the starter
solenoid, place the pinion assembly in the pinion hous-
ing, and attach the starter solenoid to the pinion hous-
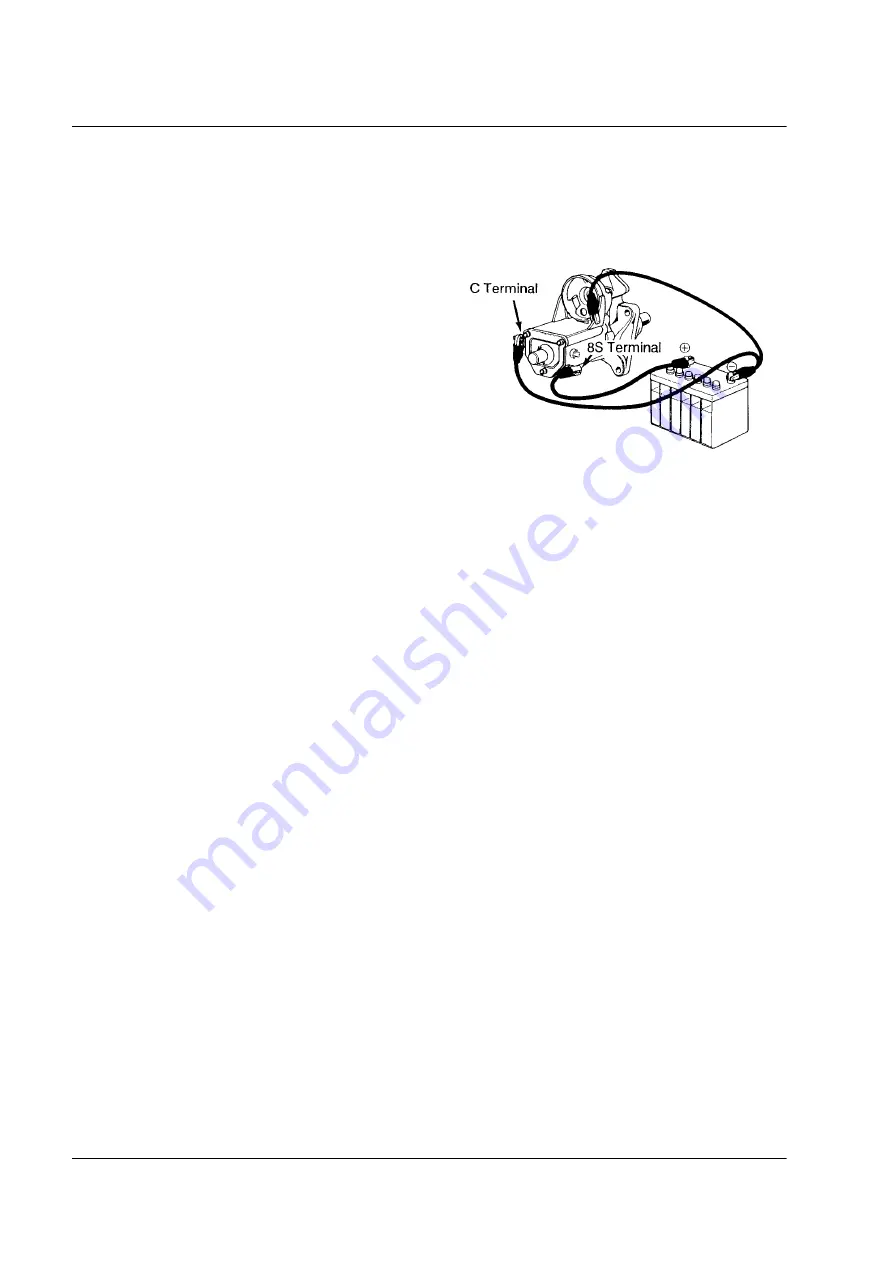
ing. Test this assembly as follows:
a.
Use jumper wires to connect the negative (-) termi-
nal of a 12 volt battery to the starter solenoid chas-
sis and to the C terminal on the starter solenoid.
b. Use a jumper wire to connect the positive terminal
of the battery to the 8S terminal on the starter sole-
noid. The starter solenoid should energize and the
pinion gear should extend. If the starter solenoid
does not energize, replace it.
c.
Disconnect the jumper wire from the C terminal on
the starter solenoid. The starter solenoid should
remain energized. If the start solenoid does not
remain energized, replace it.
d. Disconnect the jumper wire from the 8S terminal
on the starter solenoid. The starter solenoid should
de-energize and the pinion gear should retract. If
the start solenoid does not de-energize, replace it.
Energize Starter Solenoid
Assembly
1. Place the plunger back inside the starter solenoid and
install the cover.
2. Install the components of the pinion housing. Use a
light grease to lubricate the components in the pinion
housing.
a.
Place the pinion shaft spring, pinion clutch, pinion
shaft retainer, and pinion assembly retainer on the
pinion shaft.
b. Place this part of the pinion assembly in the pinion
housing.
c.
Support the end of the pinion shaft that faces the
starter solenoid.
d. Place the pinion gear spring and the pinion gear on
the pinion shaft.
e.
Push the pinion gear onto the pinion shaft as far as
possible and hold it in that position.
f.
Place the stop ring on the pinion shaft and push the
stop ring to the pinion gear. Make sure the groove
in the stop ring faces away from the pinion gear.
g. Place the snap ring in the groove on the end of the
pinion shaft.
aea379


