71
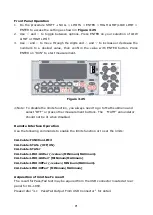
Front Panel Operation
1.
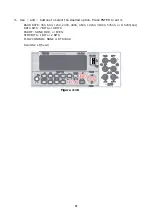
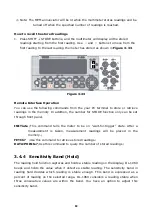
Do the procedure SHIFT + NULL > LIMITS > ENTER > HIGH LIMIT/LOW LIMIT >
ENTER to access the setting as shown in
Figure 3-25
2.
Use
◁
and
▷
to toggle between options. Press ENTER on your selection of LOW
LIMIT or HIGH LIMIT.
3.
Use
◁
and
▷
to move through the digits and
△
and
▽
to increase or decrease the
numbers to a desired value, then confirm the value with ENTER button. Press
ENTER on “RUN” to start measurement.
Figure 3-25
※
Note: To disable the limits function, you always need to go to Math submenu and
select “OFF” or press other measurement buttons. The
“
MATH” annunciator
should not be lit when disabled
Remote Interface Operation
Use the following commands to enable the limits function or to set the limits:
CALCulate:FUNCtion LIMit
CALCulate:STATe {OFF|ON}
CALCulate:STATe?
CALCulate:LIMit:LOWer {<
value
>|MINimum|MAXimum}
CALCulate:LIMit:LOWer? [MINimum|MAXimum]
CALCulate:LIMit:UPPer {<
value
>|MINimum|MAXimum}
CALCulate:LIMit:UPPer? [MINimum|MAXimum]
Acquisition of limit test's result
The result for Pass/Fail test may be aquired from the USB connector located at rear
panel for DL-1060.
Please refer "4.1 Pass/Fail Output From USB Connector " for detail.
Содержание DL-1060
Страница 1: ...INSTRUCTION MANUAL 6 1 2 DIGITAL MULTIMETER DL 1060 DL 1060G DL 1060VG DL 1060R DL 1060VR B71 0180 31...
Страница 91: ...85 3 4 10 Self test Notice Do not use SELF TEST since it is used only for an after sales service operation...
Страница 146: ...7F Towa Fudosan Shin Yokohama Bild 2 18 13 Shin Yokohama Kohoku ku Yokohama Kanagawa 222 0033 Japan http www texio co jp...

