TASCAM DP-03SD
65
12 – Exchanging Data with a Computer
Exporting a stereo master track
You can export a stereo master track that you have made on
the unit (see “Creating a stereo master track” on page 49) to a
computer. When you create a new stereo master track for a song,
the existing stereo master track is overwritten, so if you want to
keep multiple different stereo master tracks, you might want to
save them to a computer.
Before starting the following export procedures, make sure
that the song that you want to export a stereo master track for
is currently loaded and that you have already created a stereo
master track for it.
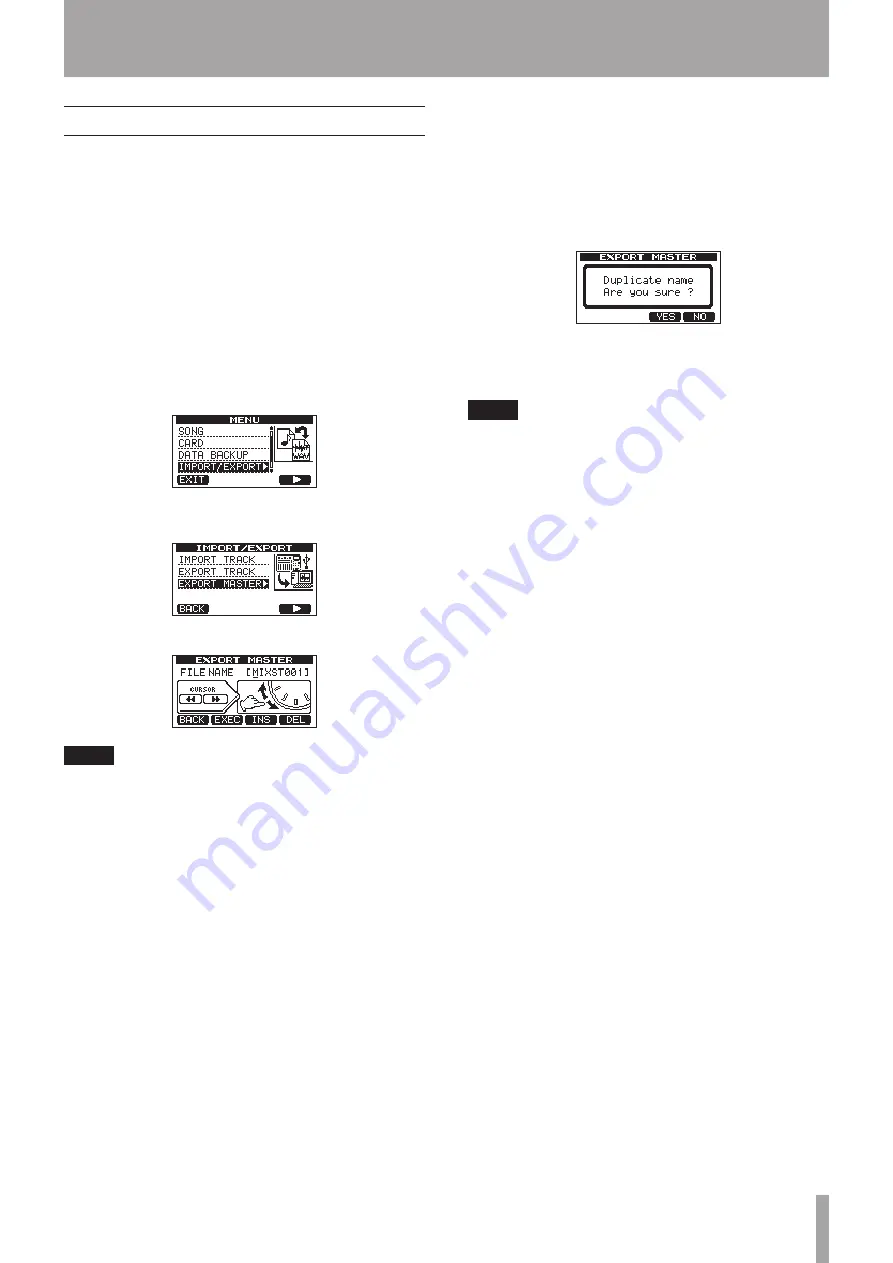
1 When the recorder is stopped, press the MENU button to
open the
MENU
screen.
2 Turn the DATA wheel to select
IMPORT/EXPORT
, and
press the F4 (
¥
) button to open the
IMPORT/EXPORT
menu.
3 Turn the DATA wheel to select
EXPORT MASTER
, and
press the F4 (
¥
) button.
The default file name is displayed and can be edited.
NOTE
If there is no stereo master track, an error message appears.
4 Use the REW (
Ô
)/F FWD (
) buttons, the DATA wheel
and the F3 (
INS
) and F4 (
DEL
) buttons to edit the name
of the stereo master file being exported (See “Editing names”
on page 30).
5 After setting the name, press the F2 (
EXEC
) button.
A stereo master track file is exported as a 16-bit, 44.1-kHz,
stereo WAV file to the FAT partition. The file name of the
exported file is the name set in step 4 above plus the “.WAV”
extension.
If you have previously exported a stereo master track with
the same name, a confirmation message (
Duplicate
name - Are you sure?
) appears.
Press the F3 (
YES
) button to overwrite the older track.
If you don't want to overwrite the older track, press F4 (
NO
)
button.
NOTE
To cancel exporting, press the
F1
(
BACK
) button.
6 Press the HOME button to return to the Home Screen.
7 Connect this unit to a computer using a USB cable (see
“Connecting with a computer” on page 60).
8 Use the computer to copy the stereo master file from the
WAVE
directory on the FAT partition of the unit to the
computer.
9 After copying finishes, disconnect the unit from the
computer using the proper procedures and then remove the
USB cable (see “Disconnecting” on page 60).


