30
TASCAM DP-03SD
5 – Song Management
This unit manages data in units called “songs”. Ordinarily, each
project should have its own “song” file. The first step is to load
the song that you want to manage (load an existing song or
create a new song).
In a song, the audio data for the recorded multitrack (tracks 1–8)
and the stereo master track are saved.
This chapter starts with an explanation of SD card partitions,
and then covers basic operations, including procedures for
loading songs and creating new songs, as well as various song
management functions.
Partitions and songs
This unit uses SD cards to record songs. SD cards formatted by
the unit are divided into partitions.
The partitions include MTR partitions for recording song data
and FAT partitions that can be read and written to by computers.
Editing names
You can edit names on the following screens.
• When creating, saving or editing the name of a song (
SAVE
,
CREATE
and
NAME EDIT
)
• When exporting a WAV file (
NAME EDIT
and
EXPORT
MASTER
)
• When backing up a song (
SONG BACKUP
)
SONG CREATE name editing screen
Use the following controls to edit names.
• Use the REW (
Ô
) (TO ZERO) and F FWD (
) (TO LAST
REC) buttons to move the cursor (underline) position. The
character at the cursor position is the one that can be edited.
• Use the DATA wheel to change the characters at the cursor
(underline) position. Ordinary symbols, numerals and English
upper and lower case letters can be input.
• To insert a blank at the cursor position, press the F3 (
INS
)
button. When editing a file name, an “
A
” is inserted at the
blank space.
• Press the F4 (
DEL
) button to delete the character at the
cursor position.
• When you have finished inputting and editing, press the F2
(
EXEC
) button to save the edited name.
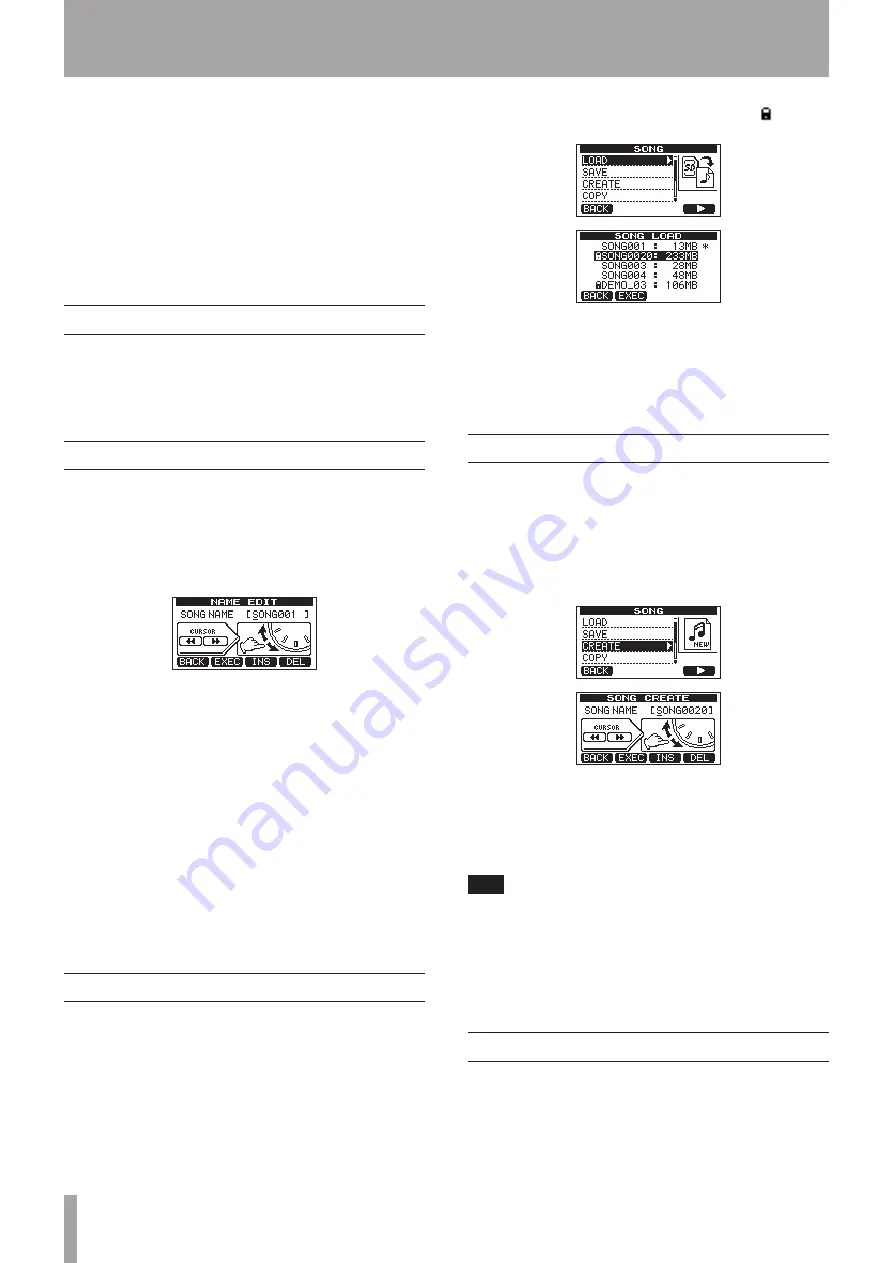
Loading a saved song
Follow these procedures to load the song you want.
1 When the recorder is stopped, press the MENU button to
open the
MENU
screen.
2 Use the data wheel to select
SONG
, and press the F4 (
¥
)
button to open the
SONG
screen.
3 Use the DATA wheel to select
LOAD
, and press the F4 (
¥
)
button to open the
SONG LOAD
screen, which shows a
list of songs in the current partition. A star (*) icon appears
to the right of the currently loaded song. A lock ( ) icon
appears to the left of songs that are protected.
4 Use the DATA wheel to select the song you want, and press
the F2 (
EXEC
) button.
The currently loaded song is saved and the selected song is
loaded.
5 Press the HOME button to return to the Home Screen.
Creating a new song
Follow these procedures to create a new song.
1 When the recorder is stopped, press the MENU button to
open the
MENU
screen.
2 Use the DATA wheel to select
SONG
, and press the F4 (
¥
)
button to open the
SONG
screen.
3 Use the DATA wheel to select
CREATE
, and press the F4
(
¥
) button to open the
SONG CREATE
screen.
A default song name like “S
ONG****
” is given to the new
song. (
****
indicates a number. In the example above the
name is “
SONG0020
”.)
4 Change the song name (title) as necessary. (See “Editing
names” on page 30 for how to do this.)
TIP
You can edit the name of a song later by selecting
NAME
EDIT
from the
SONG
screen. You can also edit the song
name when saving the song.
5 Press the F2 (
EXEC
) button to save the currently loaded
song and create the new song.
6 Press the HOME button to return to the Home Screen.
Saving a song
This unit automatically saves the current song during shutdown
and when loading another song. You can also save a song at any
time using the following procedures.
1 When the recorder is stopped, press the MENU button to
open the
MENU
screen.


