32
TASCAM DP-03SD
5 – Song Management
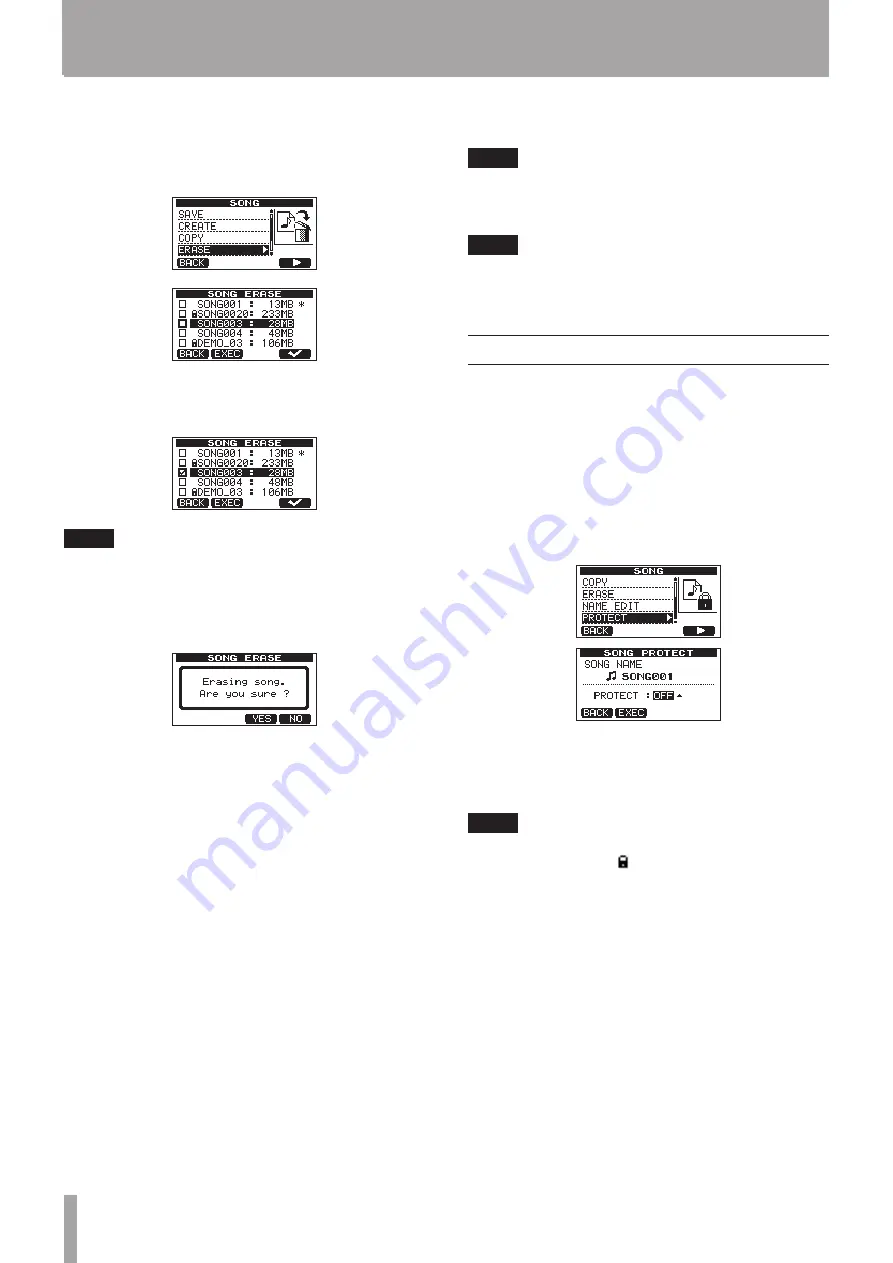
2 Use the DATA wheel to select
SONG
, and press the F4 (
¥
)
button to open the
SONG
screen.
3 Use the DATA wheel to select
ERASE
, and press the F4 (
¥
)
button to open the
SONG ERASE
screen, which shows a
list of songs.
4 Use the DATA wheel to select a song that you want to erase
and press the F4 (
✔
) button.
A check appears in the checkbox next to the song.
NOTE
To remove the check from the checkbox, press the
F4 (
✔
)
while the song is selected.
5 To erase multiple songs, repeat step 4.
6 After selecting all songs that you want to erase, press the F2
(
EXEC
) button. A confirmation screen opens.
7 Press the F3 (
YES
) button.
After the songs are erased, the
SONG
screen reopens.
NOTE
To cancel erasing a song, press the
F4 (
NO
)
button instead
of
F3 (
YES
)
button.
8 Press the HOME button to return to the Home Screen.
NOTE
Every MTR partition must always have at least one song,
so if you erase all the songs on a partition, a new song is
created automatically.
Protecting songs
If you protect a song, editing, recording and erasing of that song
is prevented.
1 Load the song that you want to protect.
2 When the recorder is stopped, press the MENU button to
open the
MENU
screen.
3 Use the DATA wheel to select
SONG
, and press the F4 (
¥
)
button to open the
SONG
screen.
4 Use the DATA wheel to select
PROTECT
, and press the F4
(
¥
) button to open the
SONG PROTECT
screen, where
you can turn protection ON and OFF.
5 Use the DATA wheel to set
PROTECT
to
ON
, and press the
F2 (
EXEC
) button.
After
PROTECT
is turned
ON
, the
SONG
screen reopens.
6 Press the HOME button to return to the Home Screen.
NOTE
• In the song list used to copy, erase and conduct other
functions, a lock icon ( ) appears next to protected songs.
• If you try to execute a prohibited operation (edit, record,
erase) on a protected song, a “
Song Protected
”
message appears and the operation is prevented.
• To remove protection from a song, follow the above
procedures but set
PROTECT
to
OFF
in step 4.


