1D-43 Engine Mechanical:
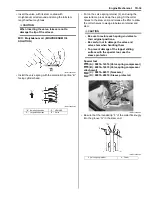
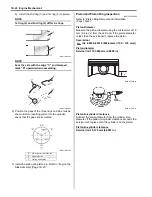
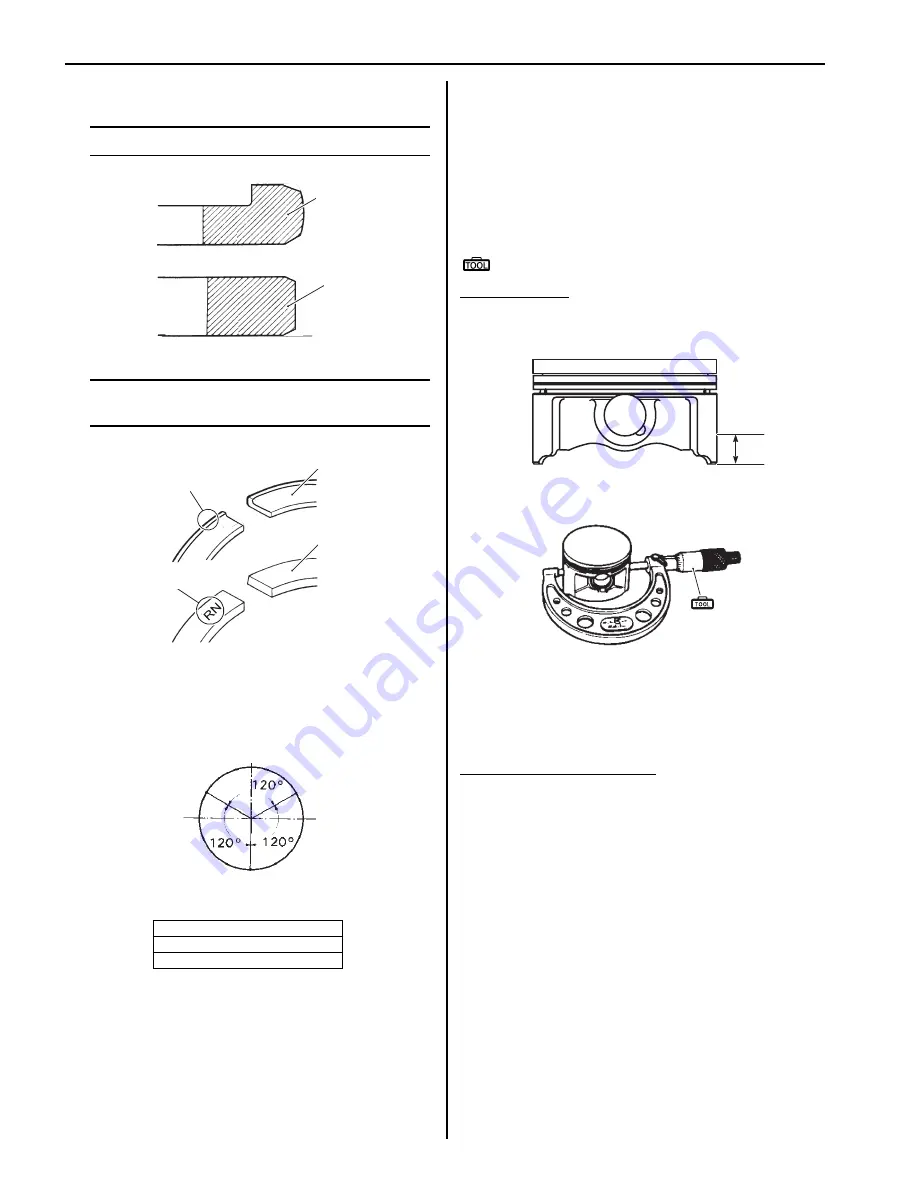
b) Install the 2nd ring (3) and 1st ring (4) to piston.
NOTE
1st ring (4) and 2nd ring (3) differ in shape.
NOTE
Face the side with the edge “C” and stamped
mark “D” upward when assembling.
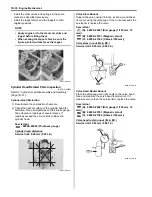
2) Position the gaps of the three rings and side rails as
shown. Before inserting piston into the cylinder,
check that the gaps are so located.
3) Install the piston and piston pin. Refer to “Engine Top
Side Assembly (Page 1D-21)”.
Piston and Piston Ring Inspection
B831G21406032
Refer to “Piston Ring Removal and Installation
(Page 1D-42)”.
Piston Diameter
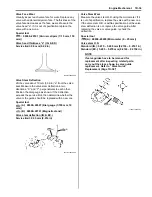
Measure the piston diameter using the micrometer at 15
mm (0.6 in) “a” from the skirt end. If the piston diameter
is less than the service limit, replace the piston.
Special tool
(A): 09900–20210 (Micrometer (100 – 125 mm))
Piston diameter
Service limit: 103.880 mm (4.0898 in)
Piston-to-cylinder Clearance
Subtract the piston diameter from the cylinder bore
diameter. If the piston-to-cylinder clearance exceeds the
service limit, replace both the cylinder and the piston.
Piston-to-cylinder clearance
Service limit: 0.120 mm (0.0047 in)
“D”: 2nd ring and lower side rail
“E”: Upper side rail
“F”: 1st ring and spacer
3
4
I831G1140179-02
3
4
“C”
“D”
I831G1140180-01
EX
IN
“D”
“E”
“F”
I831G1140181-03
“a”
I831G1140335-02
(A)
I831G1140337-01
Содержание 2009 LT-A750XK9
Страница 2: ......
Страница 4: ......
Страница 5: ...SUPPLEMENTS L LT A750XK9 09 MODEL 10 LT A750XPK9 09 MODEL 11 ...
Страница 29: ...0A 15 General Information 99565 01010 013 CD ROM Ver 13 ...
Страница 57: ...0B 28 Maintenance and Lubrication 09915 40610 Oil filter wrench Page 0B 12 Page 0B 12 ...
Страница 68: ...0C 11 Service Data ...
Страница 310: ...1K 5 Exhaust System ...
Страница 482: ...4D 6 Parking Brake ...
Страница 528: ...6B 13 Steering Handlebar ...
Страница 555: ...Exterior Parts 9D 1 Body and Accessories Exterior Parts Repair Instructions Exterior Parts Construction B831G29406001 ...
Страница 581: ......
Страница 631: ...4A 6 Brake Control System and Diagnosis ...


