Sitex SP38 Installation and Operation
Document PN
29010101
V2r0
-
63
-
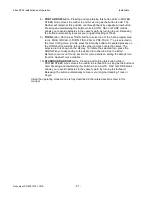
Drive Setup
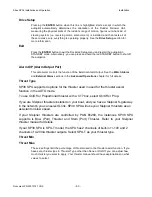
Pressing the
ENTER
button when this line is highlighted starts a script in which the
autopilot automatically determines the orientation of the Rudder Follower Unit,
measuring the physical limits of the rudder’s range of motion, figures out what kind of
steering system (i.e. reversing motor, solenoid, etc.) is installed, and then tests all of
these to make sure everything is operating properly. See the
Drive Setup
section for
more information.
Exit
Press the
ENTER
button to exit the Dockside Setup menu and restart the autopilot in
STANDBY mode. Alternatively, you can press and hold the red STANDBY button to shut off
the autopilot.
Alarm O/P (Alarm Output Port)
This parameter controls the function of the External Alarm Output. See the
Watch Alarm
and
External Alarm
sections in the
Advanced Operations
chapter for full details.
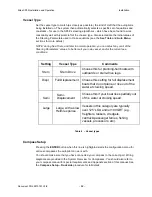
Thrust Type
SP38
SPU supports 4 options for the thruster used in used for the thruster assist
function in the AUTO mode.
To use On/Off or Proportional thruster with a CT7 box, select On/Off or Prop.
If you are Sleipner thrusters installed on your boat, and you have a Sleipner S-gateway
in the network, you can select S-link.
SP38
SPU will use your Sleipner thrusters as an
assistant on slow speed.
If your Sleipner thrusters are controlled by PGN 65280, the instances
SP38
SPU
supports is Bow (Port) Thruster and Stern (Port) Thruster. Refer to your Sleipner
thruster manual for details.
If your
SP38
SPU is SPU-T model, the SPU has 2 channels of built-in +/-10V and 2
channels of 4-20mA thruster outputs. Select SPU-T as your thruster type.
Thrust Min
Thrust Max
These 2 settings limit the percentage of thruster used in the thruster assist function. If you
have set a thruster type in Thruster Type other than None or On/Off, you can adjust how
much thruster you want to apply. Your thruster manual should have explanations on what
values to select.
Installation
Содержание SP38 Autopilot
Страница 2: ......
Страница 14: ...Sitex SP38 Installation and Operation Document PN 29010101 V2r0 13 ...
Страница 15: ...Sitex SP38 Installation and Operation Document PN 29010101 V2r0 14 Introduction ...
Страница 16: ...Sitex SP38 Installation and Operation Document PN 29010101 V2r0 15 ...
Страница 25: ...System Overview Sitex SP38 Installation and Operation Document PN 29010101 V2r0 24 System Overview ...
Страница 26: ...Sitex SP38 Installation and Operation Document PN 29010101 V2r0 25 ...
Страница 35: ...Sitex SP38 Installation and Operation Document PN 29010101 V2r0 34 Installation ...
Страница 36: ...Sitex SP38 Installation and Operation Document PN 29010101 V2r0 35 ...
Страница 73: ...Sitex SP38 Installation and Operation Basic Operation Document PN 29010101 V2r0 72 Basic Operations ...
Страница 74: ...Sitex SP38 Installation and Operation Document PN 29010101 V2r0 73 ...
Страница 108: ...Sitex SP38 Installation and Operation Document PN 29010101 V2r0 107 ...
Страница 109: ...Sitex SP38 Installation and Operation Document PN 29010101 V2r0 108 Advanced Operations ...
Страница 110: ...Sitex SP38 Installation and Operation Document PN 29010101 V2r0 109 ...
Страница 123: ...Sitex SP38 Installation and Operation Document PN 29010101 V2r0 122 Care and Maintenance ...
Страница 124: ...Sitex SP38 Installation and Operation Document PN 29010101 V2r0 123 ...
Страница 127: ...Sitex SP38 Installation and Operation Document PN 29010101 V2r0 126 Appendices ...
Страница 128: ...Sitex SP38 Installation and Operation Document PN 29010101 V2r0 127 ...
Страница 156: ...Sitex SP38 Installation and Operation Document PN 29010101 V2r0 155 Warranty ...
Страница 157: ...Sitex SP38 Installation and Operation Document PN 29010101 V2r0 156 User Notes and Settings ...
Страница 158: ...Sitex SP38 Installation and Operation Document PN 29010101 V2r0 157 ...
Страница 162: ...Sitex SP38 Installation and Operation User Notes and Settings Document PN 29010101 V2r0 161 User Notes ...

