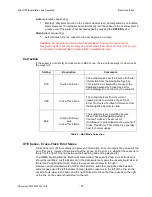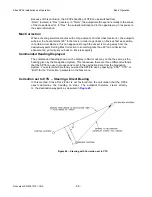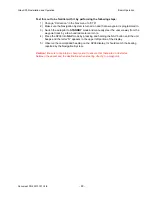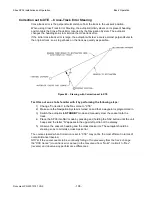
Auto Mode
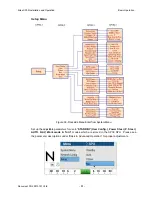
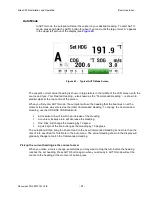
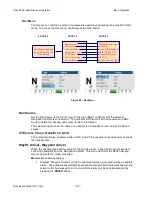
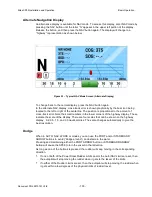
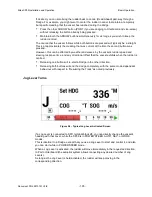
In AUTO
mode, the autopilot will steer the vessel on your desired Heading. To enter AUTO
mode, press and hold the AUTO
button for about 1 second, until the large letter `A´ appears
in the upper left portion of the display (see
Figure 43
).
Figure 43 – Typical AUTO Mode Screen
Sitex SP38 Installation and Operation
Basic Operation
Document PN
29010101
V2r0
-
91
-
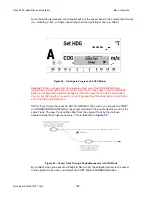
The vessel’s current actual heading is shown in large letters in the middle of the LCD screen, with the
source and type. Your Desired Heading – also known as the “Commanded Heading” – is shown in
smaller digits at the top-centre of the screen.
When you first enter AUTO
mode, the autopilot will use the heading that the boat was on at the
moment the mode was entered as the initial Commanded Heading. To change the Commanded
Heading, use the COURSE CHANGE
knob:
A clockwise turn will result in an increase of the Heading.
A counter-clockwise turn will decrease the Heading.
One ‘click’ will change the Heading by 1 degree.
A quick spin of the knob changes the Heading by 10 degrees.
The autopilot will then bring the boat around to the new Commanded Heading at no more than the
rate of turn specified for Turn Rate in the Auto menu. The actual Heading shown in the display will
gradually change to match the Commanded Heading.
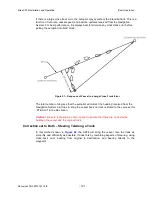
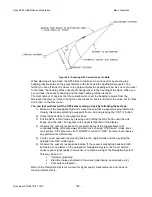
Pick up the current heading as the course to steer
When you make a course change, sometimes you may want to stop the turn before the heading
reaches the set heading. Press AUTO button again when you already in AUTO mode will set the
course to the heading at the moment of button press.
Содержание SP38 Autopilot
Страница 2: ......
Страница 14: ...Sitex SP38 Installation and Operation Document PN 29010101 V2r0 13 ...
Страница 15: ...Sitex SP38 Installation and Operation Document PN 29010101 V2r0 14 Introduction ...
Страница 16: ...Sitex SP38 Installation and Operation Document PN 29010101 V2r0 15 ...
Страница 25: ...System Overview Sitex SP38 Installation and Operation Document PN 29010101 V2r0 24 System Overview ...
Страница 26: ...Sitex SP38 Installation and Operation Document PN 29010101 V2r0 25 ...
Страница 35: ...Sitex SP38 Installation and Operation Document PN 29010101 V2r0 34 Installation ...
Страница 36: ...Sitex SP38 Installation and Operation Document PN 29010101 V2r0 35 ...
Страница 73: ...Sitex SP38 Installation and Operation Basic Operation Document PN 29010101 V2r0 72 Basic Operations ...
Страница 74: ...Sitex SP38 Installation and Operation Document PN 29010101 V2r0 73 ...
Страница 108: ...Sitex SP38 Installation and Operation Document PN 29010101 V2r0 107 ...
Страница 109: ...Sitex SP38 Installation and Operation Document PN 29010101 V2r0 108 Advanced Operations ...
Страница 110: ...Sitex SP38 Installation and Operation Document PN 29010101 V2r0 109 ...
Страница 123: ...Sitex SP38 Installation and Operation Document PN 29010101 V2r0 122 Care and Maintenance ...
Страница 124: ...Sitex SP38 Installation and Operation Document PN 29010101 V2r0 123 ...
Страница 127: ...Sitex SP38 Installation and Operation Document PN 29010101 V2r0 126 Appendices ...
Страница 128: ...Sitex SP38 Installation and Operation Document PN 29010101 V2r0 127 ...
Страница 156: ...Sitex SP38 Installation and Operation Document PN 29010101 V2r0 155 Warranty ...
Страница 157: ...Sitex SP38 Installation and Operation Document PN 29010101 V2r0 156 User Notes and Settings ...
Страница 158: ...Sitex SP38 Installation and Operation Document PN 29010101 V2r0 157 ...
Страница 162: ...Sitex SP38 Installation and Operation User Notes and Settings Document PN 29010101 V2r0 161 User Notes ...

