Simrad SH80
42
851--164300 / C
5 TRANSCEIVER UNIT
Introduction
Note
The Transceiver Unit must be mounted as a complete unit, i.e. the
door should not be opened until the unit is securely fastened to the
bulkhead.
Before mounting the Transceiver Unit, observe that the distance
between the Hull Unit and the Transceiver Unit is restricted by the
flexible transducer cable joining the two. Remember to take into
consideration the slack necessary to lower the transducer.
Caution
Do not fasten the transducer cable to the Transceiver Unit until
described later in the start-up procedure.
Free bulkhead space is required to mount the Transceiver Unit
cabinet.
→
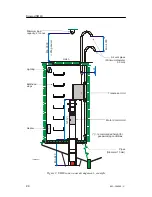
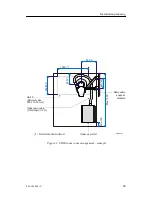
Drawing references, see pages 45, 43 and 44.
Procedure
Observe the following procedure. To ensure correct operation, tick
off every item when the action has been carried out.
1
Remove the two mounting brackets which are fastened to the
shock absorbers on the Transceiver Unit.
- Use the Allen key found in the plastic bag fastened to the
upper shock absorber.
2
Weld the mounting brackets securely to the bulkhead.
3
Use a chain fall or similar device to lift the Transceiver Unit
into position and bolt it to the mounting brackets.
- Note that eight bolts are provided in the plastic bag
fastened to the upper shock absorber.
4
Connect the grounding cable from the Transceiver Unit to
the mounting bracket.
Содержание SH80 - REV C
Страница 2: ......
Страница 14: ...Simrad SH80 X 851 164300 C Blank page...
Страница 61: ...Transceiver unit 45 851 164300 C Figure 13 Mounting the Transceiver Unit CD3110A...
Страница 186: ...Simrad SH80 170 851 164300 C 12 3 Installation drawings The SH80 installation drawings are provided on the next pages...
Страница 195: ...Installation remarks 179 851 164300 C Party Date Signature Party Date Signature Party Date Signature...
Страница 196: ...Notes...
Страница 197: ...Notes...
Страница 200: ......

