5-115
►
Original image in transaction report
When [Print Original Image] is enabled, the first page of the transmitted original is printed on the same sheet as the
transaction report. The original image is reduced to allow it to fit on the sheet. If the vertical scanning length (X direction)
of the original is longer than 432 mm (17-1/64"), the part that exceeds 432 mm (17-1/64") may be cut off.
5
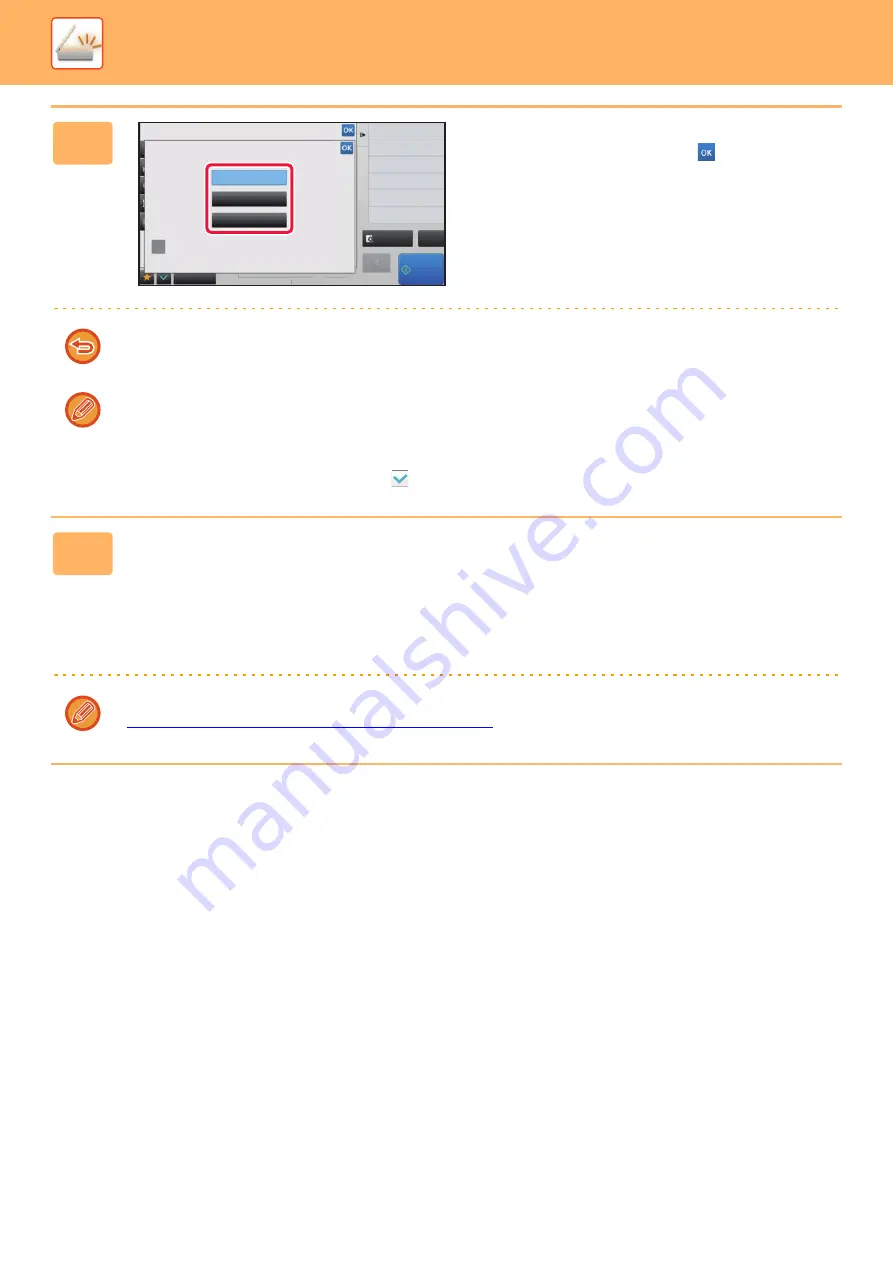
Tap the key of the print settings.
After the settings are completed, tap
and [Back] keys in
sequence.
To cancel the transaction report settings:
Tap the [Do not Print] key.
• The print conditions for a transaction report are as follows:
• "Always Print": A transaction report is printed no matter whether the transmission succeeds or fails.
• "Print at Error": A transaction report is printed when transmission fails.
• "Do not Print": Do not print a transaction report.
• Set the [Print Original Image] checkbox to
to include part of the transmitted original in the transaction report.
6
Tap the [Start] key to start scanning of the original.
• If you inserted the original pages in the document feeder tray, all pages are scanned.
A beep will sound to indicate that scanning and transmission have ended.
• When you place the original on the document glass, scan each page one at a time.
When scanning finishes, place the next original and tap the [Start] key. Repeat the procedure until all pages have
been scanned and then tap the [Read-End] key.
A beep will sound to indicate that scanning and transmission have ended.
You can tap the [Preview] key to check a preview of the image before sending an image. For more information, see
"
CHECKING THE IMAGE TO BE TRANSMITTED (page 5-67)
".
Back
reception memory
0%
CA
Preview
Receive
Start
Others
Transaction Report
Do not Print
Print at Error
Always Print
Print Original Image
Содержание MX-M6570
Страница 179: ...1 176 BEFORE USING THE MACHINE PERIPHERAL DEVICES 4 Close the front cover ...
Страница 195: ...1 192 BEFORE USING THE MACHINE PERIPHERAL DEVICES 4 Close the front cover ...
Страница 199: ...1 196 BEFORE USING THE MACHINE PERIPHERAL DEVICES 4 Close the front cover ...
Страница 201: ...1 198 BEFORE USING THE MACHINE PERIPHERAL DEVICES 3 Gently push the box back in 4 Close the front cover ...
Страница 770: ...6 31 DOCUMENT FILING USING STORED FILES 4 Tap the Move key ...
Страница 935: ...2018D US1 ...


