


5-111
►
STAMPING SCANNED ORIGINALS
(VERIFICATION STAMP)
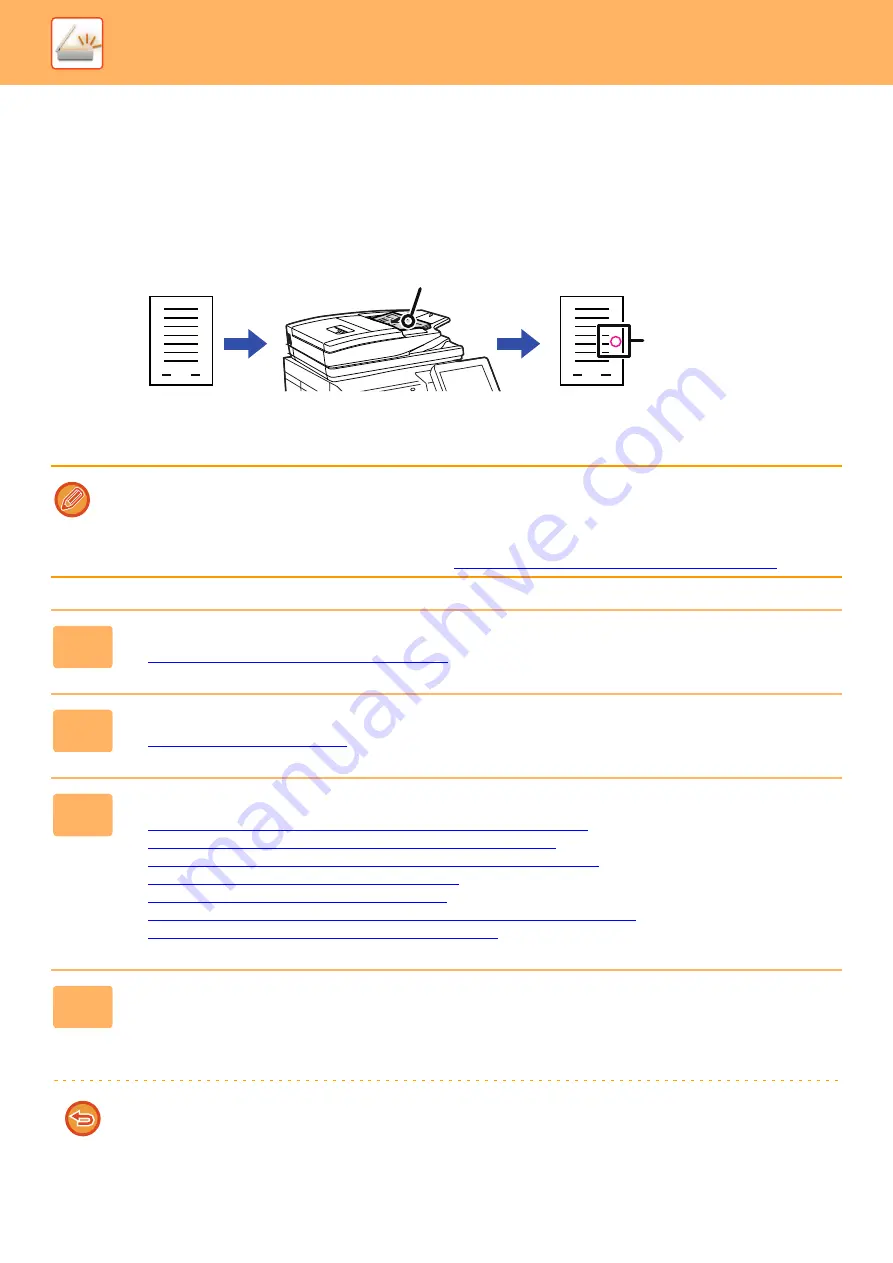
This function stamps each original that is scanned using the automatic document feeder, allowing you to verify that all
originals were correctly scanned.
• To use the verification stamp function, the optional stamp unit must be installed.
• When 2-sided originals are used, the front of each original is stamped twice.
• If an error occurs during scanning, an original that was not scanned may be stamped.
• When the "O" mark that is stamped on originals starts to become faint, replace the stamp cartridge.
For the procedure for replacing the stamp cartridge, see "
REPLACING THE STAMP CARTRIDGE (page 1-213)
1
Place originals in the automatic document feeder.
►
AUTOMATIC DOCUMENT FEEDER (page 1-131)
2
Tap the mode display to switch to the initial screen of each mode.
►
3
Specify the destination.
►
RETRIEVING A DESTINATION FROM AN ADDRESS BOOK (page 5-15)
►
VIEWING A LIST OF THE SELECTED DESTINATIONS (page 5-18)
►
USING A SEARCH NUMBER TO RETRIEVE A DESTINATION (page 5-19)
►
ENTERING AN ADDRESS MANUALLY (page 5-20)
►
SPECIFYING A NETWORK FOLDER (page 5-21)
►
RETRIEVING A DESTINATION FROM A GLOBAL ADDRESS BOOK (page 5-23)
►
USING A TRANSMISSION LOG TO RESEND (page 5-25)
4
Tap [Verification Stamp] on the action panel or [Others] key, and tap the
[Verif. Stamp] key.
The appropriate icon or checkbox is selected.
If you tap the [Others] key, tap the [Back] key after the settings have been completed.
To cancel the verification stamp setting:
Tap [Verification Stamp] on the action panel or the [Others] key, and tap [Verif. Stamp] to clear the checkmark.
1
1
Originals
Originals are
scanned
An "O" mark is
stamped in
fluorescent pink.
Position of stamp
Содержание MX-M6570
Страница 179: ...1 176 BEFORE USING THE MACHINE PERIPHERAL DEVICES 4 Close the front cover ...
Страница 195: ...1 192 BEFORE USING THE MACHINE PERIPHERAL DEVICES 4 Close the front cover ...
Страница 199: ...1 196 BEFORE USING THE MACHINE PERIPHERAL DEVICES 4 Close the front cover ...
Страница 201: ...1 198 BEFORE USING THE MACHINE PERIPHERAL DEVICES 3 Gently push the box back in 4 Close the front cover ...
Страница 770: ...6 31 DOCUMENT FILING USING STORED FILES 4 Tap the Move key ...
Страница 935: ...2018D US1 ...


