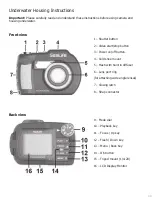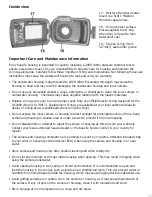
91
Preparing the underwater housing
Important
: If possible, load the camera into the housing in a dry environment such as an air-
conditioned room. This will help to avoid trapping humid air inside the sealed housing, which may
cause the housing lens port to fog underwater. The Moisture Muncher capsule will absorb humid air
trapped in the housing, but that takes time depending on how humid the environment is, so try to
avoid trapping moisture inside the housing in the first place.
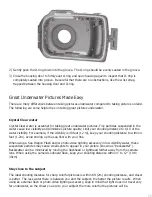
1) Open the underwater housing door by pushing in the locking tab (A) and pulling up on the latch
(B) until it releases from the housing door (C). Squeeze the housing closed to help release the
latch from the door.
2) Inspect O-ring and O-ring contact surfaces for damage (cuts, scratches, tears, cracks, dents and
any other imperfections.) Replace O-ring or have waterproof housing serviced if the O-ring or
O-ring contact surfaces become damaged. Do not use underwater housing if O-ring or O-ring
contact surfaces are damaged. See page 94 for information on replacing the O-ring
3) Clean the O-ring and O-ring contact surfaces using a dampened, lint-free cotton cloth to remove
sand, hair and other debris. Avoid stretching the O-ring. Do not lubricate the O-ring.
4) Make sure the inside/outside of the glass lens port is clean. If dirty, clean the lens using a lint-
free cotton cloth. Use lens cleaner or dampened clothe to remove stubborn stains.
5) Insert one Moisture Muncher desiccant capsule into the rubber pocket on the inside of the housing
door. Insert one end of the capsule (A) and push down until the capsule is securely held in place.
6) Set the Mode Dial of the inner camera and housing to the same mode, so the two are in synch.
Note: If the mode dials are not set to the same mode when sealing the housing, it is not a major
problem because the inner camera will display the current mode on the LCD monitor.
7) Insert the camera [with camera strap removed] into the housing.


