background image

Deutsch - 24

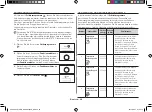
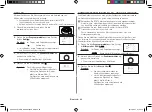
FERMENTIERPROGRAMME

Es gibt 5 Fermentierprogramme mit vorprogrammierten Garzeiten. Sie 

brauchen daher weder die Garzeit noch die Leistungsstufe einzustellen. 

Durch ggf. mehrmaliges Drücken der Taste für die Fermentierprogramme 

wählen Sie die Art der zu fermentierenden Nahrungsmittel aus. Legen 

Sie die Lebensmittel in die Mitte des Drehtellers, und schließen Sie die 

Gerätetür.

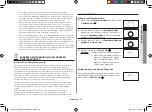
1. 

Drehen Sie den 

Programmwähler

 auf die Position 

für die 

Fermentierprogramme 

(

). 

2. 

Wählen Sie durch Drehen am 

Funktionswähler

 die 

Art der Nahrungsmittel aus. Eine Beschreibung der 

vorprogrammierten Einstellungen finden Sie in der 

Tabelle auf der nächsten Seite. Drücken Sie dann 

den 

Funktionswähler

, um die Auswahl zu bestätigen. 

3. 

Drücken Sie die Taste 

Start/+ 30s

 ( ).

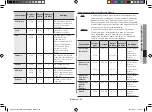
VERWENDEN DER FERMENTIERPROGRAMME

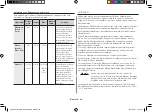
In der folgenden Tabelle wird beschrieben, wie Sie mit Hilfe der Automatikprogramme 

beispielsweise Hefeteig aufgehen lassen oder Joghurt zubereiten können.

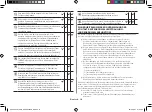
Nummer

Lebens-

mittel

Portions-

größe (g)

Ruhezeit

Empfehlungen

Teig gehen 

lassen

1-1

Pizzateig


300-500

-

Den Teig in eine Schüssel 

geeigneter Größe geben und 

diese auf den niedrigen Rost 

stellen. Mit Frischhaltefolie 

abdecken.

1-2

Kuchenteig


500-800

-

Den Teig in eine Schüssel 

geeigneter Größe geben und 

diese auf den niedrigen Rost 

stellen. Mit Frischhaltefolie 

abdecken.

1-3

Brotteig


600-900

-

Den Teig in eine Schüssel 

geeigneter Größe geben und 

diese auf den niedrigen Rost 

stellen. Mit Frischhaltefolie 

abdecken.

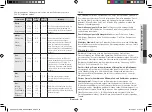
Selbstgemachter 

Joghurt

2-1

Kleine 

Behälter


500

6 Stunden 

im 

Kühlschrank

150 g Joghurt in  

5 Keramiktassen oder 

kleine Einmachgläser geben 

(je 30 g). In jede Tasse 

100 ml Milch hinzugeben. 

Haltbare Milch verwenden 

(Raumtemperatur,  

3,5 % Fett). Jeweils mit 

Frischhaltefolie abdecken 

und kreisförmig auf dem 

Drehteller verteilen.

2-2

Große 

Schüssel


500

6 Stunden 

im 

Kühlschrank

150 g Naturjoghurt mit 

500 ml haltbarer Milch 

(Raumtemperatur, 3,5 % 

Fett) mischen. Gleichmäßig 

in eine große Glasschüssel 

geben. Mit Frischhaltefolie 

abdecken und auf den 

Drehteller stellen.

CE118PFCX1_SWS_DE68-04220D_DE.indd   24

2013-08-27   �� 1:22:11

Содержание CE118PF

Страница 1: ...ng com register Microwave Oven Owner s instructions Cooking guide CE118PF This manual is made with 100 recycled paper Please be advised that the Samsung warranty does NOT cover service calls to explain product operation correct improper installation or perform normal cleaning or maintenance CE118PFCX1_SWS_DE68 04220D_EN indd 1 2013 08 28 5 58 41 ...

Страница 2: ...that your oven is operating correctly 14 Setting the time 14 Cooking Reheating 15 Power levels and time variations 16 Adjusting the cooking time 16 Stopping the cooking 16 Setting the energy save mode 16 Using the auto cook feature 16 Using the auto cook programmes 17 Using the auto reheat feature 18 Using the auto reheat programmes 19 Using the slim fry cook feature 20 Using the slim fry programm...

Страница 3: ...sed in household only WARNING Only allow children to use the oven without supervision when adequate instructions have been given so that the child is able to use the oven in a safe way and understands the hazards of improper use WARNING This appliance can be used by children aged from 8 years and above and persons with reduced physical sensory or mental capabilities or lack of experience and knowl...

Страница 4: ... removed Failure to maintain the oven in a clean conditioin could lead to deterioration of the surface that could adversely affect the life of the appliance and possibly result in a hazardous situation The appliance is not intended for installing in road vehicles caravans and similar vehicles etc This appliance is not intended for use by persons including children with reduced physical sensory or ...

Страница 5: ...ven under adult supervision due to the temperatures generated During use the appliance becomes hot Care should be taken to avoid touching heating elements inside the oven WARNING Accessible parts may become hot during use Young children should be kept away A steam cleaner is not to be used WARNING Ensure that the appliance is switched off before replacing the lamp to avoid the possibility of elect...

Страница 6: ...ntentionally generated and or used in the form of electromagnetic radiation for the treatment of material and EDM and arc welding equipment For Class B equipment is equipment suitable for use in domestic establishments and in establishments directly connected to a low voltage power supply network which supplies buildings used for domestic purposes INSTALLING YOUR MICROWAVE OVEN Place the oven on a...

Страница 7: ...e and outside surfaces Door and door seals Turntable and Roller rings Turntable type model only ALWAYS ensure that the door seals are clean and the door closes properly Failure to maintain the oven in a clean condition could lead to deterioration of the surface that could adversely affect the life of the appliance and possibly result in a hazardous situation 1 Clean the outside surfaces with a sof...

Страница 8: ...in sealed containers for microwave function For your safety do not use high pressure water cleaners or steam jet cleaners Prevent the door from closing correctly Clean the microwave oven cavity right after each use with a mild detergent solution but let the microwave oven cool down before cleaning in order to avoid injury When cleaning the upper part inside the cavity it will be convenient to turn...

Страница 9: ...into the wall socket firmly Do not use a multiple plug adapter an extension cord or an electric transformer Do not hook the power cord on a metal object insert the power cord between the objects or behind the oven Do not use a damaged power plug damaged power cord or loose wall socket When the power plug or power cord is damaged contact your nearest service centre Do not pour or directly spray wat...

Страница 10: ...cian trained by the manufacturer Samsung will charge a repair fee for replacing an accessory or repairing a cosmetic defect if the damage to the unit and or damage to or loss of the accessory was caused by the customer Items this stipulation covers include a A Dented Scratched or Broken Door Handle Out Panel or Control Panel b A Broken or missing Tray Guide Roller Coupler or Wire Rack CAUTION Only...

Страница 11: ...m This microwave oven is supposed for heating food It is intended for domestic home use only Do not heat any type of textiles or cushions filled with grains which could cause burns and fire The manufacturer cannot be held liable for damage caused by improper or incorrect use of the appliance Failure to maintain the oven in a clean condition could lead to deterioration of the surface that could adv...

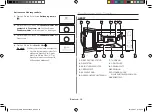
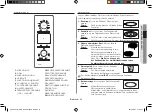
Страница 12: ...Dial as required 4 Press Start 30s button Result Defrosting starts When cooking has finished the oven will beep and flash 0 4 times The oven will then beep one time per minute oven features OVEN 1 DOOR HANDLE 2 DOOR 3 VENTILATION HOLES 4 HEATING ELEMENT 5 LIGHT 6 WATER BOWL HOLDER 7 DOOR LATCHES 8 TURNTABLE 9 COUPLER 10 ROLLER RING 11 SAFETY INTERLOCK HOLES 12 CONTROL PANEL 8 9 10 11 12 7 1 2 3 4 ...

Страница 13: ...ble to be placed on the roller ring with the center fitting on to the coupler Purpose The turntable serves as the main cooking surface it can be easily removed for cleaning 3 High rack Low rack to be placed on the turntable Purpose The metal racks can be used to cook two dishes at the same time A small dish may be placed on the turntable and a second dish on the rack The metal racks can be used in...

Страница 14: ...ed on the display Please set the current time The time can be displayed in either the 24 hour or 12 hour notation You must set the clock When you first install your microwave oven After a power failure Do not forget to reset the clock when you switch to and from summer and winter time 6 Roasting spit coupler barbecue and Skewer to be placed in the glass bowl Purpose The roasting spit is a convenie...

Страница 15: ...food in the centre of the turntable Close the door Never switch the microwave oven on when it is empty 1 Turn Mode Selector Dial to Microwave mode position Result The following indications are displayed microwave mode 2 Turn Multi Function Selector Dial to desired until the appropriate power level is displayed At that time press the Multi Function Selector Dial to set the power level 3 Set the coo...

Страница 16: ...ve safe Open the door Place the food in the centre of the turntable Close the door 1 Turn Mode Selector Dial to Auto Cook mode position POWER LEVELS AND TIME VARIATIONS The power level function enables you to adapt the amount of energy dissipated and thus the time required to cook or reheat your food according to its type and quantity You can choose between six power levels Power level Percentage ...

Страница 17: ...d white rice and add double quantity of cold water For example when cooking 0 25 kg rice add liter cold water Use glass pyrex bowl with lid Put bowl in the centre of turntable Cook covered Code Food Serving size g Standing time min Recommendations 2 Broccoli florets 200 250 300 350 400 450 500 550 1 2 Weigh the vegetables after washing cleaning and cutting into similar size Put them into a glass b...

Страница 18: ...on the display as HEAT oven is preheating And then pour dough into 6 8 paper or silicone cups for muffins and set on the low rack After beep sounds insert rack USING THE AUTO REHEAT FEATURE The 6 Auto Reheat features provide four pre programmed cooking times You do not need to set either the cooking times or the power level You can adjust the size of the serving by turning the Dial knob Use only r...

Страница 19: ...0 3 Put chilled ready mini ravioli in a microwave proof plastic dish in the centre of turntable Pierce film of ready product or cover plastic dish with microwave cling film Stir carefully before and after standing time This programme is suitable for ravioli as well as for noodles in sauce Code Food Serving size g Standing time min Recommendations 4 Frozen Pizza Snacks 100 150 250 300 Put frozen pi...

Страница 20: ...e 10 Slim Fry auto programmes for frying It contains its quantities standing times and appropriate recommendations You will use less oil compared to frying with oil fryer while you will get tasty results Programmes are running with a combination of convection top heater and microwave energy Code Food Serving size g Standing time min Recommendations 1 Frozen Oven Chips 300 350 450 500 Distribute fr...

Страница 21: ...h the cut side on the crusty plate Set plate on low rack 8 Drumsticks 200 250 300 350 400 450 1 2 Weigh drumsticks and brush with oil and spices Place them evenly on the crusty plate Set plate on the low rack Turnover after beep sounds oven will stop process Press start to continue Code Food Serving size g Standing time min Recommendations 9 Sliced Courgette 100 150 200 250 Rinse and slice courget...

Страница 22: ...imes when temperature and the preset temperature is kept for 10 minutes USING THE POWER DEFROST FEATURE The Power Defrost feature enables you to defrost meat poultry fish bread cake and fruit The defrost time and power level are set automatically You simply select the programme and the weight Use only containers that are microwave safe Open the door Place the frozen food on a ceramic in the centre...

Страница 23: ... Shield the tail of a whole fish with aluminium foil Turn the fish over when the oven beeps This programme is suitable for whole fishes as well as for fish fillets Code Food Serving size g Standing time min Recommendations 4 Bread Cake 125 1000 10 60 Put bread horizontally on a piece of kitchen paper and turn over as soon as the oven beeps Place cake on a ceramic plate and if possible turn over as...

Страница 24: ...how to use the auto programme for rising yeast dough or preparing yogurt Code Food Serving size g Standing time Recommendations Dough Proof 1 1 Pizza dough 300 500 Put dough in suitable sized bowl and set on the low rack Cover with cling film 1 2 Cake dough 500 800 Put dough in suitable sized bowl and set on the low rack Cover with cling film 1 3 Bread dough 600 900 Put dough in suitable sized bow...

Страница 25: ... is opened or press the Stop button during this operation E 15 will be displayed At that time press the Stop button one more E 15 will disappear USING THE SENSOR COOK PROGRAMMES The following table presents 8 Sensor Cook Programmes It contains its recommended weight range per item standing times after cooking and appropriate recommendations After you start the programme cooking times and power lev...

Страница 26: ...mendations 8 Roast chicken 1 0 1 2 kg 4 5 Brush chilled chicken with oil and spices Put breast side down in the middle of the low rack Turnover as soon as the oven beeps Push start to continue process Auto sensor cooking instructions The Auto Sensor allows you to cook your food automatically by detecting the amount of gases generated from the food while cooking When cooking food many kinds of gase...

Страница 27: ...gent may affect the sensor Avoid placing the oven near high moisture or gas emitting appliances since this will interfere with the proper performance of the Auto Sensor Always keep the inside of the oven clean Wipe all spills with a damp cloth This oven is designed for household use only COOKING BY CONVECTION The convection mode enables you to cook food in the same way as in a traditional oven The...

Страница 28: ...combine microwave cooking with the grill to cook quickly and brown at the same time ALWAYS use microwave safe and oven proof cookware Glass or ceramic dishes are ideal as they allow the microwaves to penetrate the food evenly ALWAYS use oven gloves when touching the recipients in the oven as they will be very hot You can improve cooking and grilling if you use the high rack Open the door Place the...

Страница 29: ...ture 2 Select the temperature by turning the Multi Function Selector Dial Temperature 200 180 160 140 100 40 C At that time press the Multi Function Selector Dial to select temperature 3 Set the cooking time by turning the Multi Function Selector Dial The maximum cooking time is 60 minutes 4 Press the Start 30s button Result Combination cooking starts The oven is heated to the required temperature...

Страница 30: ...s USING THE VERTICAL MULTI SPIT MULTI SPIT FOR KEBAB Using the multi spit with 6 kebab skewers you can easily barbecue meat poultry fish vegetables like onions peppers or courgettes and fruit which have been cut into pieces You can prepare the above food with the kebab skewers by using convection or combination mode Coupler Kebab Skewer Multi Spit Barbecue Spit Glass Bowl USE OF THE MULTI SPIT WIT...

Страница 31: ...ge and cause fire to the microwave oven USING THE CHILD LOCK FEATURE Your microwave oven is fitted with a special child lock programme which enables the oven to be locked so that children or anyone unfamiliar with it cannot operate it accidentally 1 Press the Clock button and Stop Cancel Eco button for one second Result The oven is locked no functions can be selected The display shows 2 To unlock ...

Страница 32: ... two second Result The oven does not beep to indicate the end of a function 2 To switch the beeper back on press the Start 30s and Stop Cancel Eco button again at the same time about two second Result The oven operates normally cookware guide To cook food in the microwave oven the microwaves must be able to penetrate the food without being reflected or absorbed by the dish used Care must therefore...

Страница 33: ...minium and copper but they can penetrate through ceramic glass porcelain and plastic as well as paper and wood So food must never be cooked in metal containers Food suitable for microwave cooking Many kinds of food are suitable for microwave cooking including fresh or frozen vegetables fruit pasta rice grains beans fish and meat Sauces custard soups steamed puddings preserves and chutneys can also...

Страница 34: ... recommended see table Cook covered for the minimum time see table Continue cooking to get the result you prefer Stir once during and once after cooking Add salt herbs or butter after cooking Cover during a standing time of 3 minutes Hint Cut the fresh vegetables into even sized pieces The smaller they are cut the quicker they will cook All fresh vegetables should be cooked using full microwave po...

Страница 35: ...overed After the cooking time is over stir before standing time and salt or add herbs and butter Remark the rice may not have absorbed all water after the cooking time is finished Pasta Use a large glass pyrex bowl Add boiling water a pinch of salt and stir well Cook uncovered Stir occasionally during and after cooking Cover during standing time and drain thoroughly afterwards Food Portion Power T...

Страница 36: ...ke a note of the time taken for future reference Always make sure that the reheated food is piping hot throughout Allow food to stand for a short time after reheating to let the temperature even out The recommended standing time after reheating is 2 4 minutes unless another time is recommended in the chart Take particular care when heating liquids and baby food See also the chapter with the safety...

Страница 37: ...d again before standing and serving Pasta with sauce chilled 350 g 600 W 3 4 3 Put pasta e g spaghetti or egg noodles on a flat ceramic plate Cover with microwave cling film Stir before serving Food Portion Power Time min Standing time min Instructions Filled pasta with sauce chilled 350 g 600 W 4 5 3 Put filled pasta e g ravioli tortellini in a deep ceramic plate Cover with plastic lid Stir occas...

Страница 38: ...out of any wrapping to allow thawed liquid to drain away Put the frozen food on a dish without cover Turn over half way drain off any liquid and remove any giblets as soon as possible Check the food occasionally to make sure that it does not feel warm If smaller and thinner parts of the frozen food start to warm up they can be shield by wrapping very small strips of aluminium foil around them duri...

Страница 39: ...r grilling Chops sausages steaks hamburgers bacon and gammon rashers thin fish portions sandwiches and all kinds of toast with toppings Important remark Whenever the grill only mode is used please remember that food must be placed on the high rack unless another instruction is recommended Microwave Grill This cooking mode combines the radiant heat that is coming from the grill with the speed of mi...

Страница 40: ...ead slices first Put the toast with topping on the high rack Stand for 2 3 minutes Baked potatoes 500 g 300 W Grill 10 12 Cut potatoes into halves Put them in a circle on the high rack with the cut side to the grill Fresh food Portion Power 1st side time min 2nd side time min Instructions Gratin potatoes Vegetables chilled 450 g 300 W Grill 12 15 Put the fresh gratin into a small glass pyrex dish ...

Страница 41: ...or cooking with Microwaves Convection Should be able to let the microwaves pass through Should be ovenproof like glass pottery or china without metal trims similar to the cookware described under Microwave Grill Food suitable for Microwave Convection cooking All kinds of meats and poultry as well as casseroles and gratin dishes sponge cakes and light fruit cakes pies and crumbles roast vegetables ...

Страница 42: ...r on the low rack Frozen cake 1000 g 300 W 180 C 14 18 Put the frozen cake directly on the low rack After defrost and warming stand for 15 20 minutes SPECIAL HINTS MELTING BUTTER Put 50 g butter into a small deep glass dish Cover with plastic lid Heat for 30 40 seconds using 900 W until butter is melted MELTING CHOCOLATE Put 100 g chocolate into a small deep glass dish Heat for 3 5 minutes using 4...

Страница 43: ...e replaced in person for safety reasons Please contact nearest authorised Samsung customer care to arrange for a qualified engineer to replace the bulb The oven causes interference with radios or televisions Slight interference may be observed on televisions or radios when the oven is operating This is normal To solve this problem install the oven away from televisions radios and aerials If interf...

Страница 44: ...STRIA 0810 SAMSUNG 7267864 0 07 min BELGIUM 02 201 24 18 DENMARK 70 70 19 70 FINLAND 030 6227 515 FRANCE 01 48 63 00 00 GERMANY 0180 6 SAMSUNG bzw 0180 6 7267864 HHP 0180 6 M SAMSUNG bzw 0180 6 67267864 0 20 Anruf aus dem dt Festnetz aus dem Mobilfunk max 0 60 Anruf ITALIA 800 SAMSUNG 726 7864 HHP 800 Msamsung 800 67267864 CYPRUS 8009 4000 only from landline GREECE 80111 SAMSUNG 80111 726 7864 onl...

Страница 45: ...ät Bedienungsanleitung mit Zubereitungshinweisen CE118PF Dieses Handbuch ist zu 100 auf Recyclingpapier gedruckt Bitte beachten Sie dass die Garantie von Samsung keine Inanspruchnahme des Kundendienstes für Erläuterungen zum Gerätebetrieb die Behebung einer unsachgemäßen Installation oder die Durchführung normaler Reinigung oder Wartung des Geräts abdeckt CE118PFCX1_SWS_DE68 04220D_DE indd 1 2013 ...

Страница 46: ...t 12 Bedienfeld 13 Zubehör 13 Verwenden des Geräts 14 So funktioniert ein Mikrowellengerät 14 Überprüfen auf ordnungsgemäße Funktionsweise 14 Einstellen der Uhrzeit 14 Erhitzen Aufwärmen 15 Leistungsstufen und unterschiedliche Garzeiten 16 Regulieren der Garzeit 16 Beenden Unterbrechen des Garvorgangs 16 Einstellen des Energiesparmodus 16 Garprogramme 17 Verwenden der Garprogramme 17 Aufwärmprogra...

Страница 47: ... zur Verwendung im Haushalt bestimmt WARNUNG Kinder dürfen das Gerät nur dann ohne Aufsicht verwenden wenn sie die Risiken eines unsachgemäßen Gebrauchs kennen und genaue Anweisungen erhalten haben so dass sie das Gerät ohne Gefahr bedienen können WARNUNG Dieses Gerät kann von Kindern ab 8 Jahren und Personen mit verminderten körperlichen sensorischen oder geistigen Fähigkeiten oder einem Mangel a...

Страница 48: ...eschlossen ist Das Gerät sollte regelmäßig gereinigt und eventuelle Essensrückstände sollten entfernt werden Wenn das Gerät nicht sauber gehalten wird kann die Oberfläche beschädigt werden Dies wirkt sich unter Umständen nachteilig auf die Funktionsteile des Geräts aus und verursacht Gefahren Das Gerät ist nicht zur Aufstellung in Straßenfahrzeugen Wohnwagen und ähnlichen Fahrzeugen bestimmt und n...

Страница 49: ... im Innern eines Schranks aufgestellt werden WARNUNG nur Mikrowellenfunktion Optional WARNUNG Wenn das Gerät im Kombimodus verwendet wird entstehen hohe Temperaturen Kinder dürfen das Gerät daher nur unter Aufsicht Erwachsener bedienen Das Gerät erhitzt sich im Betrieb Es ist Vorsicht geboten damit Sie die Heizelemente im Innern des Geräts nicht berühren WARNUNG Zugängliche Teile können sich im Be...

Страница 50: ...zenergie entsteht und oder in Form elektromagnetischer Strahlung zur Bearbeitung von Werkstoffen für Funkenerosions und Elektroschweißgeräte verwendet wird Geräte der Klasse B sind zum Einsatz in Wohnbereichen und in Anlagen bestimmt die direkt an eine Niederspannungsversorgung angeschlossen sind mit der Wohngebäude versorgt werden AUFSTELLEN DES MIKROWELLENGERÄTS Stellen Sie das Gerät auf einer e...

Страница 51: ...rdichtungen Drehteller und Drehringe Nur Modelle mit Drehteller Achten Sie darauf dass die Türdichtungen IMMER sauber sind und die Gerätetür ordnungsgemäß schließt Wenn das Gerät nicht sauber gehalten wird kann die Oberfläche beschädigt werden Dies wirkt sich unter Umständen nachteilig auf die Funktionsteile des Geräts aus und verursacht Gefahren 1 Reinigen Sie die Außenflächen mit einem weichen T...

Страница 52: ... von Heizkörpern oder entflammbaren Materialien an einem feuchten öligen oder staubigen Ort an einem Platz der direktem Sonnenlicht oder Wassereinwirkungen ausgesetzt ist oder an dem Gas austreten könnte Reinigen Sie den Garraum des Mikrowellengeräts nach jeder Nutzung mit einem milden Reinigungsmittel Lassen Sie ihn jedoch vor der Reinigung abkühlen um Verletzungen zu vermeiden Wenn Sie den obere...

Страница 53: ...Netzkabel bzw der Stecker beschädigt sind wenden Sie sich an Ihr nächstgelegenes Kundendienstzentrum Gießen oder sprühen Sie kein Wasser direkt auf das Gerät Stellen Sie Gegenstände weder auf oder in das Gerät noch auf die Gerätetür Sprühen Sie kein flüchtiges Material wie z B Insektizide auf die Oberfläche des Geräts Lagern Sie kein entflammbares Material im Gerät Seien Sie besonders vorsichtig b...

Страница 54: ...örteil oder dessen Verlust auf ein Verschulden des Kunden zurückzuführen ist Zu den von dieser Bestimmung betroffenen Teilen gehören a Gerätetüren Griffe äußere Verkleidung oder Gehäuse die beschädigt zerkratzt oder gerissen sind b Zerbrochene oder fehlende Drehteller Führungsringe Drehaufsätze oder Gitterroste Verwenden Sie das Mikrowellengerät nicht zum Trocknen von Zeitungen oder Kleidung Geben...

Страница 55: ...ses Gerät wurde zum Erhitzen von Nahrungsmitteln entwickelt Das Gerät ist ausschließlich für die Verwendung in Privathaushalten geeignet Erwärmen Sie keine Textilien oder mit Körnern gefüllte Kissen die zu Verbrennungen und Bränden führen könnten Der Hersteller haftet für keinerlei Schäden die durch unsachgemäße oder falsche Nutzung des Geräts entstehen Wenn das Gerät nicht sauber gehalten wird ka...

Страница 56: ...ebnis Die Nahrungsmittel werden aufgetaut Nach Ablauf der eingestellten Zeit erklingt ein Signalton Im Display blinkt vier Mal die Ziffer 0 Der Signalton wird anschließend alle 60 Sekunden wiederholt Funktionen des Geräts GERÄT 1 GRIFF DER GERÄTETÜR 2 GERÄTETÜR 3 BELÜFTUNGSSCHLITZE 4 HEIZELEMENT 5 BELEUCHTUNG 6 WASSERGEFÄSSHALTERUNG 7 TÜRRIEGEL 8 DREHTELLER 9 DREHAUFSATZ 10 DREHRING 11 ÖFFNUNGEN F...

Страница 57: ...Kochfläche und kann zum Reinigen leicht entfernt werden 3 Hoher und niedriger Rost Müssen auf den Drehteller gestellt werden Zweck Mit Hilfe der Roste können Nahrungsmittel gleichzeitig in zwei Gefäßen zubereitet werden Ein kleines Gefäß kann auf den Drehteller gestellt werden und ein weiteres auf einen Rost Die Roste können mit der Grillfunktion der Heißluftfunktion und in den Kombinationsmodi ve...

Страница 58: ...Uhrzeit ein Die Zeit kann in 24 Stunden oder 12 Stunden Notation angezeigt werden Sie müssen die Uhrzeit einstellen beim erstmaligen Aufstellen des Mikrowellengeräts nach einem Stromausfall Vergessen Sie nicht die Uhrzeit beim Wechsel zwischen Sommer und Winterzeit umzustellen 6 Grillspieß Grillaufsatz und Schaschlikspieß Müssen in der Glasschüssel platziert werden Zweck Mit dem Grillspieß können ...

Страница 59: ... Sie die Nahrungsmittel in die Mitte des Drehtellers Schließen Sie die Gerätetür Schalten Sie das Mikrowellengerät niemals ein wenn es leer ist 1 Drehen Sie den Programmwähler auf die Position für Mikrowelle Ergebnis Im Display wird Folgendes angezeigt Mikrowellenmodus 2 Stellen Sie durch Drehen am Funktionswähler die gewünschte Leistungsstufe ein Drücken Sie dann den Funktionswähler um die ausgew...

Страница 60: ...rwenden LEISTUNGSSTUFEN UND UNTERSCHIEDLICHE GARZEITEN Mit Hilfe der Leistungsstufen können Sie die abgegebene Energiemenge einstellen anhand derer die benötigten Gar oder Aufwärmzeiten entsprechend der Art und Menge der Nahrungsmittel berechnet werden Sie können zwischen sechs Leistungsstufen auswählen Leistungsstufe Prozentsatz Ausgangsleistung HOCH 100 900 W MITTELHOCH 67 600 W MITTEL 50 450 W ...

Страница 61: ...ils den kombinierten Mikrowellen und Heißluftmodus In den Programmen 9 und 10 kommt lediglich der Heißluftmodus zum Einsatz Verwenden Sie zum Entnehmen der Nahrungsmittel stets Ofenhandschuhe Nummer Lebensmittel Portions größe g Ruhezeit in Min Empfehlungen 1 Weißer Reis 150 200 200 250 5 10 Weißen Reis parboiled abwiegen und die doppelte Menge an kaltem Wasser hinzugeben Beispiel Für 0 25 kg Reis...

Страница 62: ... wird die Meldung HEAT HEIZEN angezeigt d h das Gerät wird vorgeheizt Den Teig anschließend in 6 8 Muffin Förmchen aus Papier oder Silikon geben und diese auf den niedrigen Rost stellen Den Rost bei Erklingen des Signaltons einsetzen AUFWÄRMPROGRAMME Mit Hilfe der 6 Aufwärmprogramme können Sie Nahrungsmittel unter Verwendung von vier vorprogrammierten Garzeiten aufwärmen Sie brauchen daher weder d...

Страница 63: ... 3 Die gekühlten Mini Fertigravioli in einen mikrowellengeeigneten Kunststoffbehälter geben und diesen in die Mitte des Drehtellers stellen Falls vorhanden die Folie des Fertiggerichts durchstechen oder den Kunststoffbehälter mit mikrowellengeeigneter Frischhaltefolie abdecken Vor und nach der Ruhezeit vorsichtig umrühren Dieses Programm ist sowohl für Ravioli als auch für Nudeln mit Soße geeignet...

Страница 64: ...uhezeiten und Zubereitungsempfehlungen angegeben Im Vergleich zu einer Fritteuse benötigen Sie eine kleinere Menge an Öl und erhalten dennoch die gleichen wohlschmeckenden Ergebnisse Die Programme werden mit einer Kombination aus Heißluft Oberhitze und Mikrowellenenergie ausgeführt Nummer Lebensmittel Portions größe g Ruhezeit in Min Empfehlungen 1 Tiefgefrorene Backofen Pommes 300 350 450 500 Die...

Страница 65: ...würzen Mit der Schnittseite nach unten auf die Backunterlage legen Die Unterlage auf den niedrigen Rost stellen Nummer Lebensmittel Portions größe g Ruhezeit in Min Empfehlungen 8 Hähnchenschenkel 200 250 300 350 400 450 1 2 Hähnchenschenkel wiegen mit Öl bestreichen und mit Kräutern würzen Gleichmäßig auf der Backunterlage verteilen Die Unterlage auf den niedrigen Rost stellen Bei Erklingen des S...

Страница 66: ...gestellte Temperatur wird 10 Minuten lang gehalten AUFTAUPROGRAMME Mit Hilfe der Auftauprogramme können Sie Fleisch Geflügel Fisch Brot und Obst auftauen Auftauzeit und Leistungsstufe werden automatisch eingestellt Sie brauchen nur das Programm und das Gewicht auszuwählen Verwenden Sie nur mikrowellengeeignetes Geschirr Öffnen Sie die Gerätetür Stellen Sie die gefrorenen Nahrungsmittel auf einem K...

Страница 67: ...net 3 Fisch 200 1500 20 80 Bei ganzen Fischen den Schwanz mit Aluminiumfolie schützen Den Fisch bei Erklingen des Signaltons wenden Dieses Programm ist sowohl für ganze Fische als auch für Fischfilets geeignet Nummer Lebensmittel Portions größe g Ruhezeit in Min Empfehlungen 4 Brot Kuchen 125 1000 10 60 Das Brot flach auf ein Stück Küchenpapier legen und bei Erklingen des Signaltons wenden Den Kuc...

Страница 68: ...ten können Nummer Lebens mittel Portions größe g Ruhezeit Empfehlungen Teig gehen lassen 1 1 Pizzateig 300 500 Den Teig in eine Schüssel geeigneter Größe geben und diese auf den niedrigen Rost stellen Mit Frischhaltefolie abdecken 1 2 Kuchenteig 500 800 Den Teig in eine Schüssel geeigneter Größe geben und diese auf den niedrigen Rost stellen Mit Frischhaltefolie abdecken 1 3 Brotteig 600 900 Den T...

Страница 69: ...eratur abgekühlt ist Wenn Sie während des Betriebs die Gerätetür öffnen oder die Taste Stopp drücken wird im Display die Fehlermeldung E 15 angezeigt Wenn Sie nun die Taste Stopp erneut drücken erlischt die Anzeige E 15 VERWENDEN DER SENSORGARPROGRAMME In der folgenden Tabelle wird die Verwendung der 8 Sensorgarprogramme beschrieben Es sind die entsprechenden Gewichtsangaben Ruhezeiten und Zuberei...

Страница 70: ...die Mitte des unteren Rosts legen Bei Erklingen des Signaltons wenden Drücken Sie auf die Taste Start um die Zubereitung fortzusetzen Anweisungen zu den Sensorgarprogrammen Mit Hilfe der Sensorgarprogramme können Sie die Nahrungsmittel automatisch zubereiten Der Sensor misst die Mengen an Dämpfen die von den Nahrungsmitteln während des Garvorgangs aufsteigen Beim Garen von Nahrungsmitteln entstehe...

Страница 71: ... Gerät nicht in der Nähe von Geräten auf die eine hohe Luftfeuchtigkeit oder viele Dämpfe erzeugen da dies die ordnungsgemäße Leistung des Sensors beeinträchtigen kann Halten Sie den Garraum stets sauber Wischen Sie Spritzer mit einem feuchten Tuch auf Dieses Gerät ist nur zum Gebrauch im Haushalt bestimmt GAREN MIT HEISSLUFT Im Heißluftmodus können Sie die Nahrungsmittel wie in einem herkömmliche...

Страница 72: ...ombiniert werden um Nahrungsmittel schnell zu garen und gleichzeitig zu bräunen Verwenden Sie STETS mikrowellengeeignetes und hitzebeständiges Geschirr Glas oder Keramikgeschirr ist ideal da die Nahrungsmittel von den Mikrowellen gleichmäßig durchdrungen werden Verwenden Sie zum Berühren der Behälter im Gerät STETS Ofenhandschuhe da sie sehr heiß sind Durch Verwendung des hohen Rosts können Sie da...

Страница 73: ...en und Heißluftmodus 200 C Temperatur 2 Stellen Sie durch Drehen am Funktionswähler die gewünschte Temperatur ein Temperatur 200 180 160 140 100 40 C Drücken Sie dann den Funktionswähler um die Auswahl zu bestätigen 3 Stellen Sie durch Drehen am Funktionswähler die gewünschte Garzeit ein Die maximale Garzeit beträgt 60 Minuten 4 Drücken Sie die Taste Start 30s Ergebnis Die Nahrungsmittel werden im...

Страница 74: ...erät GRILLEN MIT DEM VERTIKALEN MULTISPIESS MULTISPIESS FÜR SCHASCHLIK Mit dem Multispieß mit sechs Schaschlikspießen können Sie ganz einfach Fleisch Geflügel Fisch Gemüse z B Zwiebeln Paprika oder Zucchini sowie in Scheiben geschnittenes Obst grillen Die oben genannten Nahrungsmittel können Sie mit den Schaschlikspießen im Heißluft oder Kombinationsmodus zubereiten Verbindungsstück und Schaschlik...

Страница 75: ...das Mikrowellengerät in Brand geraten kann KINDERSICHERUNG Das Mikrowellengerät ist mit einer speziellen Kindersicherung ausgestattet Die Sperrfunktion sorgt dafür dass Kinder oder nicht mit dem Gerät vertraute Personen das Gerät nicht versehentlich in Betrieb nehmen können 1 Halten Sie die Taste zum Einstellen der Uhrzeit und die Taste Stopp Abbrechen Öko eine Sekunde lang gedrückt Ergebnis Das G...

Страница 76: ...leichzeitig die Tasten Start 30s und Stopp Abbrechen Öko etwa zwei Sekunden lang gedrückt Ergebnis Bei Beendigung einer Funktion werden keine Signaltöne ausgegeben 2 Halten Sie zum erneuten Einschalten der Signaltöne wieder gleichzeitig die Tasten Start 30s und Stopp Abbrechen Öko etwa zwei Sekunden lang gedrückt Ergebnis Es werden wieder wie gewohnt Signaltöne ausgegeben Informationen zum Geschir...

Страница 77: ...EITUNG Mikrowellengeeignetes Geschirr Das Geschirr muss durchlässig für die Mikrowellen sein um eine effiziente Erhitzung der Nahrungsmittel zu gewährleisten Mikrowellen werden von Metall z B Edelstahl Aluminium oder Kupfer reflektiert Sie können jedoch Keramik Glas Porzellan und Kunststoff sowie Papier und Holz durchdringen Daher dürfen Nahrungsmittel nie in Behältnissen aus Metall erhitzt werden...

Страница 78: ...von 250 g etwa 30 45 ml 2 3 EL Wasser hinzugeben sofern keine andere Wassermenge empfohlen wird siehe Tabelle Abgedeckt bei der zum Garen des Gemüses angegebenen Mindestzeit siehe Tabelle zubereiten Das Gemüse anschließend bis zum gewünschten Ergebnis weitergaren Einmal während des Garens und einmal nach dem Garen umrühren Nach dem Garen Salz Gewürze oder Butter hinzugeben Während der Ruhezeit von...

Страница 79: ...n von Reis verdoppelt sich während des Garvorgangs Abgedeckt garen Nach Ablauf der Garzeit aber vor der Ruhezeit umrühren und Salz Kräuter oder Butter hinzugeben Hinweis Möglicherweise hat der Reis nach Ablauf der Garzeit nicht das gesamte Wasser aufgenommen Nudeln In eine große ofenfeste Glasschüssel geben Kochendes Wasser und etwas Salz zugeben und dann gut umrühren Ohne Abdeckung erhitzen Währe...

Страница 80: ...ungsmitteln ist es hilfreich sich die benötigte Zeit zu notieren zur späteren Verwendung Vergewissern Sie sich immer dass die Nahrungsmittel vollkommen aufgewärmt sind Lassen Sie die Nahrungsmittel nach dem Aufwärmen kurze Zeit ruhen damit ein Temperaturausgleich stattfinden kann Die empfohlene Ruhezeit nach dem Aufwärmen beträgt 2 bis 4 Minuten sofern in der Tabelle keine andere Zeitspanne angege...

Страница 81: ...en Während des Aufwärmens mehrmals umrühren und dann vor der Ruhezeit und dem Servieren erneut umrühren Lebensmittel Portions größe Leistung Garzeit in Min Ruhezeit in Min Anleitung Nudeln mit Sauce gekühlt 350 g 600 W 3 4 3 Die Nudeln z B Spaghetti oder Eiernudeln auf einen flachen Keramikteller geben Mit mikrowellengeeigneter Frischhaltefolie abdecken Vor dem Servieren umrühren Gefüllte Nudeln m...

Страница 82: ...Geflügel muss vor dem Garen vollständig aufgetaut werden Entfernen Sie eventuell vorhandene Metallklammern und nehmen Sie das Geflügel vollständig aus der Verpackung damit die Auftauflüssigkeit abtropfen kann Legen Sie die tiefgefrorenen Lebensmittel auf einen Teller und decken Sie sie nicht ab Drehen Sie das Auftaugut nach der Hälfte der Zeit um gießen Sie die Flüssigkeit ab und entfernen Sie eve...

Страница 83: ...ll 3 bis 5 Minuten lang vorheizen werden die Speisen schneller gebräunt Zum Grillen geeignetes Geschirr Das Geschirr sollte hitzebeständig sein und kann Metall enthalten Verwenden Sie kein Kunststoffgeschirr es schmilzt möglicherweise Zum Grillen geeignete Nahrungsmittel Schnitzel Würstchen Steaks Hamburger Speck und dicke Schinkenscheiben Fischfilets Sandwiches und Toast Wichtiger Hinweis Beachte...

Страница 84: ...t die Toastscheiben toasten Den belegten Toast dann auf den hohen Rost legen Nach der Zubereitung 2 bis 3 Minuten lang ruhen lassen Ofenkartoffeln 500 g 300 W Grill 10 12 Die Kartoffeln halbieren Mit der Schnittseite nach oben kreisförmig auf den hohen Rost legen Frische Nahrungsmittel Portions größe Leistung 1 Seite Dauer Min 2 Seite Dauer Min Anleitung Kartoffel oder Gemüsegratin gekühlt 450 g 3...

Страница 85: ...den wie unter Mikrowelle Grill beschrieben Für das Garen im kombinierten Mikrowellen und Heißluftmodus geeignete Nahrungsmittel Fleisch und Geflügel Gratins sowie von Gerichten in Kasserollen Rührkuchen und Obstkuchen Pasteten und Streuselkuchen gebratenes Gemüse Brötchen und Brot Richtlinien für das Garen von frischen und tiefgefrorenen Nahrungsmitteln mit Heißluft Heizen Sie das Gerät mit der au...

Страница 86: ...rigen Rost legen Tiefgefrorener Kuchen 1000 g 300 W 180 C 14 18 Den tiefgefrorenen Kuchen direkt auf den niedrigen Rost legen Nach dem Auftauen und Aufwärmen 15 bis 20 Minuten lang ruhen lassen KOCHTIPPS BUTTER ZERLASSEN 50 g Butter in ein kleines tiefes Glasgefäß geben Mit einem Kunststoffdeckel abdecken Die Butter 30 bis 40 Sekunden bei 900 W so lange erhitzen bis sie geschmolzen ist SCHOKOLADE ...

Страница 87: ...lühlampe funktioniert nicht Aus Sicherheitsgründen darf die Glühlampe nicht selbst ausgetauscht werden Wenden Sie sich an das nächstgelegene autorisierte Samsung Kundendienstzentrum um die Glühlampe von qualifiziertem Fachpersonal ersetzen zu lassen Das Gerät verursacht Störungen bei Radio oder Fernsehgeräten Bei Betrieb des Geräts kann es zu leichten Störungen des Radio und Fernsehempfangs kommen...

Страница 88: ...stung 100 W 900 W 6 Leistungsstufen IEC 705 Betriebsfrequenz 2450 MHz Abmessungen B x T x H Gehäuse Garraum 523 x 491 x 309 mm 373 x 370 x 233 mm Fassungsvermögen 32 Liter Gewicht Netto Ca 19 0 kg DE68 04220D Bei Fragen oder Hinweisen AUSTRIA 0810 SAMSUNG 7267864 0 07 min BELGIUM 02 201 24 18 DENMARK 70 70 19 70 FINLAND 030 6227 515 FRANCE 01 48 63 00 00 GERMANY 0180 6 SAMSUNG bzw 0180 6 7267864 H...

Страница 89: ...ister Manuel d utilisation Mode d emploi et guide de cuisson CE118PF Ce manuel est en papier recyclé à 100 Veuillez noter que la garantie Samsung n inclut pas les déplacements du service après vente pour expliquer le fonctionnement de l appareil corriger une installation non correcte ou exécuter des travaux de nettoyage ou d entretien réguliers CE118PFCX1_SWS_DE68 04220D_FR indd 1 2013 08 27 1 23 ...

Страница 90: ... 15 Puissances et temps de cuisson 16 Réglage du temps de cuisson 16 Arrêt de la cuisson 16 Réglage du mode d économie d énergie 16 Utilisation de la fonction de cuisson automatique 16 Utilisation des programmes de cuisson automatique 17 Utilisation de la fonction réchauffage automatique 18 Utilisation des programmes de réchauffage automatique 19 Utilisation de la fonction de cuisson slim fry frir...

Страница 91: ...ERTISSEMENT n autorisez un enfant à utiliser le four sans surveillance que si vous lui avez donné les instructions appropriées lui permettant de se servir de l appareil en toute sécurité et de comprendre les dangers qu implique une mauvaise utilisation AVERTISSEMENT cet appareil peut être utilisé par des enfants à partir de 8 ans et des personnes ayant des capacités physiques sensorielles ou menta...

Страница 92: ... four doit être nettoyé régulièrement afin d en retirer tout reste de nourriture En négligeant la propreté de votre four vous risquez d en détériorer les surfaces et par conséquent d en réduire la durée de vie et de créer des situations dangereuses L appareil n est pas destiné à être installé dans un véhicule ex caravane ou tout autre véhicule similaire Cet appareil n est pas conçu pour être utili...

Страница 93: ... fonctionne en mode combiné Cet appareil devient très chaud pendant son utilisation Prenez garde à ne pas toucher les éléments chauffants situés à l intérieur du four AVERTISSEMENT les parties accessibles peuvent devenir très chaudes pendant l utilisation Les enfants en bas âge doivent être tenus à l écart du four Un nettoyeur vapeur ne doit pas être utilisé AVERTISSEMENT afin d éviter tout risque...

Страница 94: ...nellement générée et ou utilisée sous la forme de radiations électromagnétiques pour le traitement de matière ainsi que les équipements d usinage par électro érosion et de soudure à l arc Les équipements de classe B sont des équipements adaptés à l usage dans les établissements domestiques et ceux directement reliés à un réseau d alimentation électrique basse tension qui alimente les bâtiments uti...

Страница 95: ...s d étanchéité Le plateau tournant et l anneau de guidage Modèle à plateau tournant uniquement Veillez TOUJOURS à ce que les joints de la porte soient propres et à ce que celle ci ferme correctement En négligeant la propreté de votre four vous risquez d en détériorer les surfaces et par conséquent d en réduire la durée de vie et de créer des situations dangereuses 1 Nettoyez l extérieur avec un ch...

Страница 96: ...pareil dans un endroit humide graisseux ou poussiéreux et veillez à ce qu il ne soit pas exposé directement à la lumière du soleil ou à une source d eau eau de pluie N installez pas cet appareil dans un endroit susceptible de présenter des fuites de gaz ne nuise à l étanchéité de la porte Nettoyez l intérieur du four micro ondes après chaque utilisation avec un produit de nettoyage non agressif la...

Страница 97: ...aites pas passer entre des objets ou derrière le four N utilisez jamais une fiche ou un cordon d alimentation endommagé e ou une prise murale mal fixée Si la prise ou le cordon d alimentation est endommagé e contactez le centre de dépannage le plus proche Ne versez et ne vaporisez jamais d eau directement sur le four Ne posez pas d objets sur le dessus du four à l intérieur ou sur la porte Ne vapo...

Страница 98: ...ung facturera les travaux de réparation lorsqu un accessoire doit être réparé ou un défaut esthétique corrigé si l endommagement de l appareil et ou l endommagement ou la perte de l accessoire a été occasionné par le client Les éléments concernés par cette stipulation sont a une porte une poignée un panneau extérieur ou le tableau de commandes bosselé e rayé e ou brisé e b un plateau un guide de p...

Страница 99: ...de et des informations en ligne sur www samsung com Ce four micro ondes est prévu pour faire chauffer des aliments Il est uniquement destiné à un usage domestique Ne faites jamais chauffer de textiles ou de coussins remplis de grains car ceux ci pourraient s enflammer Le fabricant ne peut être tenu responsable des dommages provoqués par une utilisation non conforme ou incorrecte de l appareil En n...

Страница 100: ...Résultat la décongélation démarre Lorsque la cuisson est terminée un signal sonore retentit et un 0 clignote à 4 reprises Le four émet ensuite un signal sonore toutes les minutes fonctions du four FOUR 1 POIGNÉE 2 PORTE 3 ORIFICES DE VENTILATION 4 ÉLÉMENT CHAUFFANT 5 ÉCLAIRAGE 6 SUPPORT DU RÉSERVOIR À EAU 7 LOQUETS DE LA PORTE 8 PLATEAU TOURNANT 9 COUPLEUR 10 ANNEAU DE GUIDAGE 11 ORIFICES DU SYSTÈ...

Страница 101: ...t la partie centrale sur le coupleur Fonction Ce plateau constitue la principale surface de cuisson il peut être facilement retiré pour être nettoyé 3 Grille supérieure grille inférieure à placer sur le plateau Fonction Ces grilles métalliques vous permettent de faire cuire deux plats simultanément Vous pouvez par exemple poser un plat de petite taille sur le plateau et un deuxième sur la grille L...

Страница 102: ...rloge à l installation initiale après une coupure de courant N oubliez pas de changer l heure lors du passage à l heure d hiver ou à l heure d été 6 Tournebroche coupleur de rôtissoire et brochette à placer dans la cocotte en verre Fonction Le tournebroche permet de faire rôtir un poulet en toute simplicité car la viande n a pas besoin d être retournée Il peut également être utilisé pour la cuisso...

Страница 103: ...liments au centre du plateau Refermez la porte Ne mettez jamais le four en route lorsqu il est vide 1 Placez le Sélecteur de mode sur la position du mode Micro ondes Résultat Les indications suivantes s affichent mode micro ondes 2 Tournez le Sélecteur multifonction sur la fonction souhaitée jusqu à ce que la puissance appropriée s affiche À ce stade appuyez sur le Sélecteur multifonction pour sél...

Страница 104: ...x micro ondes Ouvrez la porte Placez les aliments au centre du plateau Refermez la porte 1 Tournez le Sélecteur de mode sur la position du mode Cuisson automatique PUISSANCES ET TEMPS DE CUISSON La fonction Puissance vous permet d adapter la quantité d énergie dispersée et par conséquent le temps nécessaire à la cuisson ou au réchauffage des aliments en fonction de leur catégorie et de leur quanti...

Страница 105: ...ez litre d eau froide Utilisez une cocotte en Pyrex avec couvercle Placez le bol au centre du plateau tournant Faites cuire à couvert Code Type d aliment Quantité g Temps de repos min Consignes 2 Brocolis en morceaux 200 250 300 350 400 450 500 550 1 2 Pesez les légumes après les avoir lavés rincés et coupés en morceaux de même taille Mettez les dans une cocotte en verre et couvrez Ajoutez 30 ml 2...

Страница 106: ...hage indique HEAT CHAUFFAGE le four préchauffe Puis versez la pâte dans 6 à 8 récipients en papier ou en silicone pour les muffins et placez les sur la grille inférieure Lorsque le signal sonore retentit insérez la grille UTILISATION DE LA FONCTION RÉCHAUFFAGE AUTOMATIQUE Les 6 fonctions de Réchauffage automatique proposent quatre temps de cuisson pré programmés Vous n avez donc besoin de régler n...

Страница 107: ... de repos 3 Ravioles réfrigérées 200 250 300 350 3 Versez les mini ravioli cuisinés dans un plat en plastique adapté à la cuisson micro ondes et placez celui ci au centre du plateau Percez le film du plat préparé ou recouvrez le plat en plastique de film étirable Remuez avec précaution avant et après le temps de repos Ce programme convient à la cuisson des ravioli ainsi qu à celle des pâtes en sau...

Страница 108: ...bleau suivant présente les 10 programmes automatiques Slim Fry Frire avec peu de graisse pour faire frire Veillez à respecter les quantités et les temps de repos recommandés ainsi que les consignes relatives à chaque mode de cuisson Vous utiliserez moins d huile qu avec une friteuse mais vous obtiendrez des résultats savoureux Les programmes sont exécutés en combinant la convection l élément chauf...

Страница 109: ... un mélange d huile d olive et d épices Placez les avec la face coupée sur le plat croustilleur Posez le plat sur la grille hauteur mini Code Type d aliment Quantité g Temps de repos min Consignes 8 Pilons de poulets 200 250 300 350 400 450 1 2 Pesez les pilons de poulets et badigeonnez les d huile et d épices Répartissez les uniformément sur le plat croustilleur Posez le plat sur la grille inféri...

Страница 110: ...TION DE DÉCONGÉLATION Le mode Décongélation permet de faire décongeler de la viande de la volaille du poisson du pain des gâteaux ou des fruits Le temps de décongélation et la puissance se règlent automatiquement Il vous suffit de sélectionner le programme et le poids correspondant aux aliments à décongeler N utilisez que des plats adaptés à la cuisson aux micro ondes Ouvrez la porte Placez l alim...

Страница 111: ... du papier d aluminium Retournez le poisson au signal sonore Ce programme convient aussi bien à la cuisson des poissons entiers qu à celle des filets Code Type d aliment Quantité g Temps de repos min Consignes 4 Pain gâteaux 125 1000 10 60 Placez le pain bien à plat sur une feuille de papier absorbant et retournez le au signal sonore Posez le gâteau sur une assiette en céramique et si possible ret...

Страница 112: ...e repos Consignes Fermentation de la pâte 1 1 Pâte à pizza 300 500 Placez la pâte dans un bol de taille appropriée et placez celui ci sur la grille inférieure Recouvrez les de film étirable 1 2 Pâte pour gâteau 500 800 Placez la pâte dans un bol de taille appropriée et placez celui ci sur la grille inférieure Recouvrez les de film étirable 1 3 Pâte à pain 600 900 Placez la pâte dans un bol de tail...

Страница 113: ...refroidi Si la porte reste ouverte ou que vous appuyez sur le bouton Arrêt durant l opération le message E 15 s affiche Si vous appuyez à nouveau sur le bouton Arrêt le message E 15 disparaîtra UTILISATION DES PROGRAMMES DE CUISSON PAR CAPTEUR Le tableau suivant répertorie les 8 programmes de Sensor Cuisson par capteur Il indique également les quantités et les temps de repos recommandés ainsi que ...

Страница 114: ...iment Quantité Temps de repos min Consignes 8 Poulet rôti 1 0 à 1 2 kg 4 5 Badigeonnez le poulet réfrigéré d huile et saupoudrez d épices Tournez le côté poitrine vers le bas au centre de la grille inférieure Retournez dès que le signal sonore retentit Appuyez sur le bouton Départ pour reprendre la cuisson Consignes pour la cuisson automatique par capteur Le capteur automatique permet de cuire aut...

Страница 115: ...e produit pourrait entraver le bon fonctionnement du capteur Ne placez pas le four à proximité d appareils produisant un taux élevé d humidité ou de gaz afin d éviter tout dysfonctionnement du capteur automatique Conservez toujours l intérieur du four propre Nettoyez les salissures à l aide d un chiffon humide Ce four est destiné à une utilisation domestique uniquement CUISSON PAR CONVECTION Le mo...

Страница 116: ...afin de faire cuire et dorer rapidement en une seule fois Utilisez TOUJOURS des ustensiles adaptés à la cuisson aux micro ondes et au four traditionnel Les plats en verre ou en céramique conviennent parfaitement car ils laissent les micro ondes pénétrer les aliments de façon uniforme Les récipients pouvant devenir très chauds veillez à TOUJOURS porter des maniques lorsque vous devez les manipuler ...

Страница 117: ...rature 2 Réglez la température en tournant le Sélecteur multifonction Température 200 180 160 140 100 40 C À ce stade appuyez sur le Sélecteur multifonction pour sélectionner la température 3 Réglez le temps de cuisson en tournant le Sélecteur multifonction Le temps de cuisson maximal est de 60 minutes 4 Appuyez sur le bouton Départ 30s Résultat La cuisson combinée démarre Le four est chauffé à la...

Страница 118: ...e retirez délicatement le tournebroche en portant des maniques UTILISATION DE LA MULTI BROCHE VERTICALE MULTI BROCHE À KEBAB Utilisez la multi broche équipée de ses 6 pics à kebab afin de confectionner des préparations à base de viande de volaille de poisson ou de légumes ex oignons poivrons ou courgettes ou de fruits coupés en morceaux Pour faire cuire ce type d aliment avec les pics utilisez le ...

Страница 119: ...UTILISATION DE LA FONCTION SÉCURITÉ ENFANTS Votre four micro ondes est équipé d une sécurité enfants qui vous permet de verrouiller les boutons de l appareil afin d éviter qu un enfant ou que toute autre personne non habituée ne puisse le faire fonctionner accidentellement 1 Appuyez sur le bouton Horloge et sur le bouton Arrêt Annuler Éco pendant une seconde Résultat Le four est verrouillé aucune ...

Страница 120: ...nal sonore à la fin d une fonction 2 Pour réactiver le signal sonore appuyez à nouveau simultanément environ deux secondes sur les boutons Démarrer 30s et Arrêt Annuler Éco Résultat Le four fonctionne normalement guide des récipients Pour faire cuire des aliments dans le four micro ondes il est nécessaire que les micro ondes pénètrent dans les aliments sans être réfléchies ou absorbées par le plat...

Страница 121: ...ts de friction qui génèrent la chaleur nécessaire à la cuisson des aliments CUISSON Récipients utilisés pour la cuisson aux micro ondes Pour une efficacité maximale les récipients doivent laisser l énergie des micro ondes les traverser Les micro ondes sont réfléchies par les métaux tels que l acier inoxydable l aluminium et le cuivre mais peuvent traverser la céramique le verre la porcelaine le pl...

Страница 122: ...quantité est recommandée reportez vous au tableau Couvrez le tout pendant la durée minimale de cuisson reportez vous au tableau Poursuivez la cuisson selon votre goût Remuez une fois pendant et une fois après la cuisson Ajoutez du sel des herbes ou du beurre après la cuisson Laissez reposer à couvert pendant 3 minutes Astuce coupez les légumes frais en morceaux de taille égale Plus les morceaux se...

Страница 123: ...uvert Une fois le temps de cuisson écoulé remuez avant de laisser reposer puis salez ou ajoutez des herbes et du beurre Remarque il est possible que le riz n ait pas absorbé toute l eau une fois le temps de cuisson écoulé Pâtes utilisez une grande cocotte en Pyrex Ajoutez de l eau bouillante une pincée de sel et remuez bien Faites cuire sans couvrir Remuez de temps en temps pendant et après la cui...

Страница 124: ...uds Laissez les aliments reposer pendant un court laps de temps après le réchauffage pour que la température s homogénéise Le temps de repos recommandé après le réchauffage est généralement compris entre 2 et 4 minutes à moins qu un autre temps ne soit indiqué dans le tableau Soyez particulièrement vigilant lorsque vous faites réchauffer des liquides ou des aliments pour bébé Reportez vous égaleme...

Страница 125: ...le réchauffage puis de nouveau avant de laisser reposer et de servir Type d aliment Quantité Puissance Temps min Temps de repos min Consignes Pâtes en sauce réfrigérées 350 g 600 W 3 4 3 Placez les pâtes ex spaghetti ou pâtes aux œufs dans une assiette plate en céramique Recouvrez les de film étirable spécial micro ondes Remuez avant de servir Pâtes farcies en sauce réfrigérées 350 g 600 W 4 5 3 M...

Страница 126: ...lique et tout emballage de la volaille afin de permettre au liquide produit pendant la décongélation de s écouler Placez les aliments congelés dans un plat sans couvrir Retournez à la moitié du temps de décongélation videz le liquide et retirez les abats dès que possible Vérifiez les aliments de temps à autre afin de vous assurer qu ils ne chauffent pas Si les parties les plus fines des aliments c...

Страница 127: ...r ils pourraient fondre Aliments convenant à la cuisson au gril Côtelettes saucisses steaks hamburgers tranches de bacon et de jambon fumé filets de poisson sandwiches et tous types de tartine garnie Remarque importante Lorsque seul le mode gril est utilisé rappelez vous que les aliments doivent être mis sur la grille supérieure sauf indications contraires Micro ondes Gril Ce mode associe la chale...

Страница 128: ... supérieure Laissez reposer 2 à 3 minutes Pommes de terre au four 500 g 300 W Gril 10 12 Coupez les pommes de terre en deux Disposez les en cercle sur la grille supérieure côté chair tourné vers le gril Aliments frais Quantité Puissance Temps pour le 1er côté en min Temps pour le 2ème côté en min Consignes Gratin de pommes de terre légumes réfrigéré 450 g 300 W Gril 12 15 Mettez le gratin frais da...

Страница 129: ...s à la cuisson au four traditionnel ex ustensiles en verre terre cuite ou porcelaine sans ornements métalliques et décrits dans la cuisson Micro ondes Gril Aliments convenant à la cuisson Micro ondes Convection viandes volailles ainsi que plats en cocotte et gratins gâteaux de Savoie gâteaux aux fruits tartes crumbles légumes grillés scones et pains Guide de cuisson par convection pour les aliment...

Страница 130: ...préchauffage terminés laissez reposer pendant 15 à 20 minutes CONSEILS SPÉCIAUX FAIRE FONDRE DU BEURRE Mettez 50 g de beurre dans un petit plat creux en verre Recouvrez le récipient d un couvercle en plastique Faites chauffer pendant 30 à 40 secondes à 900 W jusqu à ce que le beurre ait entièrement fondu FAIRE FONDRE DU CHOCOLAT Mettez 100 g de chocolat dans un petit plat creux en verre Faites cha...

Страница 131: ...ieur qualifié remplace l ampoule Le four provoque des interférences sur les radios ou les téléviseurs Ce phénomène bien que modéré peut en effet survenir lorsque le four fonctionne Ceci est tout à fait normal Pour remédier à ce problème installez le four loin des téléviseurs postes de radio ou antennes Si le microprocesseur du four détecte une interférence l afficheur peut être réinitialisé Pour r...

Страница 132: ...es Poids Net 19 0 kg env DE68 04220D AUSTRIA 0810 SAMSUNG 7267864 0 07 min BELGIUM 02 201 24 18 DENMARK 70 70 19 70 FINLAND 030 6227 515 FRANCE 01 48 63 00 00 GERMANY 0180 6 SAMSUNG bzw 0180 6 7267864 HHP 0180 6 M SAMSUNG bzw 0180 6 67267864 0 20 Anruf aus dem dt Festnetz aus dem Mobilfunk max 0 60 Anruf ITALIA 800 SAMSUNG 726 7864 HHP 800 Msamsung 800 67267864 CYPRUS 8009 4000 only from landline ...

Страница 133: ...nuale dell utente e Guida alla cottura CE118PF Questo manuale è realizzato interamente con carta riciclata Si prega di notare che la garanzia Samsung NON copre le richieste di assistenza per ottenere spiegazioni sul funzionamento del prodotto correggere una installazione non idonea o eseguire la normale pulizia o manutenzione del prodotto CE118PFCX1_SWS_DE68 04220D_IT indd 1 2013 08 27 1 26 08 ...

Страница 134: ...retto del forno a microonde 14 Impostazione dell orologio 14 Cottura Riscaldamento 15 Livelli di potenza e modifiche dei tempi 16 Regolazione del tempo di cottura 16 Interruzione della cottura 16 Impostazione della modalità di risparmio energetico 16 Uso della funzione cottura automatica 16 Uso dei programmi di cottura automatica 17 Uso della funzione riscaldamento automatico 18 Uso dei programmi ...

Страница 135: ...chio è destinato a un uso domestico AVVERTENZA I bambini possono utilizzare il forno senza la supervisione di un adulto solo dopo averli istruiti sulle procedure di sicurezza e i rischi connessi a un uso improprio dell apparecchio AVVERTENZA Questo apparecchio può essere utilizzato da bambini di età superiore agli 8 anni e da persone che abbiano ridotte capacità fisiche sensoriali o mentali o sian...

Страница 136: ...te facendo attenzione a rimuovere ogni residuo di cibo Se il forno non viene mantenuto in condizioni di pulizia ottimali la superficie potrebbe deteriorarsi danneggiando l apparecchiatura e provocando eventuali situazioni pericolose L apparecchio non è inteso per l installazione su veicoli caravan o simili Questo apparecchio non è inteso per l uso da parte di persone bambini inclusi che abbiano ri...

Страница 137: ...a non toccare gli elementi riscaldanti all interno del forno AVVERTENZA Durante l uso le parti accessibili possono diventare calde Tenere i bambini lontano dall apparecchio Non utilizzare un pulitore a vapore AVVERTENZA Assicurarsi che l apparecchio sia spento prima di sostituire la lampadina in modo da evitare possibili scariche elettriche AVVERTENZA L apparecchio e le sue parti accessibili si su...

Страница 138: ... interno dei quali viene intenzionalmente generata o usata energia a radio frequenza in forma di radiazioni elettromagnetiche per il trattamento di materiali apparecchi a elettroerosione EDM e apparecchi per saldatura ad arco Gli apparecchi di Classe B sono idonei per un uso domestico o direttamente connesso a una rete elettrica a basso voltaggio in edifici residenziali INSTALLAZIONE DEL FORNO A M...

Страница 139: ...revole e anelli della parte girevole Solo modello con piastra girevole Assicurarsi SEMPRE che le guarnizioni dello sportello siano pulite e che lo sportello si chiuda correttamente Se il forno non viene mantenuto in condizioni di pulizia ottimali la superficie potrebbe deteriorarsi danneggiando l apparecchiatura e provocando eventuali situazioni pericolose 1 Pulire le superfici esterne con un pann...

Страница 140: ...cibi in contenitori sigillati anche se idonei all uso nel microonde Per la sicurezza dell utente si sconsiglia l uso di sistemi di pulizia ad acqua ad alta pressione o a getto di vapore Si accumulino Impediscano allo sportello di chiudersi correttamente Pulire l interno del forno dopo l uso utilizzando una soluzione detergente non aggressiva Prima di pulire il forno attendere che si raffreddi per ...

Страница 141: ...Non utilizzare un trasformatore un adattatore multipresa né un cavo di prolunga Non agganciare il cavo elettrico a oggetti metallici inserire il cavo elettrico tra gli oggetti o dietro il forno Non utilizzare spine prese di corrente o cavi di alimentazione danneggiati Se la spina o il cavo di alimentazione sono danneggiati rivolgersi al più vicino centro di assistenza Non versare né spruzzare acqu...

Страница 142: ...un accessorio o la riparazione di un difetto estetico se il danno all unità e o il danno o la perdita dell accessorio è stato causato dal cliente Questa garanzia copre i seguenti casi a Ammaccatura graffiatura o rottura dello sportello della maniglia di un pannello esterno o del pannello di controllo b Rottura o mancanza del vassoio dell anello girevole dell accoppiatore o della griglia ATTENZIONE...

Страница 143: ...w samsung com Utilizzare questo forno a microonde solo per il riscaldamento e la cottura dei cibi Questo apparecchio è inteso solo per un uso domestico Non riscaldare oggetti in materiale tessile o cuscini riempiti con granaglie o erbe poiché ciò potrebbe provocare scottature o un incendio Il produttore non può essere ritenuto responsabile per danni causati da un uso improprio o scorretto dell app...

Страница 144: ...l cibo A fine cottura verrà emesso un segnale acustico e lo 0 lampeggerà 4 volte Successivamente verrà emesso un segnale acustico ogni minuto caratteristiche del forno FORNO 1 MANIGLIA DELLO SPORTELLO 2 SPORTELLO 3 FORI DI VENTILAZIONE 4 ELEMENTO RISCALDANTE 5 SPIA 6 ALLOGGIAMENTO RECIPIENTE PER L ACQUA 7 CHIUSURE DELLO SPORTELLO 8 PIASTRA GIREVOLE 9 ACCOPPIATORE 10 ANELLO DELLA PARTE GIREVOLE 11 ...

Страница 145: ...ssere posto sull accoppiatore Scopo La piastra girevole è la superficie di cottura principale Può essere facilmente smontata per la pulizia 3 Ripiano superiore ripiano inferiore da collocare sulla piastra girevole Scopo I ripiani metallici possono essere utilizzati per cucinare due piatti contemporaneamente Un piatto piccolo può essere collocato sulla piastra girevole e un secondo piatto sul ripia...

Страница 146: ... ora corrente L ora può essere visualizzata in formato a 12 o 24 ore E necessario impostare l orologio quando si installa per la prima volta il forno a microonde dopo una interruzione della corrente elettrica Ricordare di reimpostare l orologio quando si passa dall ora solare all ora legale e viceversa 6 Girarrosto accoppiatore barbecue e spiedo da posizionare sul recipiente in vetro Scopo Il gira...

Страница 147: ...llo Collocare il cibo al centro della piastra Chiudere lo sportello Non accendere mai il forno a microonde quando è vuoto 1 Ruotare il Selettore della modalità sulla posizione Microonde Risultato Vengono visualizzate le seguenti indicazioni modalità microonde 2 Ruotare il Selettore multifunzione fino a visualizzare il livello di potenza appropriato Quindi premere il Selettore multifunzione per imp...

Страница 148: ...are le dimensioni della portata ruotando la manopola Utilizzare solo recipienti adatti al forno a microonde Aprire lo sportello Collocare il cibo al centro della piastra Chiudere lo sportello 1 Ruotare il Selettore della modalità sulla posizione Cottura automatica LIVELLI DI POTENZA E MODIFICHE DEI TEMPI I livelli di potenza consentono di modificare la quantità di energia generata e quindi il temp...

Страница 149: ... recipiente al centro della piastra girevole Cuocere incoperchiato Codice Alimento Dimensione portata g Tempo di riposo min Consigli 2 Broccoli fiori 200 250 300 350 400 450 500 550 1 2 Pesare le verdure dopo averle lavate pulite e tagliate in pezzi di uguali dimensioni Collocarle in un recipiente di vetro con coperchio Aggiungere 30 ml 2 cucchiai di acqua per 200 250 g 45 ml 3 cucchiai per 300 45...

Страница 150: ...di carta o stampi in silicone collocandoli sul ripiano inferiore Dopo il segnale acustico inserire il ripiano nel forno USO DELLA FUNZIONE RISCALDAMENTO AUTOMATICO Le 6 funzioni di Riscaldamento automatico forniscono tempi di cottura pre programmati Non è necessario impostare né il tempo di cottura né il livello di potenza E possibile impostare le dimensioni della portata ruotando la manopola Util...

Страница 151: ... i raviolini congelati su un piatto di plastica per microonde al centro della piastra girevole Forare la pellicola del prodotto precotto oppure coprire il piatto di plastica con pellicola per microonde Mescolare prima e dopo il tempo di riposo Questo programma è adatto per ravioli e pasta al sugo 4 Pizzette surgelate 100 150 250 300 Collocare le pizzette surgelate sul ripiano inferiore Codice Alim...

Страница 152: ...ura dei cibi La tabella fornisce quantità tempi di riposo e consigli Questa funzione consente di utilizzare meno olio rispetto all uso di una friggitrice ottenendo fritti gustosi e croccanti I programmi utilizzano in combinazione il riscaldamento per convezione l elemento riscaldante superiore e l energia a microonde Codice Alimento Dimensione portata g Tempo di riposo min Consigli 1 Patatine al f...

Страница 153: ...li aromi Collocarle sul piatto doratore con il taglio rivolto verso il basso Collocare il piatto sul ripiano inferiore Codice Alimento Dimensione portata g Tempo di riposo min Consigli 8 Cosce di pollo 200 250 300 350 400 450 1 2 Pesare le cosce di pollo e ungerle con olio e spezie Collocare gli alimenti sul piatto doratore Collocare il piatto sul ripiano inferiore Girare dopo il segnale acustico ...

Страница 154: ...enuta per 10 minuti USO DELLA FUNZIONE SCONGELAMENTO La funzione Scongelamento consente di scongelare carni pollame pesce pane dolci e frutta Il tempo di scongelamento e il livello di potenza vengono impostati automaticamente E sufficiente selezionare il programma e il peso Utilizzare solo recipienti adatti al forno a microonde Aprire lo sportello Posizionare il cibo surgelato su un piatto di cera...

Страница 155: ... Pesce 200 1500 20 80 Proteggere la coda del pesce con un foglio di alluminio Girare il pesce quando il forno emette un segnale acustico Questo programma è adatto per pesci interi o filetti di pesce Codice Alimento Dimensione portata g Tempo di riposo min Consigli 4 Pane Dolci 125 1000 10 60 Posizionare il pane orizzontalmente su carta da cucina e girarlo appena il forno emette un segnale acustico...

Страница 156: ...300 500 Collocare l impasto in un recipiente di dimensioni appropriate e posizionarlo sul ripiano inferiore Coprire con una pellicola per microonde 1 2 Impasto per torte 500 800 Collocare l impasto in un recipiente di dimensioni appropriate e posizionarlo sul ripiano inferiore Coprire con una pellicola per microonde 1 3 Pasta da pane 600 900 Collocare l impasto in un recipiente di dimensioni appro...

Страница 157: ...ezza Se durante questa operazione lo sportello viene aperto o viene premuto il tasto Stop sul display apparirà il messaggio E 15 Premendo nuovamente il tasto Stop il messaggio E 15 non sarà più visibile a display USO DEI PROGRAMMI DI COTTURA CON SENSORE La seguente tabella presenta 8 programmi di Sensor Cottura con sensore La tabella fornisce quantità per alimento tempi di riposo e consigli All av...

Страница 158: ... acustico Premere il tasto Avvio per continuare la cottura 8 Pollo arrosto 1 0 1 2 kg 4 5 Ungere il pollo congelato con olio e aggiungere gli aromi Collocare il pollo con il petto rivolto verso il basso al centro del ripiano inferiore Girare non appena il forno emette un segnale acustico Premere il tasto Avvio per continuare la cottura Istruzioni per la cottura con sensore automatico Il sensore au...

Страница 159: ...essi da questi detersivi possono interferire con il funzionamento del sensore Non installare il forno nei pressi di apparecchi che emettono gas o umidità elevata poiché ciò potrebbe influire negativamente sulle prestazioni del sensore automatico Mantenere pulito l interno del forno Pulire tutti i residui con un panno umido Questo forno è progettato per uso domestico COTTURA PER CONVEZIONE La modal...

Страница 160: ...a a microonde con il grill Utilizzare SEMPRE materiali da forno adatti alla cottura a microonde I piatti in vetro o ceramica sono ideali in quanto permettono alle microonde di penetrare uniformemente negli alimenti Per toccare i recipienti all interno del forno indossare SEMPRE guanti da forno a causa dell elevata temperatura che possono raggiungere E possibile migliorare la cottura e la grigliatu...

Страница 161: ...cazioni modalità combinata microonde e convezione 200 C temperatura 2 Impostare la temperatura ruotando il Selettore multifunzione Temperatura 200 180 160 140 100 40 C Quindi premere il Selettore multifunzione per impostare la temperatura 3 Impostare il tempo di cottura ruotando il Selettore multifunzione Il tempo di cottura massimo è 60 minuti 4 Premere il tasto Start 30s Risultato Inizia la cott...

Страница 162: ...o per proteggersi le mani USO DEL SUPPORTO MULTISPIEDO VERTICALE MULTISPIEDO Il supporto per 6 spiedini consente di cucinare con facilità carne pollame pesce verdure ad esempio cipolle peperoni o zucchine e frutta tagliati a pezzi Gli spiedini possono essere utilizzati in modalità convezione o combinata Accoppiatore kebab spiedo Multispiedo Spiedo da barbecue Recipiente in vetro USO DEL SUPPORTO M...

Страница 163: ...di rimuovere il recipiente per l acqua In caso contrario potrebbe verificarsi un incendio o danni all apparecchiatura USO DELLA FUNZIONE SICUREZZA BAMBINI Il forno a microonde è dotato dello speciale programma Sicurezza bambini che permette di bloccare il forno per evitarne l accensione accidentale 1 Premere i tasti Orologio e Stop Annulla Eco per un secondo Risultato Il forno è bloccato è impossi...

Страница 164: ... indica il termine di una funzione viene disattivato 2 Per riattivare la segnalazione acustica premere di nuovo contemporaneamente i tasti Start 30s e Stop Annulla Eco per circa due secondi Risultato Il segnale acustico verrà ripristinato guida ai materiali per la cottura Durante la cottura le microonde devono essere in grado di penetrare negli alimenti senza essere riflesse o assorbite dal piatto...

Страница 165: ... rapido delle molecole produce calore ed è questo calore che cuoce i cibi COTTURA Stoviglie per cottura a microonde Per essere efficaci le microonde devono essere in grado di attraversare i materiali utilizzati per la cottura degli alimenti Le microonde vengono riflesse dai metalli quali acciaio inossidabile alluminio e rame ma possono attraversare ceramica vetro porcellana e plastica oltre che ca...

Страница 166: ...diversa quantità d acqua vedere tabella Cuocere incoperchiato per il tempo minimo indicato vedere tabella Continuare a cuocere per ottenere il risultato desiderato Mescolare una volta durante e dopo la cottura Aggiungere sale aromi o burro dopo la cottura Coprire durante il tempo di riposo 3 minuti Suggerimento Tagliare le verdure in pezzi di uguale grandezza Più piccoli sono minore è il tempo di ...

Страница 167: ... e aggiungere sale oppure aromi e burro quindi lasciare a riposo Nota il riso potrebbe non avere assorbito tutta l acqua al termine della cottura Pasta Utilizzare un recipiente in Pyrex grande Aggiungere acqua bollente un pizzico di sale e mescolare bene Cuocere senza coperchio Mescolare di tanto in tanto durante e dopo la cottura Coprire durante il tempo di riposo e successivamente scolare bene l...

Страница 168: ...e il tempo impiegato come riferimento futuro Assicurarsi sempre che gli alimenti siano ben caldi in ogni loro parte Fare riposare il cibo per un breve periodo dopo averlo riscaldato in modo da consentire alla temperatura di stabilizzarsi Il tempo di riposo consigliato è di 2 4 minuti a meno che non venga indicato un tempo diverso nella tabella Prestare molta attenzione quando si riscaldano liquidi...

Страница 169: ...Pasta al sugo congelata 350 g 600 W 3 4 3 Collocare la pasta per esempio spaghetti o pasta all uovo su un piatto di ceramica Coprire con una pellicola per microonde Mescolare prima di servire Alimento Porzione Potenza Tempo min Tempo di riposo min Istruzioni Pasta ripiena al sugo congelata 350 g 600 W 4 5 3 Collocare la pasta ripiena ad esempio ravioli o tortellini in una fondina di ceramica Copri...

Страница 170: ...lla cottura Rimuovere le eventuali fascette metalliche ed estrarre gli alimenti dalla confezione per consentire di eliminare il liquido prodotto dallo scongelamento Collocare il cibo surgelato su un piatto senza coperchio Girare gli alimenti eliminare il liquido e rimuovere le rigaglie non appena possibile Controllare di tanto in tanto gli alimenti per assicurarsi che non siano caldi Se le parti p...

Страница 171: ...Costolette salsicce bistecche hamburger pancetta e fette di spalla tranci sottili di pesce sandwich e ogni tipo di toast farcito Nota importante Quando si utilizza solo la modalità grill ricordare che gli alimenti devono essere collocati sul ripiano superiore se non altrimenti specificato Microonde Grill Questa modalità di cottura combina il calore irradiato dal grill alla velocità della cottura a...

Страница 172: ...o sul ripiano superiore con il lato tagliato verso il grill Gratin di patate verdure congelato 450 g 300 W Grill 12 15 Collocare il gratin fresco su un piatto in Pirex Collocare il piatto sul ripiano superiore Dopo la cottura lasciare riposare per 2 3 minuti Alimenti freschi Porzione Potenza Tempo per il 1 lato min Tempo per il 2 lato min Istruzioni Mele al forno 2 mele ca 400 g 300 W Grill 7 8 To...

Страница 173: ...roonde Grill Alimenti idonei per la cottura Microonde Convezione Ogni tipo di carne e pollame oltre a piatti gratinati torte morbide e di frutta dolci e crostate verdure al forno paste e pane Guida alla cottura di cibi freschi e surgelati in modalità convezione Con la funzione di preriscaldamento preriscaldare il forno in modalità convezione fino alla temperatura desiderata Quando si effettua la c...

Страница 174: ...iore Torta surgelata 1000 g 300 W 180 C 14 18 Collocare il dolce surgelato sul ripiano inferiore Dopo lo scongelamento e il riscaldamento lasciare riposare per 15 20 minuti SUGGERIMENTI SPECIALI FONDERE IL BURRO Mettere 50 grammi di burro in una ciotola di vetro Coprire con un coperchio di plastica Riscaldare per 30 40 secondi a 900 W fino a quando il burro si è sciolto FONDERE IL CIOCCOLATO Mette...

Страница 175: ...tituzione della lampadina rivolgersi al centro assistenza clienti di Samsung per richiedere l uscita di un tecnico specializzato Il forno causa interferenze alla ricezione radiotelevisiva Quando il forno è in funzione possono verificarsi lievi interferenze nella ricezione delle apparecchiature radio e tv Ciò è normale Per risolvere questo problema installare il forno lontano da apparecchi televisi...

Страница 176: ... mm Volume 32 litri Peso netto 19 0 kg circa DE68 04220D AUSTRIA 0810 SAMSUNG 7267864 0 07 min BELGIUM 02 201 24 18 DENMARK 70 70 19 70 FINLAND 030 6227 515 FRANCE 01 48 63 00 00 GERMANY 0180 6 SAMSUNG bzw 0180 6 7267864 HHP 0180 6 M SAMSUNG bzw 0180 6 67267864 0 20 Anruf aus dem dt Festnetz aus dem Mobilfunk max 0 60 Anruf ITALIA 800 SAMSUNG 726 7864 HHP 800 Msamsung 800 67267864 CYPRUS 8009 4000...

Отзывы: