87
Tel: 886.2.2175 2930 Email: [email protected]
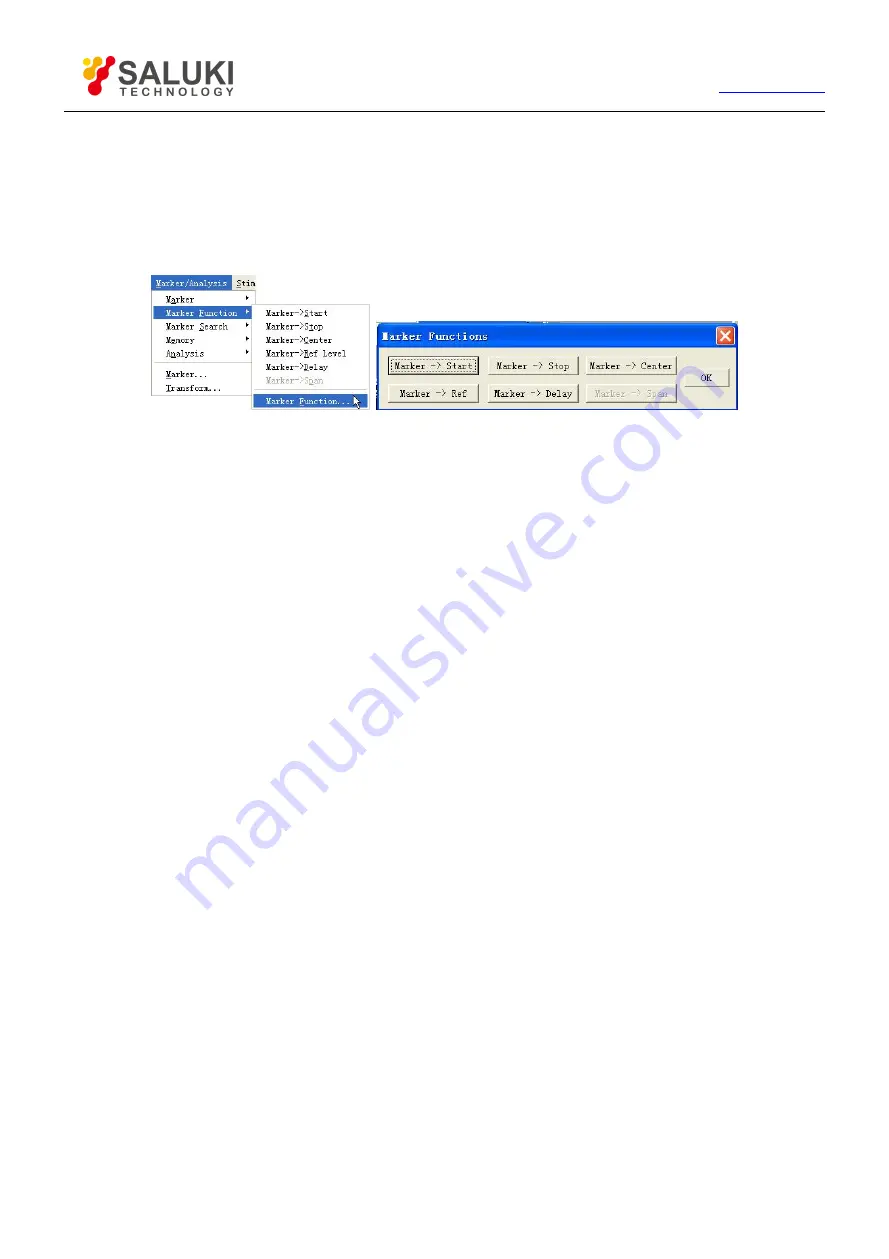
By mouse or touch screen -marker function dialog box
1) Click [Marker/Analysis], and click [Marker Function…] on the [Marker Function] menu to display Marker Function
dialog box.
2) Select the required Analyzer function settings in the dialog box.
3) Click [OK] to close the dialog box after setting is complete.
Figure 6-7 Measure by Use of Marker Function Dialog box Settings
By mouse or touch screen -marker toolbar
1) Click [Response], point to [Toolbar] of the [Display] submenu, click and select [Marker] on the Toolbar submenu to
display Marker toolbar.
2) Select the required Analyzer function settings in the Marker toolbar.
By front panel keys
1) Press
【
Marker
】
in MKR/ANALYSIS area.
2) Press corresponding soft-key of [Marker Functions], and press corresponding soft-key to select Analyzer setting
functions in the arisen marker function soft-key toolbar.
Marker function dialog box
[Marker->Start]
When clicking, start value of Sweep Setup is equal to the value for Stimulus marker.
[Marker->Stop]
When clicking, stop value of Sweep Setup is equal to the value for Stimulus marker.
[Marker->Center]
When clicking, center value of Sweep Setup is equal to the value for Stimulus marker.
[Marker->Ref Level]
When clicking, reference value settings are equal to response values for Stimulus marker.
[Marker->Delay]
When clicking [Marker->Delay] button, Analyzer will use phase slope to adjust Electrical delay of receiving path, thus the phase locus
near the Stimulus marker can be flatten. This function can be used to make electrical length and phase offset Measure, and it is only
applicable for ratio Measure.
[Marker->Span]
When clicking it, span value of Sweep Setup is equal to activation D-value between Stimulus marker and marker R (
△
marker value),
and this button is only valid when marker is Stimulus and
△
marker function is on.
6.1.5.
Advanced Marker Option Setting


