121
Tel: 886.2.2175 2930 Email: [email protected]
When it is selected, channel settings status information will be printed.
[Time]
When it is selected, current time information will be printed.
[Print Window and Other Information Separately]
When it is selected, window information and other setup information will be printed on separate pages, and when it is cleared, and
the information will be printed on the same page.
7.2.2.
Printing Measure Display
After addition of printer to Windows XP operation system of Analyzer is completed and print content is set up in Measure application
program, the required Measure information can be output via the printer.
7.2.2.1.
By mouse or touch screen
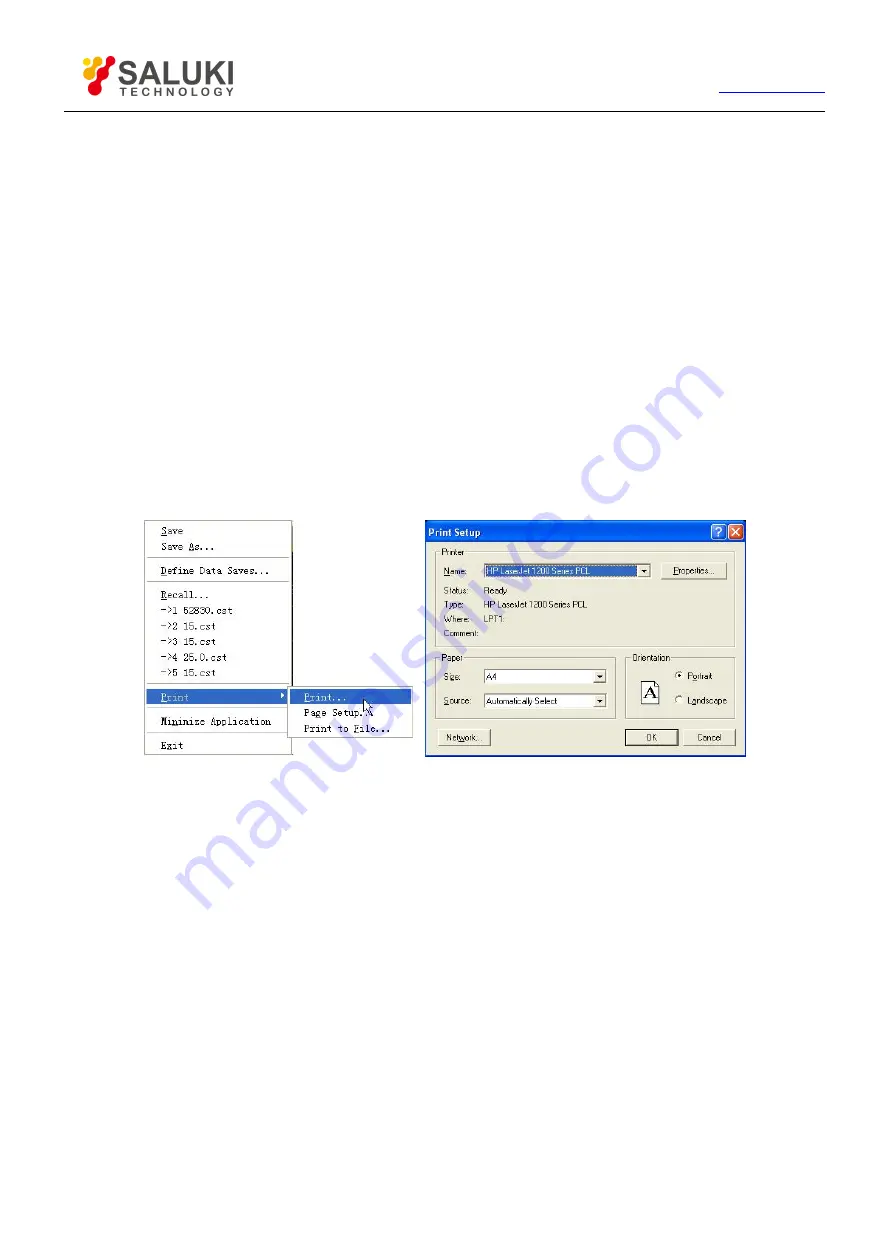
1) Click [File], and click [Print…] in [Print] menu to display Print Setup dialog box.
2) Click [OK] to begin print after print setup is completed in dialog box.
Figure 7-5 Print Measure Information
7.2.2.2.
By front panel keys
1) Press
【
】
in UTILITY area, and press corresponding soft-key of [Print…] to display Print Setup dialog box.
2) Press [
] in ENTRY area to begin print after settings are completed.
7.2.3.
Printing to File
Analyzer supports outputting the printed content to bmp file. If multi-page print is required, multiple bmp files will be automatically
established. Each file corresponds to one page, and other files are indentified in the form of “file name (number).bmp”, such as
amp.bmp, amp(1).bmp and amp(2).bmp.
7.2.3.1.
By mouse or touch screen
1) Click [File], and click [Print to File…] on [Print] menu to display Save As dialog box.
2) Set up file storage directory and file name in the dialog box.
3) Click [Save] to save file.
7.2.3.2.
By front panel keys
1) Press
【
】
in UTILITY area, and press corresponding soft-key of [Print to File…] to display Save As dialog box.


