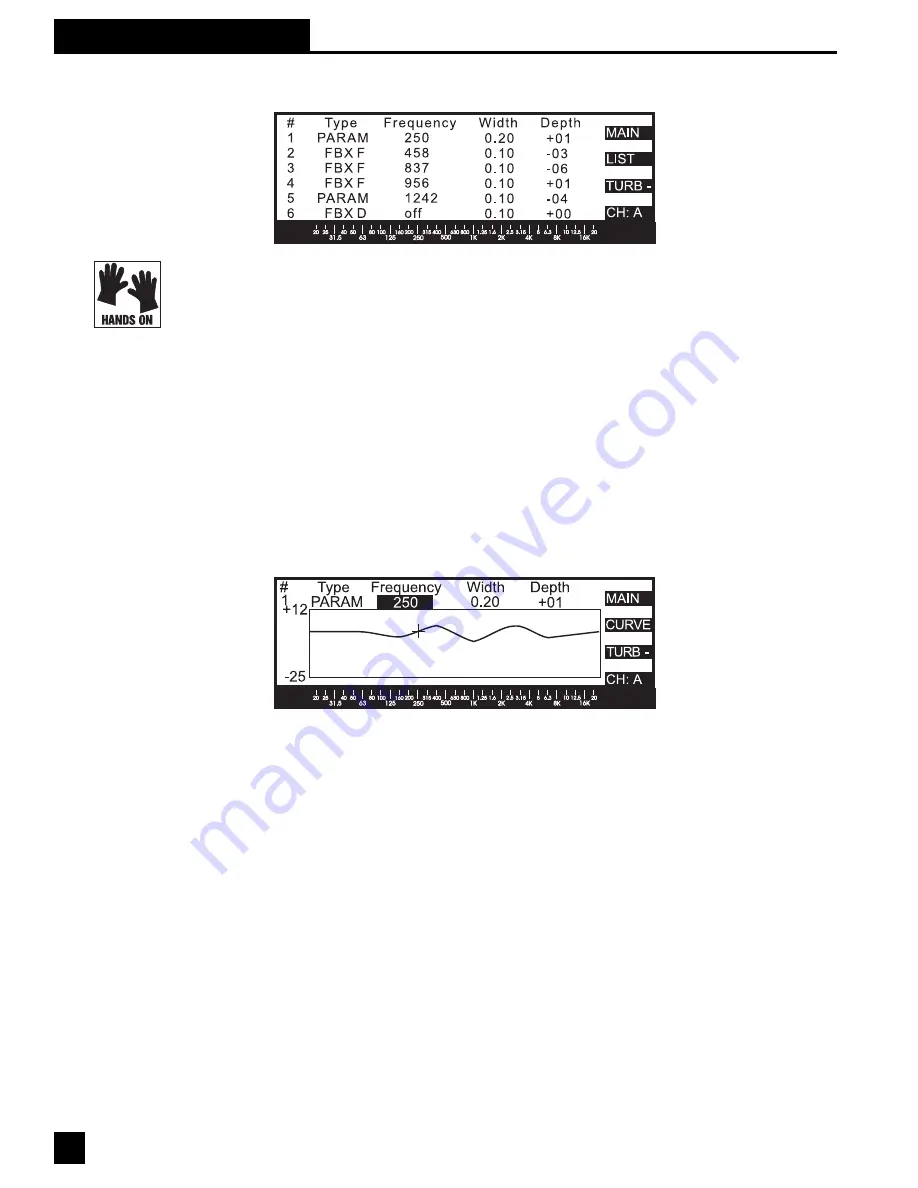
11.4 FILTER CONTROL MENU: LIST MODE AND CURVE MODE
LIST MODE:
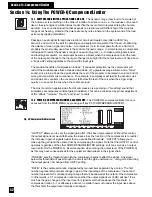
The POWER-Q provides up to 12 filters per channel for parametric equalization or
feedback control. Each of these 12 filters can be set to any of the three types of filters: paramet-
ric, FBX fixed or FBX dynamic. Only six of the filters are displayed at a time; the remaining six will
be displayed when the arrow keys are used to scroll “above” or “below” the screen currently
displayed. Arrowing down from the 12th filter accesses the controls for setting high pass (HPF)
and low pass (LPF) filters for each channel individually.
Use the arrow keys to move the cursor to the "Type" field of the filter you wish to change. Rotating
the data wheel will select among three filter options: parametric, FBX D (for dynamic) and FBX F
(for fixed). The third soft key button (“LOCK +/-”) locks the FBX F filters (they are locked when the
display reads “LOCK+”) and will cause relevant filter labels to read “FBX L.” This button should be
toggled to “LOCK-” until the FBX fixed filters are set.
CURVE MODE:
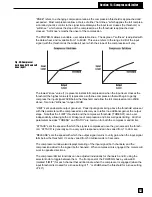
Pressing the “CURVE/LIST” soft key switches the tabular LIST mode to a frequency
response plot representing the sum total of all EQ settings (graphic, parametric, FBX, HPF, LPF)
in channel A or B. Soft key #4 selects which channel’s curve is displayed.
The top line of the "Curve" mode display shows the filter number (1 through 12, high pass, low
pass), the type of filter that corresponds to that number, the frequency of the filter, and its width
and depth. These values will correspond to the settings in LIST mode. The filter chosen for this
top line can be changed using the up/down arrow keys. (NOTE: This is important, as all other
parameters are adjusted using the data wheel after selecting parameters with the left/right arrow
keys.) When the displayed filter is set to “PARAM” using the data wheel, the frequency, width and
depth of the parametric filter can be changed by using the arrow keys and data wheel.
For example, let’s say we want to add a parametric notch at 60 Hz, 10dB deep, and 0.20 octaves
wide. While “PARAM” or “FBX L/F/D” is highlighted, use the up/down keys to select the number
of the filter (1 through 12) you wish to use. Using the data wheel, select “PARAM” as the type of
filter. Press the right arrow key to highlight "Frequency," and turn the data wheel to set “60.” (You
will see the position indicator on the screen move as you change this value. If you’re adding to an
existing EQ curve, the position indicator will follow the line of the curve.) Use the right arrow key
to move to “Width,” and set this to “.20.” Move to the right one more time to “Depth,” and use the
data wheel to set this value to “-10.”
Both the graphic display and the audio program will change in real time to reflect these changes.
The cursor traces the existing displayed curve until you change the “Depth” value up or down from
zero, and the actual curve display and audio will only change when a boost or cut is set. It is also
possible to preset a boost or cut with frequency set to “off,” and then sweep the boost/cut through
all the audio frequencies until you find the sound you like. (This makes for quite an interesting
36
Section 11: FBX/PARAMETRIC EQs
Fig. 40: Curve Mode
Fig. 39: Filter menu control


