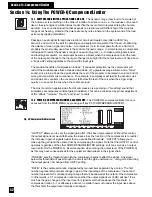
10.1 GRAPHIC EQUALIZER APPLICATIONS.
Automatic Room EQ or an RTA analysis will produce a
room EQ curve that may best be regarded as a starting point or baseline for further fine tuning with
the second level of POWER-Q graphic EQ controls, which are user adjustable. Experienced
graphic equalizer users employ a variety of methods to arrive at their preferred sound, and the
POWER-Q allows your personal touch in determining the way your system sounds.
A graphic equalizer is an engineer’s most common choice for compensating for less than ideal
acoustical reproduction. The quality of equipment used, the placement of speakers and the
acoustical properties of a room will rarely result in tonally balanced sound reproduction. Even the
best sound equipment will not produce sound to its optimal potential in most acoustical environ-
ments; for example, reflective parallel room surfaces (wall to wall, floor to ceiling) will create
standing waves and acoustic resonances that will vary as a function of room dimensions.
A multiband graphic equalizer can compensate for unequal acoustical energy across the frequency
bands of the audio spectrum. The POWER-Q graphic EQ provides you with a choice of measure-
ment and calibration aids to perform automatic equalization, or it will allow you to rely on your own
experience and hearing acuity to equalize an acoustical space. You can even combine methods. In
fact, the POWER-Q goes a step further, providing you with some very powerful advantages for mak-
ing a sound system sound as good as it can. You can arrive at a baseline “flat response” curve by one
of two methods: by performing the POWER-Q Automatic Room EQ function (see Section 9), or by
using the RTA to analyze pink or white noise played through your sound system into a reference
microphone (see Section 13). However, you may not want to stop there. Many sound engineers can
improve the sound of a flat response system and will tweak the sound of the EQ further, perhaps
changing the overall frequency balance to match the performers’ style or the requirements of a par-
ticular application. In such situations, the POWER-Q truly lives up to its name.
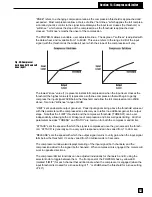
To fully understand the powerful options made available with the POWER-Q, think of the unit as
containing two separate graphic EQs. The “first” EQ is automatically set by the POWER-Q using
the Automatic Room EQ function (see Section 9). Its function is to make the frequency response
of the acoustical environment as even as possible, or flat. We call this response curve the “Room
EQ.” Although the POWER-Q makes graphic EQ adjustments to produce the Room EQ, the
actual slider settings for these adjustments are NOT displayed; instead, the graphic EQ screen will
display a graphic EQ settings as flat. Think of this as the default starting point for you to sculpt
sound, adding EQ as needed for the various applications you may use for the POWER-Q, even in
the same auditorium.
In actual practice, many or most sound engineers will choose to adjust EQ settings differently for
various applications. For example, the system EQ desirable for a hip-hop artist would likely require
more low end boost than would be appropriate for an acoustic folk artist. This additional applica-
tion-specific EQ is the “second” EQ added to the sound. Let’s call it the “Program EQ.”
The actual total EQ added to your program by the POWER-Q is the combination of Room EQ,
Program EQ, FBX filters, parametric filters, and high and low pass filters. The resultant total curve
reflecting all these changes can be viewed in both the graphic EQ and FBX/Parametric Filter
screens. This curve shows a combination of all EQ and filtering currently active in the POWER-Q;
bypassing Room or Program EQ (see Section 22) will change the curve display accordingly. A
Hardware bypass will simply bypass all the processing of the POWER-Q, and the curve display will
NOT change, though the EQ shown will not be in the signal path.
Only the Program EQ will be saved and recalled by the POWER-Q. The Room EQ will be stored
in memory (even after the unit is turned off) as the default Room EQ, and will remain in the signal
path unless it is bypassed (Section 22), reset (Section 10.2), or until another Automatic Room EQ
procedure is run. Then the results of the new analysis will become the Room EQ default. The
reasoning for this is quite simple: every room is different (even the same room will have differ-
ences from one performance to the next), and calibrating your system (with Automatic Room EQ,
which takes only seconds) insures optimal performance in the new space. We even encourage
you to re-Auto EQ the same room periodically. Once your Room EQ is set, you’ve established the
Section 10: Using The POWER-Q Graphic Equalizer
Section 10: Graphic EQ
29


