


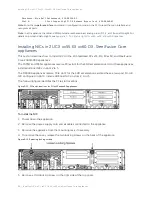


84 | Installing NICs in CX xx55, DX, EX xx60, and SteelFusion Core Appliances
Installing NICs in 1U CX xx55 and EX xx60 appliances
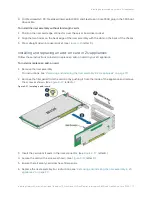
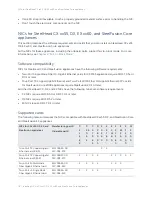
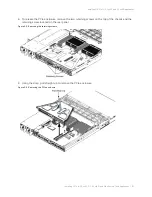
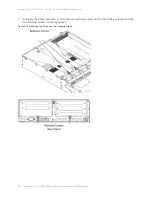
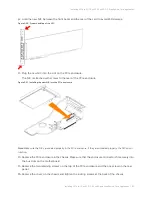
15. Plug the new NIC into the slot on the PCIe enclosure.
Figure 5-9. Installing the new NIC into the PCIe enclosure
Note:
Make sure the NICs are seated properly in the PCIe enclosure. If they aren’t seated properly, NICs don’t
function.
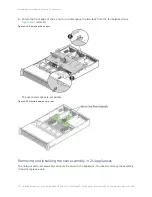
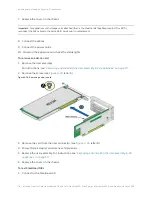
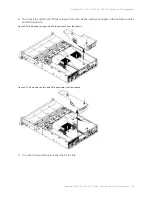
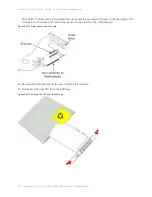
16. Secure the NIC in the PCIe enclosure at the back panel with the locking screws. When replacing the
enclosure, the standoff pictured in
must line up with the stand on the motherboard.
Figure 5-10. Securing the NIC to the PCIe enclosure
Содержание SteelCentral AppResponse 2170
Страница 8: ...8 Contents ...
Страница 16: ...16 Getting Started Troubleshooting ...
Страница 166: ...166 NIC Status Lights for xx60 xx55 and xx50 Appliances NICs for Series xx50 platforms ...