


74 | Installing Network Cards in SteelHead GX and xx70, SteelHead SD, SteelCentral, Interceptor 9600, and SteelFusion Core 3500
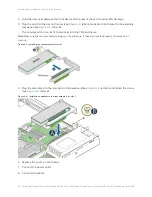
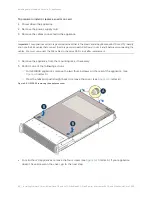
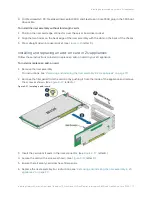
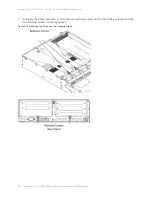
Installing network add-on cards in 2U appliances
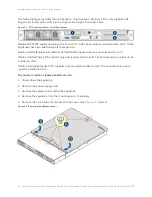
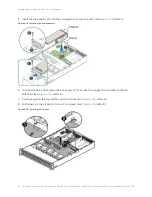
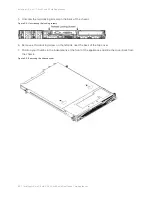
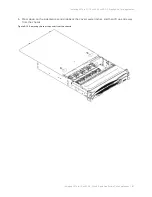
7. Replace the cover on the chassis.
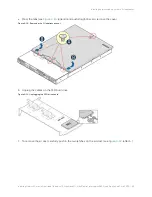
Important:
For appliances with storage units attached (that is, the SteelCentral AppResponse 6170 or 8170),
reconnect the SAS cables to the same RAID cards prior to replacement.
8. Connect the cables.
9. Connect the power cords.
10. Power up the appliance and check the status lights.
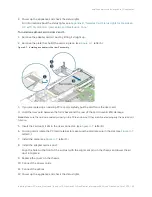
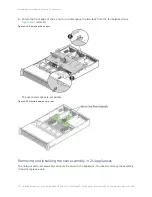
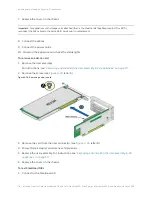
To remove an add-on card
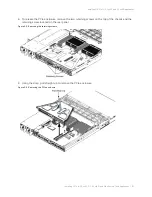
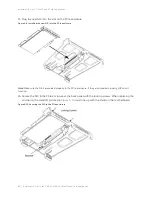
1. Remove the riser assembly.
For instructions, see
“Removing and installing the riser assembly in 2U appliances” on page 70
.
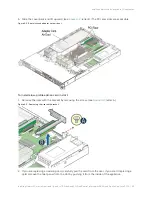
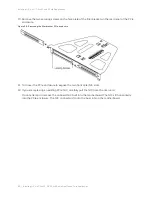
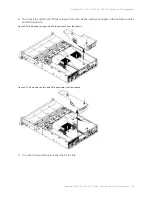
2. Remove the screw. (see
, letter A.)
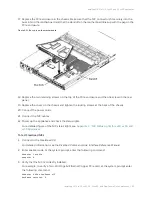
Figure 4-18. Removing a add-in card
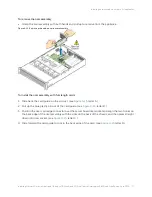
3. Remove the card from the riser connector. (see
, letter B.)
4. Ensure that all empty card slots have filler panels.
5. Replace the riser assembly. For instructions, see
“Removing and installing the riser assembly in 2U
6. Replace the cover on the chassis.
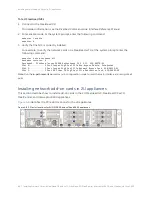
To test SteelHead NICs
1. Connect to the SteelHead CLI.
Содержание SteelCentral AppResponse 2170
Страница 8: ...8 Contents ...
Страница 16: ...16 Getting Started Troubleshooting ...
Страница 166: ...166 NIC Status Lights for xx60 xx55 and xx50 Appliances NICs for Series xx50 platforms ...