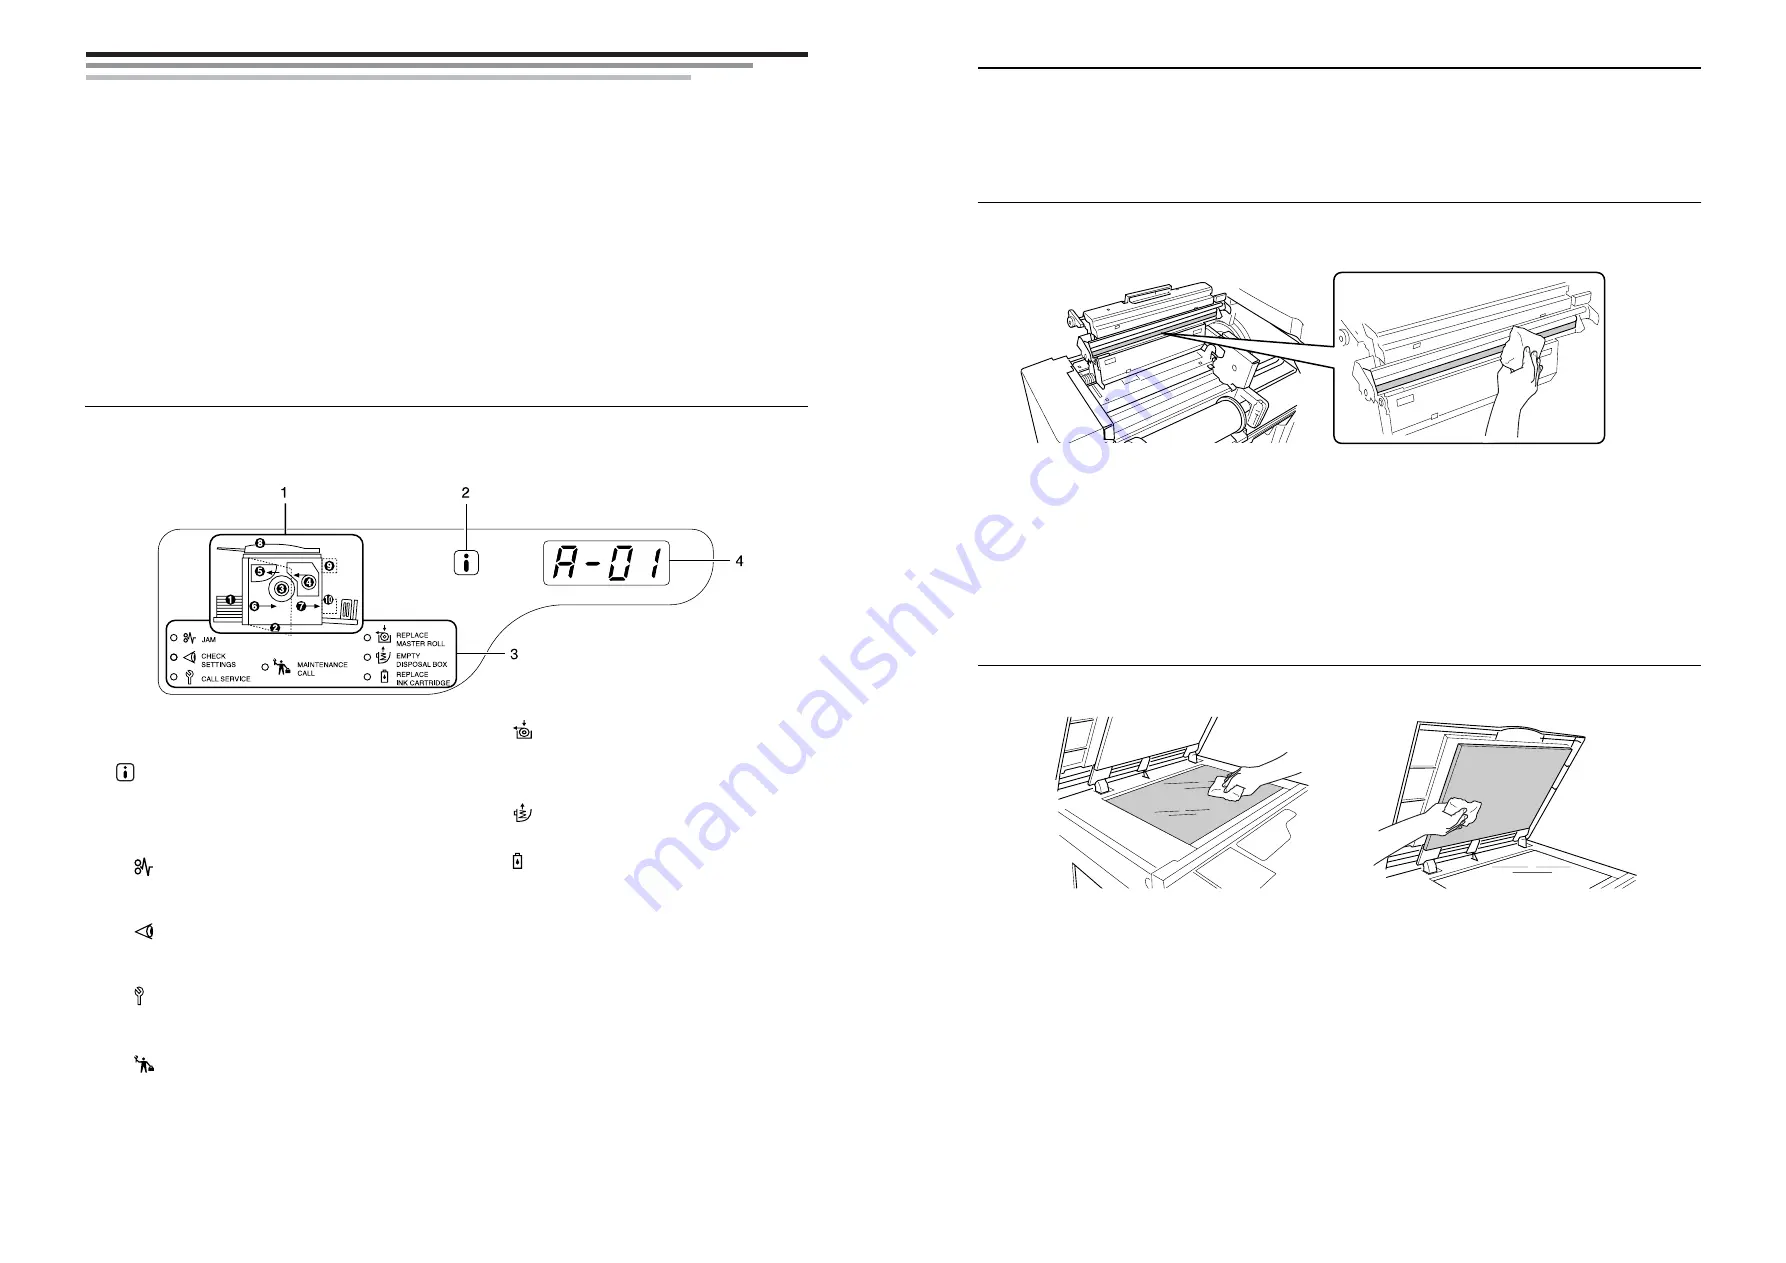
Check & Error Display
80
Troubleshooting
Check & Error Display
When an error occurs on the machine or when consumables or other sections are not yet ready, the Check & Error
Display shows error locations and numbers indicating error types. For some errors, error numbers are shown on the
Error Number Display (Print Quantity Display).
Checking with the Check & Error Display
Besides indicators that show error types, numbers that show error locations light.
Check the display and take an appropriate procedure according to the methods described on the subsequent pages.
1)
Error Location Indicator
Numbers corresponding to error locations light.
2)
indicator
Lights when the function is in use.
3)
Error Type Indicator
z
(Jam) Indicator
Lights when paper jams occur inside the
machine or ADF unit (option).
z
(Check Settings) Indicator
Lights when the Print Cylinder(Drum), paper, or
other items have not yet set up.
z
(Call Service) Indicator
Lights when such an error occurs that needs
advices or supports from service personnel.
z
(Maintenance Call) Indicator
Lights when the time for periodic inspection
comes.
z
(Replace Master Roll) Indicator
Blinks when the remaining master quantity is
small and lights up when the entire master is
consumed.
z
(Empty Disposal Box) Indicator
Lights when the Master Disposal Box is full.
z
(Replace Ink Cartridge) Indicator
Blinks when the remaining ink quantity is small
and lights up when the entire ink is consumed.
4)
Error Number Display
Error numbers appear and blinks on the Print
Quantity Display.
Error contents are shown with alphabetical charac-
ters (single digit) and numeric characters (two digits).
Cleaning
Cleaning
77
Cleaning
Thermal Print Head
Clean the Thermal Print Head each time you replace the Master Roll. Open the Master Making Unit Cover, and then
gently wipe the Thermal Print Head in the back of the unit several times with a soft cloth or tissue.
B
Caution:
• Since the Thermal Print Head is very delicate, avoid shocks or scratches with a hard object.
• Since Thermal Print Head is susceptible to (damage by) static electricity, please be sure to remove the static elec-
tricity charged in the body before cleaning.
Note:
• For more effective cleaning, dampen a soft cloth or tissue with a small amount of alcohol before wiping the Thermal
Print Head.
Stage Glass and Stage Cover
If the Stage Glass and/or Stage Cover is stained, gently wipe them with a soft cloth or tissue.
B
Caution:
• Since the Stage Glass is very delicate, avoid shocks or scratches with a hard object.
Riso Kagaku Technical Training Center Version
Содержание RZ200AW
Страница 1: ...Riso Kagaku Technical Training Center Version...
Страница 2: ...MEMO Riso Kagaku Technical Training Center Version...
Страница 111: ...MEMO Riso Kagaku Technical Training Center Version...
Страница 112: ...Riso Kagaku Technical Training Center Version...


