PART V TROUBLESHOOTING
5-16
ENGLISH
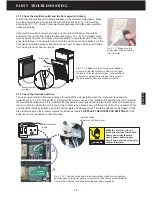
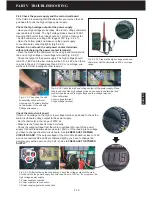
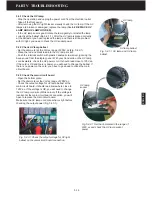
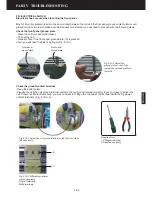
5.4.1 Check the UV lamp
- Stop the operation and unplug the power cord from the electrical outlet.
- Take off the front panel.
- After removing the UV light blocker, visually check the UV lamp. If the UV
lamps are broken or damaged, replace the lamp (See
6.2 REPLACE UV
LAMP AND UV LAMP HOLDER
).
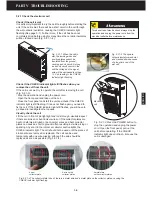
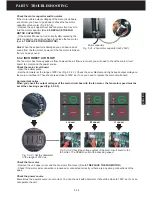
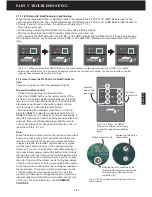
- If the UV lamp seems good, rotate the lamp gently to reinstall the lamp
correctly at the ballast (Fig.5.4.1-1). After the UV lamp is placed correctly
at the ballast or you have replaced the lamp and there is still a problem
with UV light, you need to check the UV socket power.
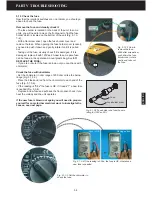
5.4.2 Check UV lamp ballast
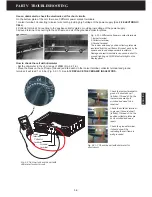
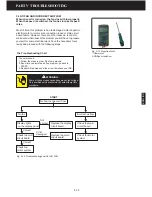
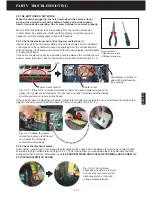
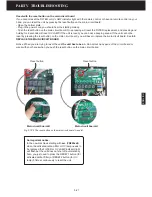
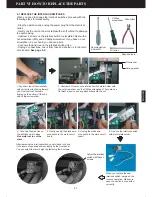
- Set the ohmmeter at the Volt ac range of 200V ac (Fig. 5.4.2-1).
- Place the red and black lead into the UV lamp socket.
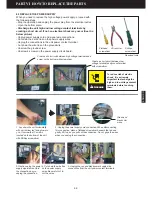
- Push the interlock switch with plastic handled screw driver, ignoring the
beep sound from the display panel. With your hand solid on the UV lamp
cord insulators, check the UV power cord. It should read close to 120V ac.
If the cord is OK and there is power, you will need to change the ballast. If
there is no power on the cord, you have to go ahead to check the main
circuit board.
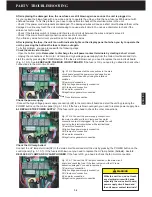
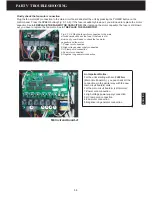
5.4.3 Check the main circuit board
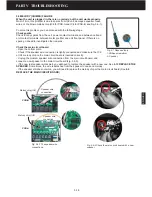
- Open the bottom plate.
- Set the ohmmeter at the Volt ac range of 200V ac.
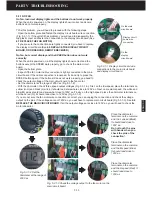
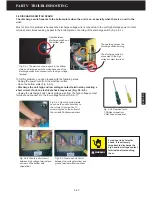
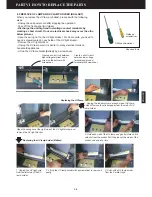
- Check the output voltage for UV lamp ballast at the
main circuit board, it should read somewhere close to
120V ac. If the voltage is OK, you will need to change
the UV lamp cord wire (White colour). If the voltage is
incorrect at the main circuit board connection, you will
have to replace the main circuit board.
Make sure the UV lamp cord connection is tight before
checking the output power (Fig.5.4.3-1).
UV lamp
UV lamp ballast
UV lamp
socket
Fig. 5.4.2-1 Set the ohmmeter in the range of
200V ac and check the UV lamp socket
power.
Fig. 5.4.3-1 Check the output voltage for UV light
ballast on the main circuit board connection.
Fig. 5.4.1-1 UV lamp and UV lamp
ballast.
Содержание R200T
Страница 69: ...ENGLISH NOTES ...

