- 53 -
10.6. AUTOMATIC ADJUSTMENT TIME
<Automatic adjustment time> parameter determines time interval between successive internal
adjustments carried out automatically. The time interval is declared in hours and ranges between 0.5
and 12 hours.
To set time interval for automatic adjustment:
•
select <Automatic adjustment time> option,
•
using displayed menu, select appropriate time interval (given in hours) which is a time gap
elapsing from the last carried out internal automatic adjustment until activation of the following
automatic internal adjustment.
CAUTION!
Parameter settings can be modified only for balances that are not a subject to conformity assessment
(verification).
10.7. REPORT PRINTOUT
Adjustment report is generated automatically at the end of each adjustment process or adjustment
test and next it is sent to communication port assigned for PERIPHERAL DEVICES/PRINTER (by
default it is COM1). Report content is declared in PRINTOUTS/ADJUSTMENT REPORT menu.
Instruction on how to declare settings for this option is to be found further down this manual, read
sections referring to printouts.
The report can be printed using balance-connected printer or sent to a computer and saved for
archiving purposes as a file.
11. DETERMINING PRINTOUT CONTENT
11.1. ADJUSTMENT REPORT
ADJUSTMENT REPORT
is a group of parameters enabling to declare data that is to be printed on
an adjustment printout.
Variable
Overview
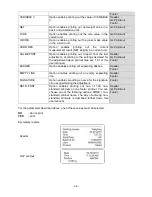
PROJECT
Option enables naming the project (name associated with a particular type of
weighing). The name may consist of maximum 31 characters.
CALIB TYPE
Option enables printing out the type of the adjustment being carried out.
USER
Option enables printing out the name of a logged-in user.
PROJECT
Option enables printing out the name of the project (see parameter Project).
DATE
Option enables printing out the date of the carried out adjustment.
TIME
Option enables printing out the time of the carried out adjustment.
BALANCE ID
Option enables printing out the balance ID number.
Содержание AS X2 Series
Страница 7: ...7 1 GENERAL INFORMATION 1 1 DIMENSIONS AS X2 series PS X2 series...
Страница 8: ...8 APP X2 series WLC X2 series...
Страница 26: ...26 Enter particular key setup Select the key The selected key is displayed automatically on a home screen...
Страница 96: ...96 Status Completed Signature...
Страница 132: ...132...


