The
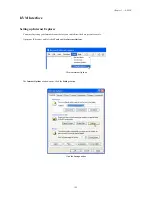
Security Settings
window opens, click the
Enable
button under the
Download signed ActiveX controls
section.
Click the Enable button under the Download Signed ActiveX Controls section
Scroll down and click the
Enable
button under the
Run ActiveX controls and plug-ins
section. Click the
OK
button.
Click the Enable button under the Run ActiveX Controls section
You are prompted with a Warning window. Click the
Yes
button to accept the changes to the Internet zone and go back to the
Internet Options
window.
Chapter 5 — ESMS
144
Содержание QSSC-S99K 2U
Страница 1: ...User s Manual 2U 2 Way x86 Server QSSC S99K 2U ...
Страница 43: ...LV DIMM support 35 Chapter 3 BIOS ...


