ENGINE
3.10
ENGINE INSTALLATION NOTES
After the engine is installed in the frame, review this checklist and perform all steps that apply.
General Items
1.
Install previously removed components using new gaskets, seals, and fasteners where applicable.
2.
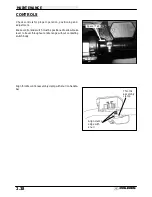
Perform regular checks on fluid levels, controls, and all important areas on the vehicle as outlined in the daily
pre-ride inspection checklist (refer to Chapter 2 or the Owner’s Safety and Maintenance Manual).
PVT System
1.
Adjust center distance of drive and driven clutch. (Chapter 6)
2.
Adjust clutch offset, alignment, and belt deflection. (Chapter 6)
3.
Clean clutch sheaves thoroughly and inspect inlet and outlet ducts for proper routing and sealing. (Chapter 6)
Transmission
1.
Inspect transmission operation and adjust linkage if necessary. Refer to Chapter 2 and Chapter 8.
Exhaust
1.
Replace exhaust gaskets. Seal connections with high temp silicone sealant.
2.
Check to be sure all springs are in good condition.
Bleed Cooling System
1.
Remove radiator cap and slowly add coolant to top of filler neck.
2.
Fill coolant reservoir tank to full mark.
3.
Install radiator cap and squeeze coolant lines to force air out of system.
4.
Again remove radiator cap and slowly add coolant to top of fill neck.
5.
Start engine and observe coolant level in the radiator. Allow air to purge and top off as necessary. Reinstall
radiator cap and bring engine to operating temp. Check level in reservoir tank after engine is cool and add
coolant if necessary.
Engine Break In Period
4 Cycle Engine Break-In Period is defined as the first 10 hours of engine operation, or 2 full tanks of fuel.
1.
Use only Polaris Premium 4 All Season synthetic oil, or API certified “SH” oil. Never substitute or mix oil
brands. Serious engine damage can result.
2.
Use fuel with a minimum octane of 87 (R+M)/2 method.
3.
Change break-in oil and filter at 20 hours or 500 miles, whichever comes first.
Содержание Sportsman 400
Страница 5: ...SPORTSMAN 400 A01CH42AB SPORTSMAN 400 A01CH42AA GENERAL INFORMATION 1 3 MODEL COLOR IDENTIFICATION ...
Страница 6: ...SPORTSMAN 400 A01CH42AC GENERAL INFORMATION 1 4 MODEL COLOR IDENTIFICATION ...
Страница 21: ...Newton Meter to Pound Foot and Pound Inch GENERAL INFORMATION 1 19 TORQUE CONVERSIONS ...
Страница 22: ...Newton Meter to Pound Foot and Pound Inch GENERAL INFORMATION 1 20 TORQUE CONVERSIONS ...
Страница 94: ...ENGINE 3 25 CYLINDER HEAD EXPLODED VIEW 1 Remove the two 6mm flange bolts A from cylinder head A ...
Страница 152: ...Forward FUEL SYSTEM CARBURETION 4 2 FUEL TANK ASSEMBLY ...
Страница 325: ...BRAKES 9 22 FRONT BRAKE CALIPER EXPLODED VIEW Pads Caliper Mount Piston Pin Boot Square O Rings Adjuster Screw ...
Страница 366: ...ELECTRONIC SPEEDOMETER WIRING DIAGRAM ELECTRICAL 10 32 ...
Страница 372: ...ELECTRICAL 10 38 NOTES ...
Страница 379: ...ELECTRICAL 10 39 WIRING DIAGRAM 2001 SPORTSMAN 400 ...
Страница 380: ...ELECTRICAL 10 40 WIRING DIAGRAM 2001 SPORTSMAN 500 EARLY ...
Страница 381: ...ELECTRICAL 10 41 WIRING DIAGRAM 2001 SPORTSMAN 500 LATE ...


