95
3
Ta
king
Pict
ures
Expands the dynamic range and enables a more ample gradation
expression, and reduces the occurrence of overexposed and
underexposed areas. Highlight Correction adjusts the overexposed
areas and Shadow Correction adjusts the underexposed areas.
1
Press the
3
button in
A
mode.
The [
A
Rec. Mode] menu appears.
2
Use the four-way controller (
23
) to select [D-Range
Setting].
3
Press the four-way controller (
5
).
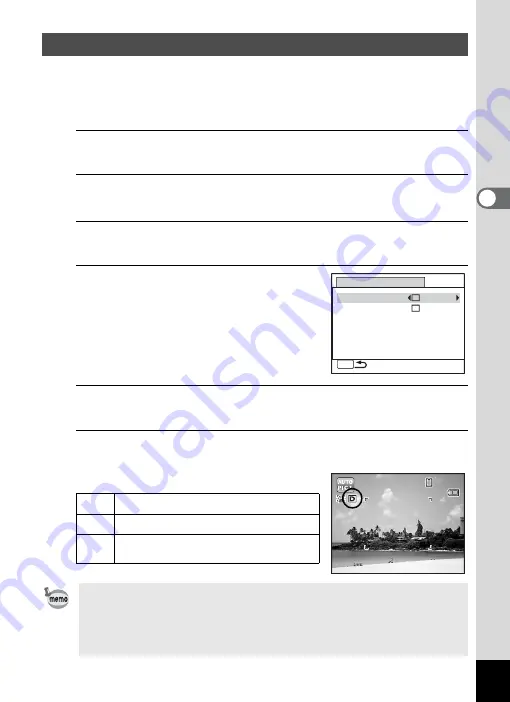
The [D-Range Setting] screen appears.
4
Use the four-way controller (
23
)
to select [Highlight Correction] or
[Shadow Correction].
5
Use the four-way controller (
45
) to select
O
(On) or
P
(Off).
6
Press the
3
button twice.
The camera returns to capture status.
The D-Range Setting icon appears on the display.
Correcting the Brightness (D-Range Setting)
P
When [Highlight Correction] is set to
O
Q
When [Shadow Correction] is set to
O
O
When [Highlight Correction] and
[Shadow Correction] are both set to
O
• When [Highlight Correction] is set to
O
, the minimum sensitivity is ISO
125.
• If you change the [Highlight Correction] or [Shadow Correction] setting
frequently, you can save time by assigning it to the Green button
(p.107).
D-Range Setting
MENU
Highlight Correction
Shadow Correction
1 4 : 2 5
1 4 : 2 5
1 4 : 2 5
3 8
3 8
3 8
0 3 / 0 3 / 2 0 1 1
0 3 / 0 3 / 2 0 1 1
0 3 / 0 3 / 2 0 1 1
Содержание 15936
Страница 30: ...Memo 28...
Страница 50: ...Memo 48...
Страница 51: ...2 Common Operations Understanding the Button Functions 50 Setting the Camera Functions 55...
Страница 64: ...Memo 62...
Страница 136: ...Memo 134...
Страница 158: ...Memo 156...
Страница 159: ...6 Recording and Playing Back Sound Recording Sound Voice Recording 158 Adding a Voice Memo to Images 161...
Страница 165: ...7 Settings Camera Settings 164...
Страница 182: ...Memo 180...
Страница 183: ...8 Connecting to a Computer Connecting to a Computer 182 Using the Provided Software 186...
Страница 196: ...Memo 194...
Страница 220: ...Memo 218 9 Appendix...


