4
Specifying settings from the control panel
4-142
CS230 (Phase3)
4.29
Prefix/Suffix settings
The registered characters can be added to the e-mail address that is
specified when sending e-mail. This eliminates having to enter characters
that are often entered such as the same domain name.
Prefix/Suffix parameters
The prefix/suffix parameters are as follows:
To specify the prefix/suffix settings
1
In the Administrator Setting screen, touch [5 Network Setting]. (Refer to
page 4-10 for more details.)
2
In the Network Setting screen, touch [9 Detail Setting].
3
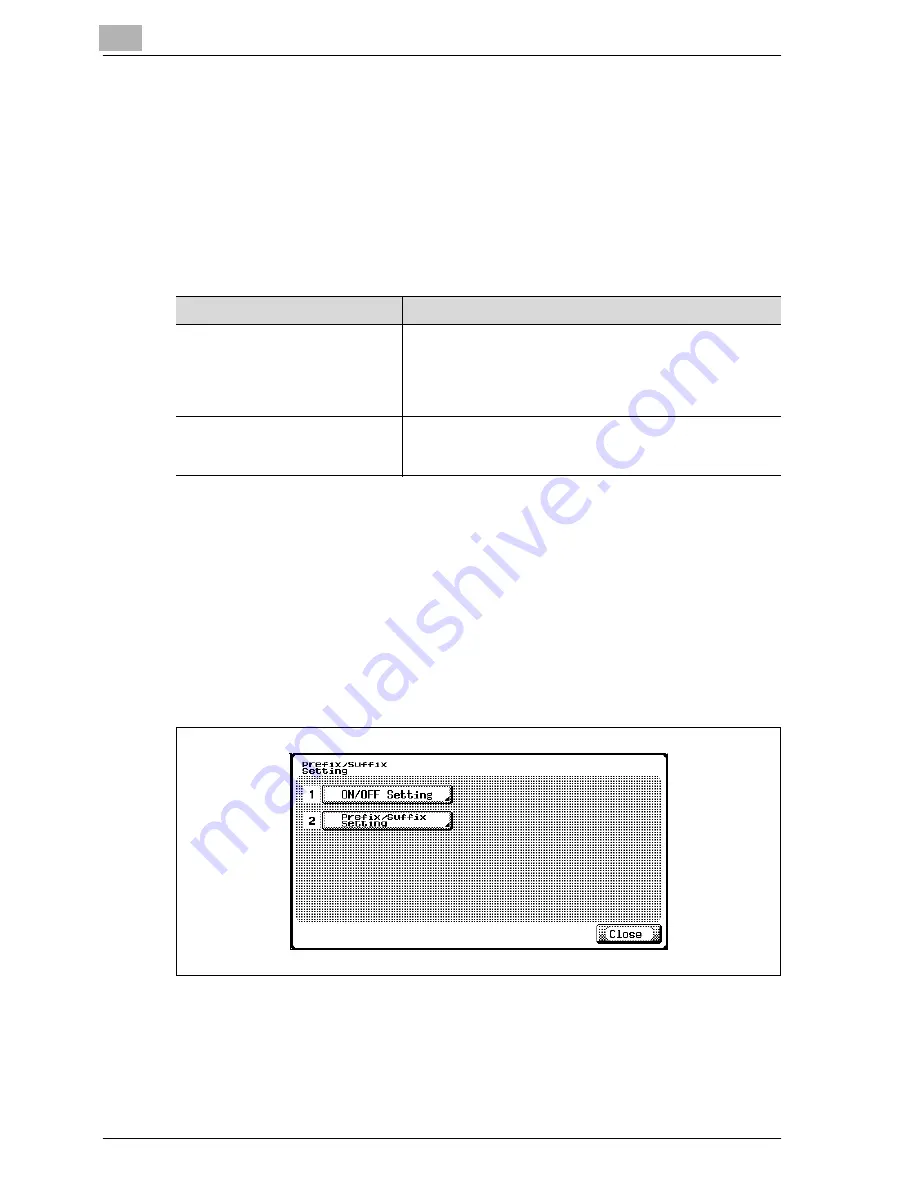
In the Detail Setting screen, touch [8 Prefix/Suffix Setting].
The Prefix/Suffix Setting screen appears.
Item
Description
ON/OFF Setting
E-mail addresses are registered with "Notification Address
Setting", a parameter for specifying notification of the ma-
chine’s status.
This parameter sets whether to enable the prefix/suffix
function.
Prefix/Suffix Setting
Registers the character strings that are used by the pre-
fix/suffix function. For details on specifying the settings, re-
fer to "Prefix/Suffix settings" on page 4-142.
Содержание CS230
Страница 1: ...Oc CS230 Phase 3 User s Guide Network Scanner...
Страница 13: ...1 Introduction...
Страница 14: ......
Страница 26: ...1 Introduction 1 14 CS230 Phase3...
Страница 27: ...2 Before using the scan functions...
Страница 28: ......
Страница 42: ...2 Before using the scan functions 2 16 CS230 Phase3...
Страница 43: ...3 Scanning documents...
Страница 44: ......
Страница 125: ...Scanning documents 3 CS230 Phase3 3 83 4 Touch Yes to delete the job 5 Touch Close...
Страница 131: ...4 Specifying settings from the control panel...
Страница 132: ......
Страница 166: ...4 Specifying settings from the control panel 4 36 CS230 Phase3 2 Note To cancel changes to the setting touch Cancel...
Страница 303: ...5 Specifying settings Using Web Connection...
Страница 304: ......
Страница 313: ...Specifying settings Using Web Connection 5 CS230 Phase3 5 11 To log off 1 Click Logout at the upper left of the window...
Страница 314: ...5 Specifying settings Using Web Connection 5 12 CS230 Phase3 The user is logged off and the Login page appears...
Страница 343: ...Specifying settings Using Web Connection 5 CS230 Phase3 5 41 3 Enter the settings and click Apply...
Страница 359: ...Specifying settings Using Web Connection 5 CS230 Phase3 5 57 3 Check the message and then click the OK button...
Страница 376: ...5 Specifying settings Using Web Connection 5 74 CS230 Phase3 4 Specify the settings of the button custom items...
Страница 385: ...Specifying settings Using Web Connection 5 CS230 Phase3 5 83 4 Click the Apply button 5 Click the OK button...
Страница 392: ...5 Specifying settings Using Web Connection 5 90 CS230 Phase3 TCP IP Specify TCP IP settings...
Страница 395: ...Specifying settings Using Web Connection 5 CS230 Phase3 5 93 5 21 NetWare Specify NetWare settings...
Страница 398: ...5 Specifying settings Using Web Connection 5 96 CS230 Phase3 5 22 IPP Specify the IPP print settings...
Страница 402: ...5 Specifying settings Using Web Connection 5 100 CS230 Phase3 5 24 SNMP Specify SNMP settings...
Страница 412: ...5 Specifying settings Using Web Connection 5 110 CS230 Phase3 4 Specify the desired settings...
Страница 417: ...Specifying settings Using Web Connection 5 CS230 Phase3 5 115 E mail TX SMTP Specify e mail send settings...
Страница 430: ...5 Specifying settings Using Web Connection 5 128 CS230 Phase3 2 Check the message and then click the OK button...
Страница 441: ...6 Scan function troubleshooting...
Страница 442: ......
Страница 444: ...6 Scan function troubleshooting 6 4 CS230 Phase3...
Страница 445: ...7 Appendix...
Страница 446: ......


