background image

ProSafe Wireless-N VPN Firewall SRXN3205 Reference Manual

2-8

Connecting to the Internet (WAN)

v1.0, July 2008

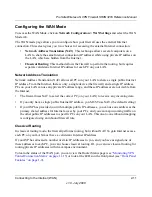
3.

If you clicked 

Yes

, enter the ISP-provided Login and Password information.

4.

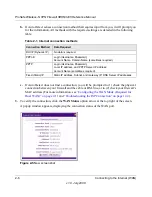
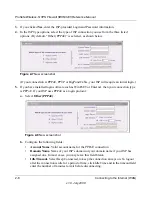
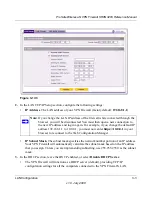
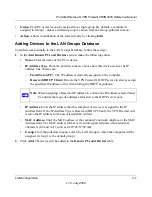
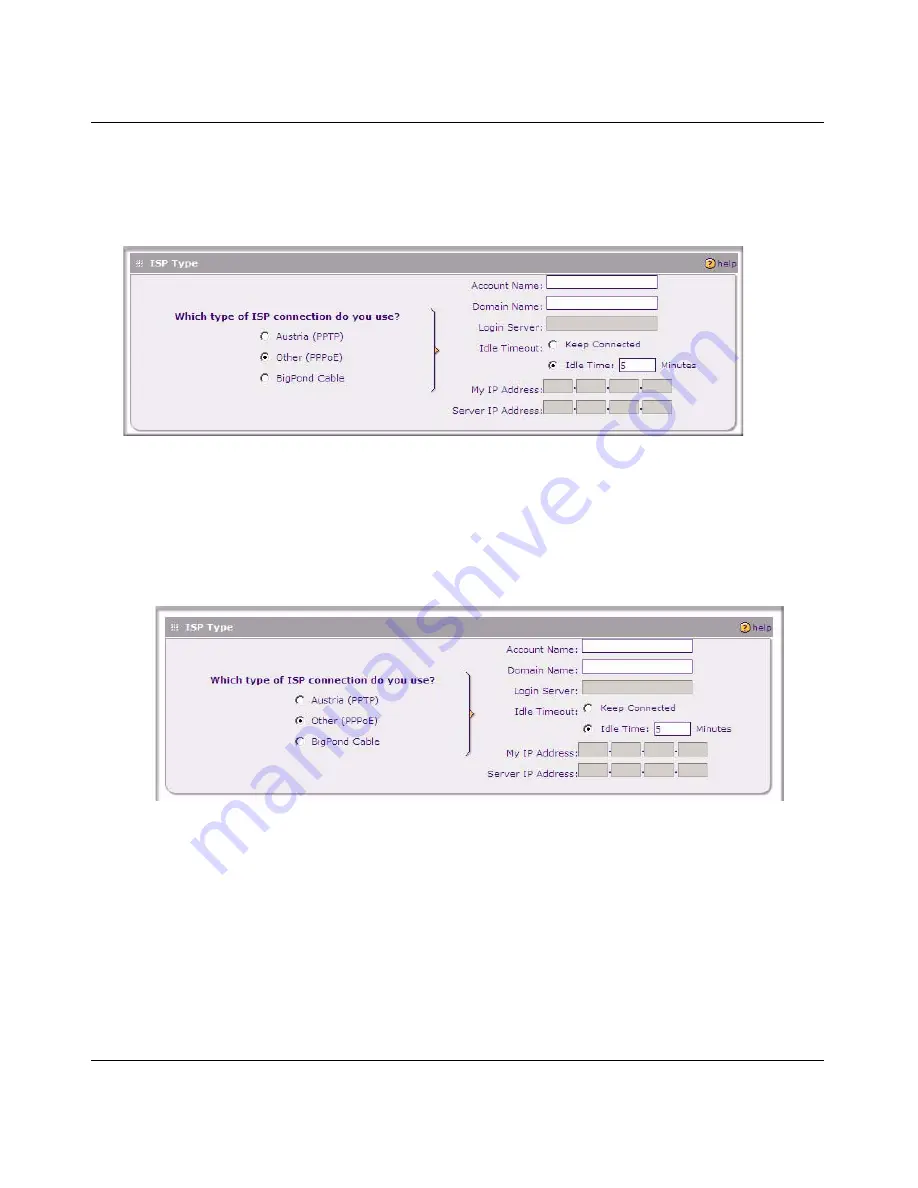
In the ISP Type options, select the type of ISP connection you use from the three listed 
options. (By default, “Other (PPPoE)” is selected, as shown below. 

(If your connection is PPPoE, PPTP or BigPond Cable, your ISP will require an initial login.)

5.

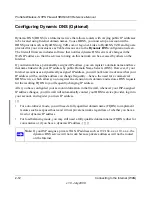
If you have installed login software such as WinPoET or Enternet, then your connection type 
is PPPoE. If your ISP uses PPPoE as a login protocol:

a.

Select 

Other (PPPoE)

b.

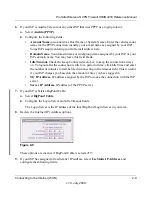
Configure the following fields: 

Account Name

. Valid account name for the PPPoE connection 

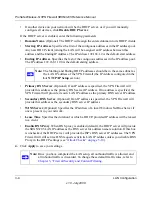
Domain Name. 

Name of your ISP’s domain or your domain name if your ISP has 

assigned one. In most cases, you may leave this field blank. 

Idle Timeout. 

Select Keep Connected, to keep the connection always on. To logout 

after the connection is idle for a period of time, click Idle Time and in the timeout field 
enter the number of minutes to wait before disconnecting. 

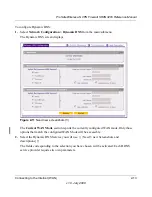
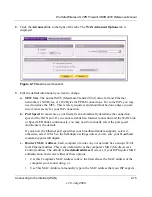
Figure 2-7 

New screen shot

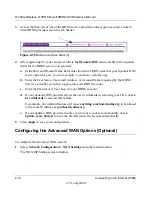
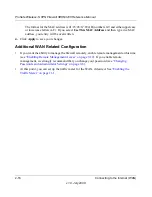
Figure 2-8 

New screen shot 

Содержание SRXN3205 - ProSafe Wireless-N VPN Firewall Wireless Router

Страница 1: ...tested and found to comply with the limits for a Class B digital device pursuant to part 15 of the FCC Rules These limits are designed to provide reasonable protection against harmful interference in...

Страница 2: ...s has been notified of the placing of this equipment on the market and has been granted the right to test the series for compliance with the regulations Voluntary Control Council for Interference VCCI...

Страница 3: ...ED OR IMPLIED WARRANTIES INCLUDING BUT NOT LIMITED TO THE IMPLIED WARRANTIES OF MERCHANTABILITY AND FITNESS FOR A PARTICULAR PURPOSE ARE DISCLAIMED IN NO EVENT SHALL THE OpenSSL PROJECT OR ITS CONTRIB...

Страница 4: ...ill the authors be held liable for any damages arising from the use of this software Permission is granted to anyone to use this software for any purpose including commercial applications and to alter...

Страница 5: ...irewall with Content Filtering 1 3 Autosensing Ethernet Connections with Auto Uplink 1 3 Extensive Protocol Support 1 4 Easy Installation and Management 1 4 Maintenance and Support 1 5 Package Content...

Страница 6: ...ng Group Names in the LAN Groups Database 3 7 Configuring DHCP Address Reservation 3 8 Configuring Multi Home LAN IP Addresses 3 9 Configuring Static Routes 3 10 Configuring Static Routes 3 10 Configu...

Страница 7: ...2 About IKE 5 12 Managing IKE Policies 5 12 About the IKE Policy Table 5 13 VPN Policy 5 13 VPN Tunnel Connection Status 5 15 Creating a VPN Client Connection VPN Client to FVS336G 5 15 Configuring th...

Страница 8: ...ding a Policy 6 17 Chapter 7 Managing Users Authentication and Certificates Adding Authentication Domains Groups and Users 7 1 Creating a Domain 7 1 Creating a Group 7 3 Creating a New User Account 7...

Страница 9: ...evices 9 10 Reviewing the DHCP Log 9 12 Monitoring Active Users 9 12 Viewing Port Triggering Status 9 13 Monitoring VPN Tunnel Connection Status 9 14 Reviewing the VPN Logs 9 15 Chapter 10 Troubleshoo...

Страница 10: ...irements C 4 Where Do I Get the Internet Configuration Parameters C 4 Internet Connection Information Form C 5 Overview of the Planning Process C 6 Inbound Traffic C 6 Virtual Private Networks VPNs C...

Страница 11: ...are described in the following paragraphs Typographical Conventions This manual uses the following typographical conventions Formats This manual uses the following formats to highlight special messag...

Страница 12: ...directly to where the topic is described in the manual A button to access the full NETGEAR Inc online knowledge base for the product model Links to PDF versions of the full manual and individual chap...

Страница 13: ...the chapter you were viewing opens in a browser window Click the print icon in the upper left of your browser window Printing a PDF version of the Complete Manual Use the Complete PDF Manual link at...

Страница 14: ...ProSafe Wireless N VPN Firewall SRXN3205 Reference Manual xiv v1 0 July 2008...

Страница 15: ...ilding access point provides a maximum connectivity area of about a 500 foot radius Consequently the ProSafe Wireless N VPN Firewall can support a small group of users in a range of several hundred fe...

Страница 16: ...easy monitoring of status and activity Flash memory for firmware upgrade AC DC power adapter for low current draw A Powerful True Firewall with Content Filtering Unlike simple Internet sharing NAT rou...

Страница 17: ...sive Protocol Support The VPN firewall supports the Transmission Control Protocol Internet Protocol TCP IP and Routing Information Protocol RIP For further information about TCP IP refer to Internet C...

Страница 18: ...PN sessions The total number of concurrent tunnels and sessions is not to exceed eight SSL VPN provides remote access for mobile users to selected corporate resources without requiring a pre installed...

Страница 19: ...protect this traffic Wireless Repeater In this mode SRXN3205 does not function as an access point It communicates with only repeater mode point to point bridge mode and point to multi point bridge mo...

Страница 20: ...Wireless clients must also support WMM Quality of Service QoS Support You can configure parameters that affect traffic flowing from the security router to the client station and traffic flowing from t...

Страница 21: ...ied remote IP address or range of addresses Visual monitoring The VPN firewall s front panel LEDs provide an easy way to monitor its status and activity Maintenance and Support NETGEAR offers the foll...

Страница 22: ...11 802 11g 54 Mbps Wireless CardBus Adapter WG111 801 11g 54 Mbps Wireless USB Adapter WPN111 RangeMax Wireless USB 2 0 Adapter System Requirements Before installing the SRXN3205 ensure your system me...

Страница 23: ...rt Information Card If any of the parts are incorrect missing or damaged contact your NETGEAR dealer Keep the carton including the original packing materials in case you need to return the firewall fo...

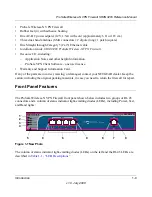
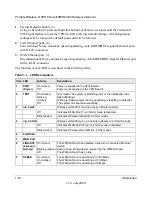
Страница 24: ...s not supplied to the VPN firewall 2 TEST On Amber Blinking Amber Off Test mode The system is initializing On or the initialization has failed Blinking Writing to Flash memory during upgrading or rese...

Страница 25: ...are described below 1 Left Middle and Right Detachable SMA Antennas 1 The SRXN3205 provides three SMA connectors for the detachable antennas two dipole and one patch For the best performance attach th...

Страница 26: ...must use Internet Explorer 5 1 or higher Apple Safari 1 2 or higher or Mozilla Firefox l x Web browser with JavaScript cookies and SSL enabled Although these web browsers are qualified for use with th...

Страница 27: ...onnect the cables and restart your network according to the instructions in the installation guide See the Installation Guide SRXN3205 ProSafe Wireless N VPN Firewall for complete steps A PDF of the I...

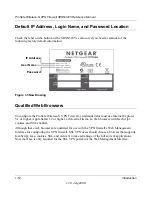
Страница 28: ...bed in later chapters Logging into the VPN Firewall To connect to the VPN firewall your computer needs to be configured to obtain an IP address automatically from the VPN firewall by DHCP For instruct...

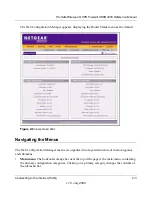
Страница 29: ...us menu as the default Navigating the Menus The Web Configuration Manager menus are organized in a layered structure of main categories and submenus Main menu The horizontal orange bar near the top of...

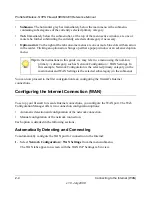
Страница 30: ...ections Configuring the Internet Connection WAN To set up your firewall for secure Internet connections you configure the WAN port The Web Configuration Manager offers two connection configuration opt...

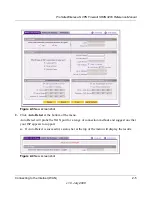
Страница 31: ...Click Auto Detect at the bottom of the menu Auto Detect will probe the WAN port for a range of connection methods and suggest one that your ISP appears to support a If Auto Detect is successful a sta...

Страница 32: ...more information see Configuring the WAN Mode Required for Dual WAN on page 2 11 and Troubleshooting the ISP Connection on page 12 4 3 To verify the connection click the WAN Status option arrow at the...

Страница 33: ...c WAN ISP configurations failed you can attempt a manual configuration as described in the following section or see Troubleshooting the ISP Connection on page 12 4 Manually Configuring the Internet Co...

Страница 34: ...login software such as WinPoET or Enternet then your connection type is PPPoE If your ISP uses PPPoE as a login protocol a Select Other PPPoE b Configure the following fields Account Name Valid accoun...

Страница 35: ...keep the connection always on To logout after the connection is idle for a period of time click Idle Time and enter the number of minutes to wait before disconnecting in the timeout field This is use...

Страница 36: ...dress to the firewall using DHCP network protocol 11 Review the Domain Name Server DNS Servers options If your ISP has not assigned any Domain Name Servers DNS addresses click Get dynamically from ISP...

Страница 37: ...private IP address range and these IP addresses are not visible from the Internet The firewall uses NAT to select the correct PC on your LAN to receive any incoming data If you only have a single publ...

Страница 38: ...nt uses a dynamically assigned IP address you will not know in advance what your IP address will be and the address can change frequently hence the need for a commercial DDNS service which allows you...

Страница 39: ...S screen displays The Current WAN Mode section reports the currently configured WAN mode Only those options that match the configured WAN Mode will be accessible 2 Select the Dynamic DNS Service you w...

Страница 40: ...NS Service to identify you when logging into your DDNS account c Enter the Password or User Key for your DDNS account d If your dynamic DNS provider allows the use of wildcards in resolving your URL c...

Страница 41: ...sh an Internet connection and the WAN Link or Speed LED blinks continuously you may need to manually select the port speed AutoSense is the default If you know the Ethernet port speed that your broadb...

Страница 42: ...will be overwritten 4 Click Apply to save your changes Additional WAN Related Configuration If you want the ability to manage the firewall remotely enable remote management at this time see Enabling R...

Страница 43: ...way address is the LAN address of the VPN Firewall IP addresses will be assigned to the attached PCs from a pool of addresses specified in this menu Each pool address is tested before it is assigned t...

Страница 44: ...if you entered a secondary DNS server IP address in the LAN Setup menu WINS Server if you entered a WINS server IP address in the LAN Setup menu Lease Time date obtained and duration of lease Configur...

Страница 45: ...ng subnetting use 255 255 255 0 as the subnet mask 3 In the DHCP section leave the DNCP enabled or select Disable DHCP Server The VPN Firewall will function as a DHCP server default providing TCP IP c...

Страница 46: ...primary DNS server IP address Secondary DNS Server Optional If an IP address is specified the VPN Firewall will provide this address as the secondary DNS server IP address WINS Server Optional Specifi...

Страница 47: ...the LAN Groups Database are Generally you do not need to enter IP addresses or MAC addresses Instead you can just select the desired PC or device No need to reserve an IP address for a PC in the DHCP...

Страница 48: ...s the entries in the LAN Groups Database For each computer or device the following fields are displayed Name The name of the PC or device For computers that do not support the NetBIOS protocol this wi...

Страница 49: ...er Reserved DHCP Client Directs the VPN Firewall s DHCP server to always assign the specified IP address to this client during the DHCP negotiation IP Address Enter the IP address that this computer o...

Страница 50: ...To edit the names of any of the eight available groups 1 From the LAN Groups tab click the Edit Group Names link to the right of the tabs The Network Database Group Names tab appears 2 Select the rad...

Страница 51: ...Reserved IP addresses should be assigned to servers or access points that require permanent IP address settings The Reserved IP address that you select must be outside of the DHCP Server pool To reser...

Страница 52: ...onal logical subnet To add a secondary LAN IP address follow these steps 1 Select Network Configuration LAN Setup from the main sub menu 2 Click the LAN Multi homing tab and the LAN Multi homing scree...

Страница 53: ...tional static routes You should configure static routes only for unusual cases such as multiple firewalls or multiple IP subnets located on your network To add or edit a static route 1 Select Network...

Страница 54: ...route leads 7 Enter the IP Subnet Mask for this destination If the destination is a single host enter 255 255 255 255 8 Enter the Interface which is the physical network interface WAN or LAN through...

Страница 55: ...namically adjust its routing tables and adapt to changes in the network RIP is disabled by default To configure RIP parameters 1 Select Network Configuration Routing from the main sub menu 2 Click the...

Страница 56: ...e default section disables RIP versions RIP 1 A class based routing that does not include subnet information This is the most commonly supported version RIP 2 This includes all the functionality of RI...

Страница 57: ...1b g n or 802 11a n wireless adapters A location for the SRXN3205 that conforms to the Wireless Equipment Placement and Range Guidelines You will use the following topics to set up your ProSafe Wirele...

Страница 58: ...ints for 11b bg ng it is better if adjacent access points use different radio frequency Channels to reduce interference The recommended Channel spacing between adjacent access points is 5 Channels for...

Страница 59: ...ct SSID can connect This nullifies the wireless network discovery feature of some products such as Windows XP but the data is still fully exposed to a determined snoop using specialized test equipment...

Страница 60: ...in for the user name and password for the password both in lower case letters as shown in Figure 4 2 3 Click Login The main menu of the SRXN3205 displays with the default opening screen Router Status...

Страница 61: ...n 4 5 v1 0 July 2008 You will automatically be logged out of the VPN Firewall after 5 minutes of no activity 4 Select Network Configuration from the main menu orange menu bar 5 Select Wireless Setting...

Страница 62: ...Access Point on the right side of the screen 7 If you want your SSID network name broadcast leave the default setting as is If you disable Allow Broadcast of Name SSID only devices that have the corre...

Страница 63: ...ply at the bottom of the Wireless Settings screen If the settings were accepted a message appears in the center of the screen Operation succeeded Testing Basic Wireless Access No Security 1 Prepare a...

Страница 64: ...you in discovering where the errors in your security settings are by removing doubts about your wireless settings Configuring 802 11b g n Wireless Settings To configure the 802 11 b g n wireless setti...

Страница 65: ...rticle and other articles of interest can be found in Appendix B Related Documents When selecting or changing channels some points to bear in mind Access points use a fixed channel and you can select...

Страница 66: ...uration and then Wireless Settings The Wireless Settings screen of your VPN Firewall will display as shown in Figure 4 7 below 2 Configure the Wireless LAN settings based on the following field descri...

Страница 67: ...els are available If using multiple access points it is better if adjacent access points use different channels to reduce interference The recommended channel spacing between adjacent access points is...

Страница 68: ...ireless PC Client s with wireless Ethernet adapters installed 8 Configure the Client PCs to obtain the IP and DNS addresses automatically using the internal DHCP server DHCP is the default firewall se...

Страница 69: ...age 4 20 To configure WPA with RADIUS see Configuring WPA with RADIUS on page 4 21 To configure WPA2 with RADIUS see Configuring WPA2 with RADIUS on page 4 22 To configure WPA and WPA2 with RADIUS see...

Страница 70: ...eless adapter card All wireless nodes in the same network must be configured with the same SSID Authentication Circle one Automatic Open System or Shared Key Choose Shared Key for more security Note I...

Страница 71: ...the same SSID Authentication Circle one Automatic Open System or Shared Key Choose Shared Key for more security Note If you select shared key the other devices in the network will not connect unless t...

Страница 72: ...acters in the form of 10 digits for 64 bit 26 digits for 128 bit or xx digits for 152 bit in any combination of 0 9 a f or A F characters Select which of the four keys will be the default by clicking...

Страница 73: ...n 4 17 v1 0 July 2008 6 Figure 4 8 Note If you use a wireless computer to configure WEP settings you will be disconnected when you click Apply Reconfigure your wireless adapter to match the new settin...

Страница 74: ...ent software for instructions on configuring WPA settings To configure WPA PSK in the Wireless Settings menu 1 Click the WPA radio button on the left to enable WPA data encryption When you select the...

Страница 75: ...Wireless Settings menu 1 Click the WPA2 radio button on the left to enable WPA2 data encryption When you select the WPA2 data encryption only the feature selections for WPA2 are made active on screen...

Страница 76: ...st also support WPA2 Consult the product documentation for your wireless adapter WPA client software for instructions on configuring WPA settings and WPA2 client software for instructions on configuri...

Страница 77: ...ireless Settings menu 1 Click the WPA radio button on the left to enable WPA data encryption When you select the WPA data encryption only the feature selections for WPA and RADIUS are made active on s...

Страница 78: ...selections for WPA2 and RADIUS are made active on screen while the other options and features remain grayed out 2 Select RADIUS from the WPA with drop down menu on the right PSK is the default WPA an...

Страница 79: ...the product documentation for your wireless adapter WPA client software for instructions on configuring WPA settings and WPA2 client software for instructions on configuring WPA2 settings To configur...

Страница 80: ...munication with the RADIUS Server Server Name The IP Address The IP address of the RADIUS Server The default is 0 0 0 0 RADIUS Port The port number of the RADIUS Server The default is 1812 Shared Key...

Страница 81: ...nection will be made Deploying the VPN Firewall Once you deploy your firewall in its final locaion retest the SRXN3205 to ensure it is still operating properly To deploy the VPN Firewall 1 Disconnect...

Страница 82: ...to the SRXN3205 7 If you want to fine tune the overall performance of the Wireless Settings for your environment refer to Advanced Wireless Settings on page 4 27 Note By default SRXN3205 is set with...

Страница 83: ...The default wireless LAN parameters usually work well However you can use these settings to fine tune the overall performance of your Wireless Settings for your environment The Advanced menu in the W...

Страница 84: ...interval time between 100ms and 1000ms for each beacon transmission which allows the access point to synchronize the wireless network The default is 100 Preamble Mode A long transmit preamble may pro...

Страница 85: ...tered any wireless stations to the list it will be empty The ACL Access Control List does not need to be enabled to add or delete MAC address to the list 4 Click Apply to save the state enabled or dis...

Страница 86: ...nnect to the SRXN3205 7 Repeat these steps for each additional device you want to add to the list 8 To delete an existing entry click the check box to the left of the entry and then click the delete b...

Страница 87: ...al Plug and Play E Mail Notifications of Event Logs and Alerts Administrator Tips About Firewall Security and Content Filtering The ProSafe Wireless N VPN Firewall provides you with Web content filter...

Страница 88: ...access specific resources Outbound rules LAN to WAN determine what outside resources local users can have access to A firewall has two default rules one for inbound traffic and one for outbound traffi...

Страница 89: ...he desired Service or application to be covered by this rule If the desired service or application does not appear in the list you must define it using the Services menu see Adding Customized Services...

Страница 90: ...ps Select the Group to which this rule will apply Use the LAN Groups screen under Network Configuration to assign PCs to Groups See Managing Groups and Hosts LAN Groups on page 3 5 WAN Users These set...

Страница 91: ...ect the desired Service or application to be covered by this rule If the desired service or application does not appear in the list you must define it using the Services menu see Adding Customized Ser...

Страница 92: ...on is selected you must enter the start and end fields WAN Destination IP Address This setting determines the destination IP address applicable to incoming traffic This is the public IP address that w...

Страница 93: ...dence of two or more rules may be important in determining the disposition of a packet For example you should place the most strict rules at the top those with the most specific services or addresses...

Страница 94: ...selected application from an internal IP LAN address to an external WAN IP address according to the schedule created in the Schedule menu You can also tailor these rules to your specific needs see Ad...

Страница 95: ...all inbound traffic is blocked Remember that allowing inbound services opens holes in your firewall Only enable those ports that are necessary for your network To create a new inbound service rule in...

Страница 96: ...sted on the Attack Checks screen and defined below WAN Security Checks Respond To Ping On Internet Ports To allow the firewall to respond to a Ping request from the Internet click this check box Ping...

Страница 97: ...ts To prevent the firewall from responding to Ping requests from the LAN click this checkbox VPN Pass through When the firewall is in NAT mode all packets going to the Remote VPN Gateway are first fil...

Страница 98: ...es LAN WAN Inbound Rule Hosting A Local Public Web Server If you host a public Web server on your local network you can define a rule to allow inbound Web HTTP requests from any outside IP address to...

Страница 99: ...want to allow incoming videoconferencing to be initiated from a restricted range of outside IP addresses such as from a branch office you can create an inbound rule In the example shown in Figure 5 6...

Страница 100: ...her addresses are available to map to your servers In the example shown in Figure 5 7 we have configured multi NAT to support multiple public IP addresses on one WAN interface The inbound rule instruc...

Страница 101: ...puter or server that is available to anyone on the Internet for services that you have not yet defined To expose one of the PCs on your LAN as this host 1 Create an inbound rule that allows all protoc...

Страница 102: ...percentage of maximum sessions or absolute number of maximum sessions If you want to give the maximum number of sessions per IP in percentage check yes radio button otherwise check No radio button The...

Страница 103: ...ers for many common protocols are defined by the Internet Engineering Task Force IETF and published in RFC1700 Assigned Numbers Service numbers for other applications are typically chosen from the ran...

Страница 104: ...TCP or UDP port of the range that the service uses 5 Enter the last port of the range that the service uses If the service only uses a single port number enter the same number in both fields 6 Click...

Страница 105: ...the Internet Protocol Suite standards RFC 1349 A ToS priority for traffic passing through the VPN firewall is one of the following Normal Service No special priority given to the traffic The IP packe...

Страница 106: ...Schedule 2 or Schedule 3 To invoke rules and block keywords or Internet domains based on a schedule 1 Select Security Schedule from the main submenu The Schedule 1 screen displays as the default sele...

Страница 107: ...If any of these words appear in the Web site name URL or in a newsgroup name the web site or newsgroup will be blocked by the VPN firewall You can apply the keywords to one or more groups Requests fr...

Страница 108: ...Wireless N VPN Firewall SRXN3205 Reference Manual 5 22 Firewall Security and Content Filtering v1 0 July 2008 2 Select Yes to enable Content Filtering 3 Click Apply to activate the menu controls Figur...

Страница 109: ...r your list of blocked Keywords or Domain Names in the Blocked Keyword fields and click Add after each entry The Keyword or Domain name will be added to the Blocked Keywords table You can also edit an...

Страница 110: ...When source MAC address filtering is enabled traffic will be dropped from any computers or devices whose MAC addresses are listed in the Blocked MAC Addresses table To enable MAC filtering and add MAC...

Страница 111: ...VPN firewall to bind IP to MAC address and vice versa Some PCs or decvies are configured with static fixed addresses To prevent users from changing static IP addresses the VPN firewall needs to enabl...

Страница 112: ...isplays logging option for this rule To remove an entry from the table select the IP MAC Bind entry and click Delete To edit an entry click Edit adjacent to the entry Add IP MAC Bind Rule Name Specify...

Страница 113: ...ss 00 01 02 03 04 07 IP address 192 168 10 12 All the above host entries are added in IP MAC Binding table The scenario for the above hosts are as such Host1 Matching IP MAC address in IP MAC Table Ho...

Страница 114: ...eceives the PC s request and responds using the different port numbers that you have now opened 4 The VPN firewall matches the response to the previous request and forwards the response to the PC With...

Страница 115: ...ll down menu choose either TCP or UDP transport protocol 5 In the Outgoing Trigger Port Range fields a Enter the Start Port range 1 65534 b Enter the End Port range 1 65534 6 In the Incoming Response...

Страница 116: ...dwidth class in the kernel If multiple connections correspond to the same firewall rule these will share the same class An exception occurs when an individual type bandwidth profile has classes set pe...

Страница 117: ...or Outbound Traffic 4 If you decide not to enter a new profile once you started a new profile click Bandwidth Profile in the submenu to return to the List of Bandwidth Profiles table 5 Click Apply to...

Страница 118: ...rded Small values will limit the UPnP broadcast range 4 Click Reset to revert to the previous settings 5 Click Apply to save changes 6 To view the contents of the UPnP Portmap Table click Refresh to r...

Страница 119: ...work tries to access a blocked site To configure e mail or syslog notification or to view the logs see Activating Notification of Events and Alerts on page 11 4 Administrator Tips Consider the followi...

Страница 120: ...guring an IPsec VPN Connection using the VPN Wizard Configuring a VPN tunnel connection requires that all settings and parameters on both sides of the VPN tunnel match or mirror each other precisely w...

Страница 121: ...ugh the VPN Wizard A remote client policy can support up to 200 clients To set up a gateway VPN Tunnel using the VPN Wizard 1 Select VPN IPsec VPN from the main submenu 2 Click the VPN Wizard tab and...

Страница 122: ...stered in a Dynamic DNS service Both local and remote endpoints should be defined as either IP addresses or Internet Names FQDN A combination of IP address and Internet Name is not permissible 6 Enter...

Страница 123: ...y 2008 You can also view the status of your IKE Policies by clicking the IKE Policies tab The IKE Policies screen is displayed Then view or edit the parameters of the new policy by clicking Edit in th...

Страница 124: ...200 clients The remote clients must configure the Local Identity field in the policy as PolicyName X fvs_remote com where X stands for a number from 1 to 25 As an example if the client type policy on...

Страница 125: ...er an appropriate name for the connection This name is not supplied to the remote VPN client It is used to help you manage the VPN settings 4 Enter a Pre shared Key The key must be entered both here a...

Страница 126: ...nternet name Both local and remote ends should be defined as either IP addresses or Internet Names FQDN A combination of IP address and Internet Name is not permissible 8 Click Apply The VPN Policies...

Страница 127: ...SRXN3205 Reference Manual 6 8 Virtual Private Networking Using IPsec v1 0 July 2008 2 You can also view the status of your IKE Policies by clicking the IKE Policies tab The IKE Policies screen display...

Страница 128: ...RXN3205 Reference Manual Virtual Private Networking Using IPsec 6 9 v1 0 July 2008 3 To see the detailed settings of the IKE Policy click the Edit button next to the policy The Edit IKE Policy tab is...

Страница 129: ...otiation protocol Managing IKE Policies IKE Policies are activated when the following occur 1 The VPN policy selector determines that some traffic matches an existing VPN policy If the VPN policy is o...

Страница 130: ...esponder Exchange Mode Two modes are available either Main or Aggressive Main Mode is slower but more secure Aggressive mode is faster but less secure If specifying either a FQDN or a User FQDN name a...

Страница 131: ...PN Endpoints No third party server or organization is involved Auto Some parameters for the VPN tunnel are generated automatically by using the IKE Internet Key Exchange protocol to perform negotiatio...

Страница 132: ...PN Wizard Type The Type is Auto or Manual as described previously Auto is used during VPN Wizard configuration Local IP address either a single address range of address or subnet address on your local...

Страница 133: ...nection between a Windows PC and the SRXN3205 firewall Using the SRXN3205 s VPN Wizard we will create a single set of VPN client policies IKE and VPN that will allow up to 200 remote PCs to connect fr...

Страница 134: ...and User Database Configuration on page 6 24 respectively As an alternative to the local user database you can also choose a RADIUS server Configuring the VPN Client From a PC with the Netgear Prosafe...

Страница 135: ...frame click Security Policy 8 For the Phase 1 Negotiation Mode check the Aggressive Mode radio box 9 PFS should be disabled and Enable Replay Detection should be enabled 10 In the left frame expand Au...

Страница 136: ...172 21 4 1 LAN IP address subnet 192 168 2 1 255 255 255 0 NETGEAR ProSafe VPN Client software IP address 192 168 1 2 Mode Config Operation After IKE Phase 1 is complete the VPN connection initiator r...

Страница 137: ...l 6 18 Virtual Private Networking Using IPsec v1 0 July 2008 3 Click the Mode Config tab The Mode Config tab is displayed 4 Click Add The Add Mode Config Record screen is displayed 5 Enter a descripti...

Страница 138: ...N client Recommended settings are SA Lifetime 3600 seconds Encryption Algorithm 3DES Authentication Algorithm SHA 1 12 Click Apply The new record should appear in the VPN Remote Host Mode Config Table...

Страница 139: ...UTH is disabled by default To enable XAUTH choose one of the following Edge Device to use this firewall as a VPN concentrator where one or more gateway tunnels terminate If selected you must specify t...

Страница 140: ...nu choose Domain name and enter the FQDN of the firewall in this example it is local_id com f Choose Gateway IP Address from the second pull down menu and enter the WAN IP address of the firewall in t...

Страница 141: ...on the connection Within 30 seconds the message Successfully connected to MyConnections modecfg_test is displayed and the VPN client icon in the toolbar will read On 3 From the client PC ping a compu...

Страница 142: ...3 You can add XAUTH to an existing IKE Policy by clicking Edit adjacent to the policy to be modified or you can create a new IKE Policy incorporating XAUTH by clicking Add 4 In the Extended Authentic...

Страница 143: ...ssword associated with the IKE policy for authenticating this gateway by the remote gateway 6 Click Apply to save your settings User Database Configuration When XAUTH is enabled as an Edge Device user...

Страница 144: ...options become active 4 Configure the following entries Primary RADIUS Server IP address The IP address of the RADIUS server Secret Phrase Transactions between the client and the RADIUS server are aut...

Страница 145: ...may be sufficient as an identifier or the server may require a name which you would enter here This name would also be configured on the RADIUS server although in some cases it should be left blank on...

Страница 146: ...the server and client can establish an encrypted connection With support for 10 concurrent sessions users can easily access the remote network for a customizable secure user portal experience from vir...

Страница 147: ...d reroutes individual data streams on the user s PC to the Port Forwarding connection rather than opening up a full tunnel to the corporate network Offers more fine grained management than VPN Tunnel...

Страница 148: ...n the remote PC that will function as if it were on the local network Configure the portal s SSL VPN Client to define a pool of local IP addresses to be issued to remote clients as well as DNS address...

Страница 149: ...individual layouts for the SSL VPN portal The layout configuration includes the menu layout theme portal pages to display and web cache control options The default portal layout is the SSL VPN portal...

Страница 150: ...other URLs this name is case sensitive b In the Portal Site Title field enter a title that will appear at the top of the user s web browser window c To display a banner message to users before they lo...

Отзывы: