ProSafe Wireless-N VPN Firewall SRXN3205 Reference Manual
Connecting to the Internet (WAN)
2-1
v1.0, July 2008
Chapter 2
Connecting to the Internet (WAN)
The initial Internet configuration of the SRXN3205 ProSafe Wireless-N VPN Firewall is described
in this chapter.
This chapter contains the following sections:
•
“Understanding the Connection Steps”
•
“Logging into the VPN Firewall”
•
“Navigating the Menus”
•
“Configuring the Internet Connection (WAN)”
•
“Configuring Dynamic DNS (Optional)”
•
“Configuring the Advanced WAN Options (Optional)”
Understanding the Connection Steps
Typically, six steps are required to complete the basic Internet connection of your firewall.
1. Connect the firewall physically to your network
. Connect the cables and restart your
network according to the instructions in the installation guide. See the
Installation Guide,
SRXN3205 ProSafe Wireless-N VPN Firewall
for complete steps. A PDF of the
Installation
Guide
is on the NETGEAR web site at:
http://kbserver.netgear.com
.
2. Log in to the VPN Firewall
. After logging in, you are ready to set up and configure your
firewall. You can also change your password and enable remote management at this time. See
“Logging into the VPN Firewall” on page 2-2
.
3. Configure the Internet connections to your ISP(s)
. During this phase, you will connect to
your ISPs. You can also program the WAN traffic meters at this time if desired. See
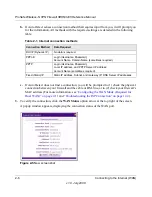
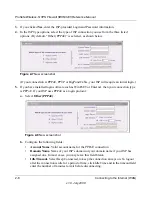
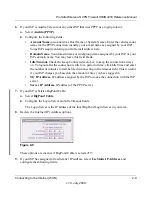
“Configuring the Internet Connection (WAN)” on page 2-4
.
4. Configure dynamic DNS on the WAN port (optional)
. Configure your fully qualified
domain names during this phase (if required). See
“Configuring Dynamic DNS (Optional)” on
page 2-12
.


