ProSafe Wireless-N VPN Firewall SRXN3205 Reference Manual
Virtual Private Networking Using IPsec
6-3
v1.0, July 2008
2.
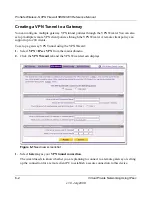
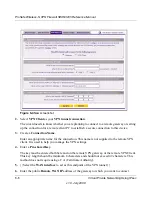
Create a
Connection Name
. Enter an appropriate name for the connection. This name is not
supplied to the remote VPN endpoint. It is used to help you manage the VPN settings.
3.
Enter a
Pre-shared Key
. The key must be entered both here and on the remote VPN gateway,
or the remote VPN client. This key should be minimum of 8 characters and should not exceed
49 characters. This method does not require using a CA (Certificate Authority).
4.
{{Select which
WAN interface
(WAN1 or WAN2) will act as this endpoint of the VPN
tunnel.}}}
5.
Enter the
Remote WAN IP
Address or Internet Name
of the gateway to which you want to
connect.
•
Both the remote WAN address and your local WAN address are required. When choosing
these addresses, follow the guidelines in
Table 7-1
above.
•
The remote WAN IP address must be a public address or the Internet name of the remote
gateway. The
Internet name
is the Fully Qualified Domain Name (FQDN) as registered in
a Dynamic DNS service. Both local and remote endpoints should be defined as either IP
addresses or Internet Names (FQDN). A combination of IP address and Internet Name is
not permissible.
6.
Enter the
Local WAN IP Address or Internet Name
of your gateway, the SRXN3205.
The Local WAN IP address is used in the IKE negotiation phase. The WAN IP address
assigned by your ISP may display automatically. You can modify the address to use your
FQDN. An FQDN is required if the WAN Mode you selected is auto-rollover.
7.
Enter the
Remote LAN IP Address and Subnet Mask
of the remote gateway.
The information entered here must match the Local LAN IP and Subnet Mask of the remote
gateway; otherwise the secure tunnel will fail to connect. The IP address range used on the
remote LAN must be different from the IP address range used on the local LAN.
8.
Click the
VPN Wizard Default Values
option arrow at the top right of the screen to view the
recommended VPNC parameters that will be used for additional settings configured by the
Wizard.
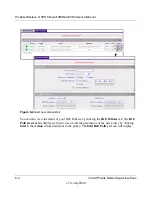
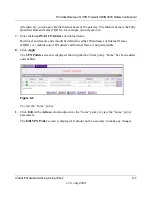
9.
Click
Apply
to save your settings.
The
VPN Policies
screen is displayed showing the new policy as enabled.
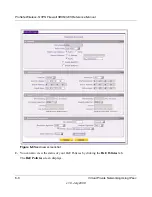
10.
Click
Edit
in the
Action
column adjacent to the policy to confirm your policy settings.


