22
2. Projecting an Image (Basic Operation)
CAUTION
• Perform the adjustment from behind or from the side of the projector. Adjusting from
the front could expose your eyes to strong light which could injure them. The rear
vents of the projector may become heated during normal projector operation. Use
caution when adjusting the tilt foot on the rear side.
• Keep hands away from the lens mounting portion while the lens shift is in operation.
Failure to do so could result in hands being pinched by the moving lens.
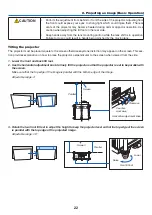
Tilting the projector
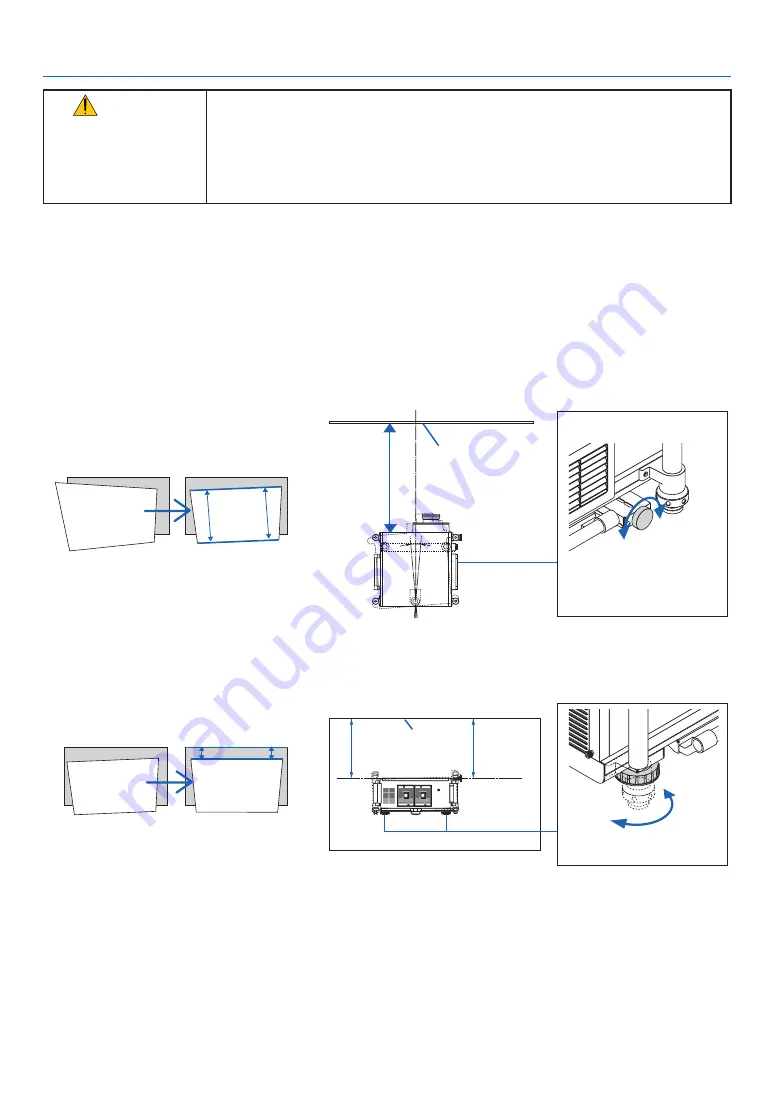
The projector must be placed square to the screen otherwise keystone distortion may appear on the screen. This sec-
tion provides explanation on how to place the projector perpendicular to the screen when viewed from the side.
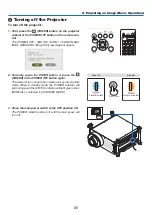
1. Lower the front and back tilt feet.
2. Use the horizontal adjustment knob to finely tilt the projector so that the projector is set to be parallel with
the screen.
Make sure that the top edge of the image is parallel with the bottom edge of the image.
Adjustable range: 4°
Screen
Parallel
Clockwise
Counter-
clockwise
Horizontal adjustment knob
3. Rotate the two front tilt feet to adjust the height to keep the projector level so that the top edge of the screen
is parallel with the top edge of the projected image.
Adjustable range: 1.8°
Screen
Parallel
Lower
Raise
Front tilt foot
Содержание NP-PH1000U
Страница 1: ...Projector PH1000U User s Manual Model No NP PH1000U ...
Страница 244: ... NEC Display Solutions Ltd 2011 7N951661 ...

